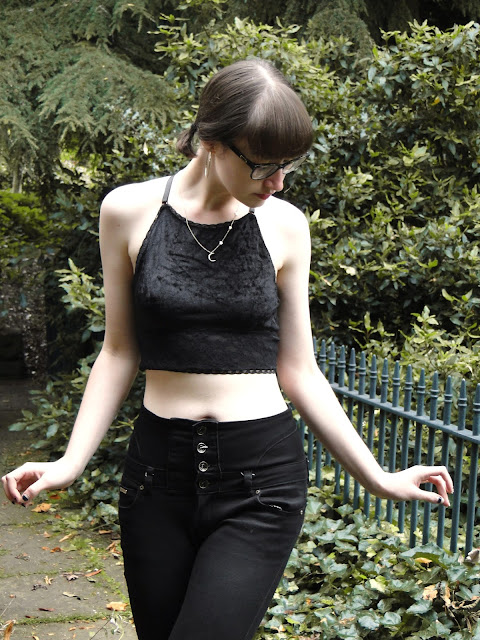
After the success of my Sierra bra from the free download on Madalynne's website, I was well hyped up to have a go at another of the free patterns on her site. The Noelle set was next up- another soft cup bra with a panty pattern thrown in!
Love a good lingerie make for using up fabrics- You barely need anything to make this! I used a little left over velvet for the front outer, the back and linings out of mesh and the underbust band from left over lace I also used for my Sierra bra. Only other notions you need are a metal hoop to join the halter straps to the bodice at the back and some elastic. I used this lovely lacy flat black lingerie elastic from The Button Shed on Amazon, still some left! But I've ordered some more so stocks don't wear thin! Inside the bra I used some plain elastic on the underbust.

As with the Sierra Bra, the Noelle pattern suggests including a lining. The Sierra sew-along explains how to hide the side seams inside the lining. The Noelle doesn't mention this, but I thought I'd use my new found skills to do the same again. I have read on quite a few reviews of this pattern that the sizing is a bit off, and lots of people have just taken in a little extra at the side seams. Typically I'd made life harder for myself in hiding the seams inside the bra! Although it could have got away with being a little tighter, I decided against altering the seams- but will remember to take a little out next time!! Next time I must also remember to trim down my seam allowances before they get sandwiched inside the bra and also make sure the allowance in the top half is hidden in the same direction at the allowance in the band.
 |  |
I could have made a neater job of attaching the elastic around the edge. You can't tell, but I foolishly thought you could just go right the way round so started at the top of a side seam, only to find that when I reached the strap area I would have to cut the elastic and start sewing a new piece at the neckline. What I should have done is start at the centre back! No one will know though.
I stitched the elastic so the straight edge lined up with the raw edges, picot facing inwards, then flipped it up so the seam was hidden underneath and picot on the outer edge, then zig-zagged on top. It is important to either put the neckline piece on first, or up the back/underarm elastic on first so that you can do the flipping up bit without getting in a twist. You'll see exactly what I mean when you have a go!
I attached my underbust band using the overlocker, which was fine but did make the seam a little bulky. The pattern suggests using zig-zag stitch on the normal machine which I might try that instead next time. The side seams of the band are at a slight angle, but due to body shape the fabric pools a little at the widest part where it joins the bra. It's not much so I shaved a little off the pattern, making a straighter line for next time. Plain elastic is then sewn to the inside of the bra, hiding the seam and adding a little more 'grab'. I used my flat picot elastic to finish the bottom of the band.
My metal loop was 10p from market! Bargain! They gave it my dad for free though because he only had a fiver, even better! It's about the size of a 5 pence piece, perfect size for getting the top of the back looped round as well as the two straps. I stitched the ends of the straps down with zigzag stitch to keep them secure once in position. The front of the bra loops through smaller loops on the other end of the straps. It was a little bit of a squeeze with all the picot and velvet but the straps join on nicely.
And then it's finished! Already! My head is spinning with all the lovely fabrics I can use to make more! I've got some red velvet in my stash that's nore been doing anything for a while...

x
Location: Botanical Gardens, Sheffield
Currently listening to: We're In This Together, Nine Inch Nails


It’s nice sharing! The shop online have all kinds of bra set on sale. www.haoyii.com
ReplyDelete