Sunday 25 July 2021

Butterick B6684, Blouse

The B6684 is a simple vintage-inspired blouse from Butterick with 4 different sleeve options.
Option A almost feels like a cop-out - by far the simplest of the sleve options (er, sleeveless), but also the most wearable. Everyone I Googled who'd tried this pattern seemed to have opted for version A and they also advised grading out at the hips a little.
I took this on board, and cut a size 10 but went right out to a 14 at the hips. The shape otherwise is very straight-up-and-down - I thought the extra fabric in the hip would help accentuate the waistline. 
Fabric was this LOVELY viscose challis kindly supplied by Minerva. It was a dream to handle. The neck tie is cut on the bias which is always a bit scary when cutting from a lightweight fabric that likes to move as you cut it. The viscose challis was very patient though and didn't seem to particularly shift when I cut it. It pressed perfectly making for very sharp bust darts and ensured hemming sleeves and bottom was as painless as possible. 
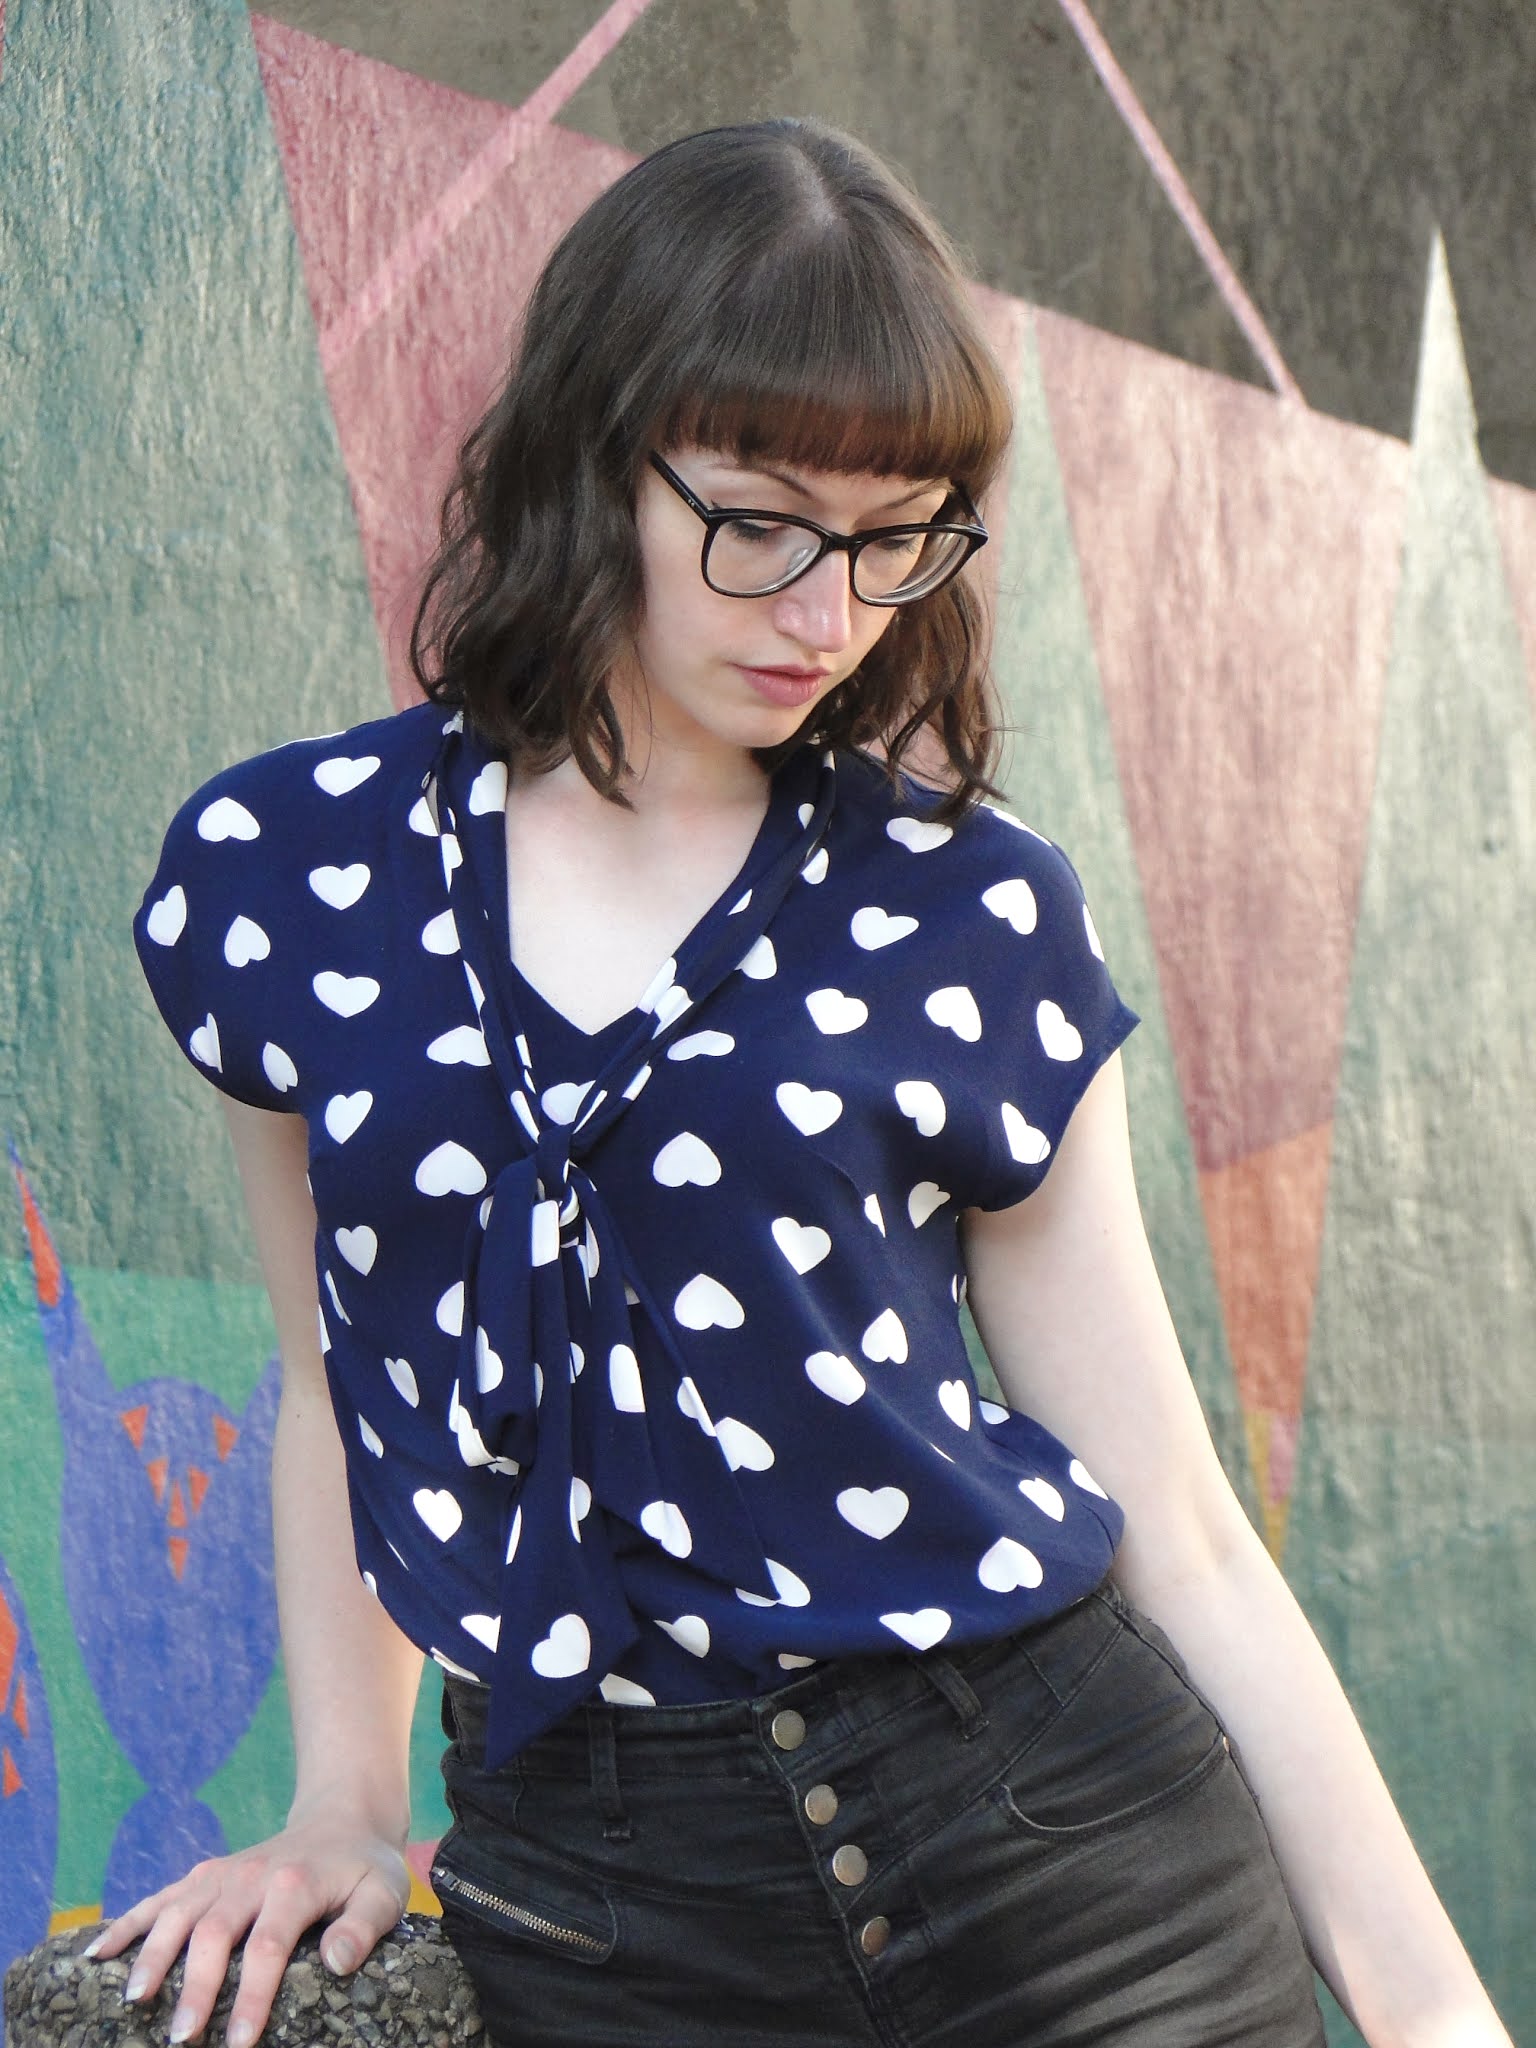
The heart print was a little larger than I anticipated seeing it online (my fault for not reading the deets fully!). I was a little bit worried it would alook a little bit too cutesy for me but I think the shape of the blouse is so flattering it looks very 'me' once I've got it on. Hopefully this post serves as a good demo to anyone eyeing up this fabric as to how big the print is. I'm sure there are some makers who could absolutely rock the cutesy vibes teaming this fabric with any pattern - I would love to see!
I was really mindful when cutting out the fabric to have a row of hearts down the centre front and centre back of the blouse. I flipped the pattern piece over instead of cutting on the fold in order to make sure the hearts were symmetrical from left to right. So happy with the results of this! Side seams weren't possible to pattern match per se, but I made sure the waistline and hemline intersected the hearts at the same point on front and back, so the rows of hearts were parallel all the way round.
Of note this fabric is also really comfy! It feels really light to wear - perfect for summer! It was also really kind to me on the fray-ometer, only fraying a little on the raw edges where I'd handled it a lot, but even then it was still very controlable. 
I love the instructions for the neckband attachment. The back of the blouse it attached right sides together to a little bit of the necktie which wasn't turned into the inside of the tie. a facing is then applied, sandwiching the tie inside of the neckline - facing flipped inside, (trimmed, snipped and understitched) and then wow! A lovely v-neck and functional bow! I held my breath stitching the v-neck - I wanted it to line up perfectly so tit pointed down towards the centre of the centre-front hearts. I got it bang on! First attempt! I can't help but feel this was a Sewing Bee worthy achievement! 
The arm holes are hemmed with a narrow hem (do this BEFORE overlocking the sideseams). The cut of the blouse then creates a bit of a sleeve illusion as the shoulders are still covered. This gives a 50s vibe which I ❤!
I hemmed the bottom in a similar fashion then it was finished! No fiddly fastenings, a super cute bow, shoulders covered enough to not feel too exposed at work and a perfect v-neck for anyone who gets that close.
This simple blouse was exactly when I needed to boost my sew-jo and create a garment I know I will wear. Excluding cutting, the blouse only took a morning to make (and I don't think I cut any corners!). But even with cutting it's only 3 pattern pieces plus a facing - so such a quick win!
I want more!

x
Location: Hunter House Road, Sheffield
Currently listening to: Speak of The Devil, Chris Isaak

Sunday 18 July 2021

Daria Patternmaking, Rose Cafe Bustier

Playing it safe. That's what we've all been doing for the past year thanks to Covid and I'm sick of it. I want to take risks and feel alive again. I want to be pushed an shocked and surprised at what I can achieve when I turn up the pressure and I take. A. Risk.

On a whim one night- sick of playing it safe, I bought the downloadable Daria Atelier Rose Cafe bustier dress patterns from her Etsy page for £10.25. I have never made anything like this before. I've made underwear sure, but always out of stretch fabric and never with underwire. 

What I liked about this risk was Daria was there to hold my hand the whole way. I watched her Youtube tutorials before even tracing the pattern to identify where I might struggle. Her videos are so in depth, you can just follow them as you sew. She also includes a handy guide to help with fitting and modifications to the bust sizing.

I planned ot make a calico toile of the dress and have fun and not take things to seriously- just see how it ended out. No rush and no prefect end product pending, slow down and learn! I had this herringbone fabric left over from my skort and I thought it seemed like the perfect weight to make the Rose Cafe dress. I had a bit of leftover lining to hand and I thought to really test the fit and account for the seam allowances I should probably line it properly... and then it just took flight! I knew the fit wouldn't be perfect as I cut a cup size smaller than the corresponding underbust size with a sort of curious enthusiasm as to how I would make them fit together.
It turned out I needed to take about 2cm where the bodice meets the cup at both the side and centre, keeping the centre cup seam lined up with the bodice seam. I then extended the new seamline to meet the original seam around where the side back panel and centre back panel meet. The overall circumference wasn't too bad ( I cut a small with XS cup size), but I took out about 2cm overall by increasing the back panel seam by 0.5cm (so 1cm on each side = 2cm in total). As this was primarily just a fancy toile I didn't topstich any of my seams (totally expected to be unpicking the lot!), same goes for understitching - but somehow I was lucky and my lining seems to stay in place really well! I did interface (tho didn't add any extra reinforcement/stay tape to the seams), as I thought this would help me to envision the way the fabric would sit on the body for the real thing. I also skipped the straps stage but I think they will be fairly essential on my actual dress if I want to lift my arms up without flashing!
I dismantled a Primark bra to gain some underwire chanelling (why don't they sell this in my local haberdashery?) . I was encouranged to find the 34B bra (£2!) had the exact length of chanelling I needed for Rose Cafe! I attached this with two rows of stithcing to the bottom of the cups before they were inserted into the bodice, and found this allowed me to insert the underwire inside the seam too. Wow! Structure! Proper sewing! Shaping! Fitting! See what results are gained when you are taken out of your comfort zone! 

Bra cup advice - mark the front and back and left and right and top and bottom and mark the notches REALLY WELL, because once you have cut out and have a load of triangles floating around it can be hard to identify top from bottom, left from right and inside from outside! Mark the top piece of the cup clearly too, so you can tell which park joins the centre and which bit joins the side of the cup.

Inserting the cups into the bustier is probably the most satisfying sewing you will ever do. The bodice overlaps the cups and you sew a really tiny edge stitch all along the underbust until next thing you know it actually looks like a bustier.
The dress is done up with a zip but but now I'd gone into a bit of ad lib, as I didn't have enough herringbone to actualy make the rest of the dress. I continued to sew the centre back seams to the lining with a 1cm seam allowance (could have increased this as I used eyelets to close insead of the zip), and then along the bottom, leaving just the centre panel open to turn through. Before turning through I added some extra interfacing on each side of the centre back to reinforce the eyelets. 


Turn out, bop some eyelets in following past me's very thorough and helpful eyelet guide, slip stitch the opening at the centre front and then strike lucky on some matching ribbon in your stash! Suddenly you've made a bustier.
Next stop Rose Cafe Dress I think!! 
Thank you for pushing me out of my confort zone and encouraging me to keep learning. 


x
Location: Brunswick House, Glossop Road
Currently listening to: New Dawn, Moon Duo