The dream would be a 6 month summer sabbatical, hiding in a beautiful home nestled into the layered landscape overlooking Matlock, Derbyshire. I would wake up early every morning, make a coffee and a bowl of kellogs then head to the studio, naturally lit by Peak District sunlight. I would wear an oversized artist shirt and a cute neckerchief, I would have a paintbrush in one had always and I would wear comfy mules on my feet. I would sit out in my leafy garden and look down onto glorious Matlock Bath, I'd go down to the town to buy my baguettes and try different flavour ice creams every week. I would sew sew sew every day.

However, I'm not sure I can get a 6 month sewing sabbatical right now, and I'm not sure I can afford a 6 month stay in a holiday home in the hills. I did get in a cheeky visit to Matlock this summer though, and it was glorious as ever. The Identity Store were hosting their leathercraft fair at Matlock town football club again, so I used this as an excuse for a daytrip with Mark. We had a great day, eating ice cream, hunting in the antique shops, admiring the scenery, AND turns out he's very fun to shop fabric with.

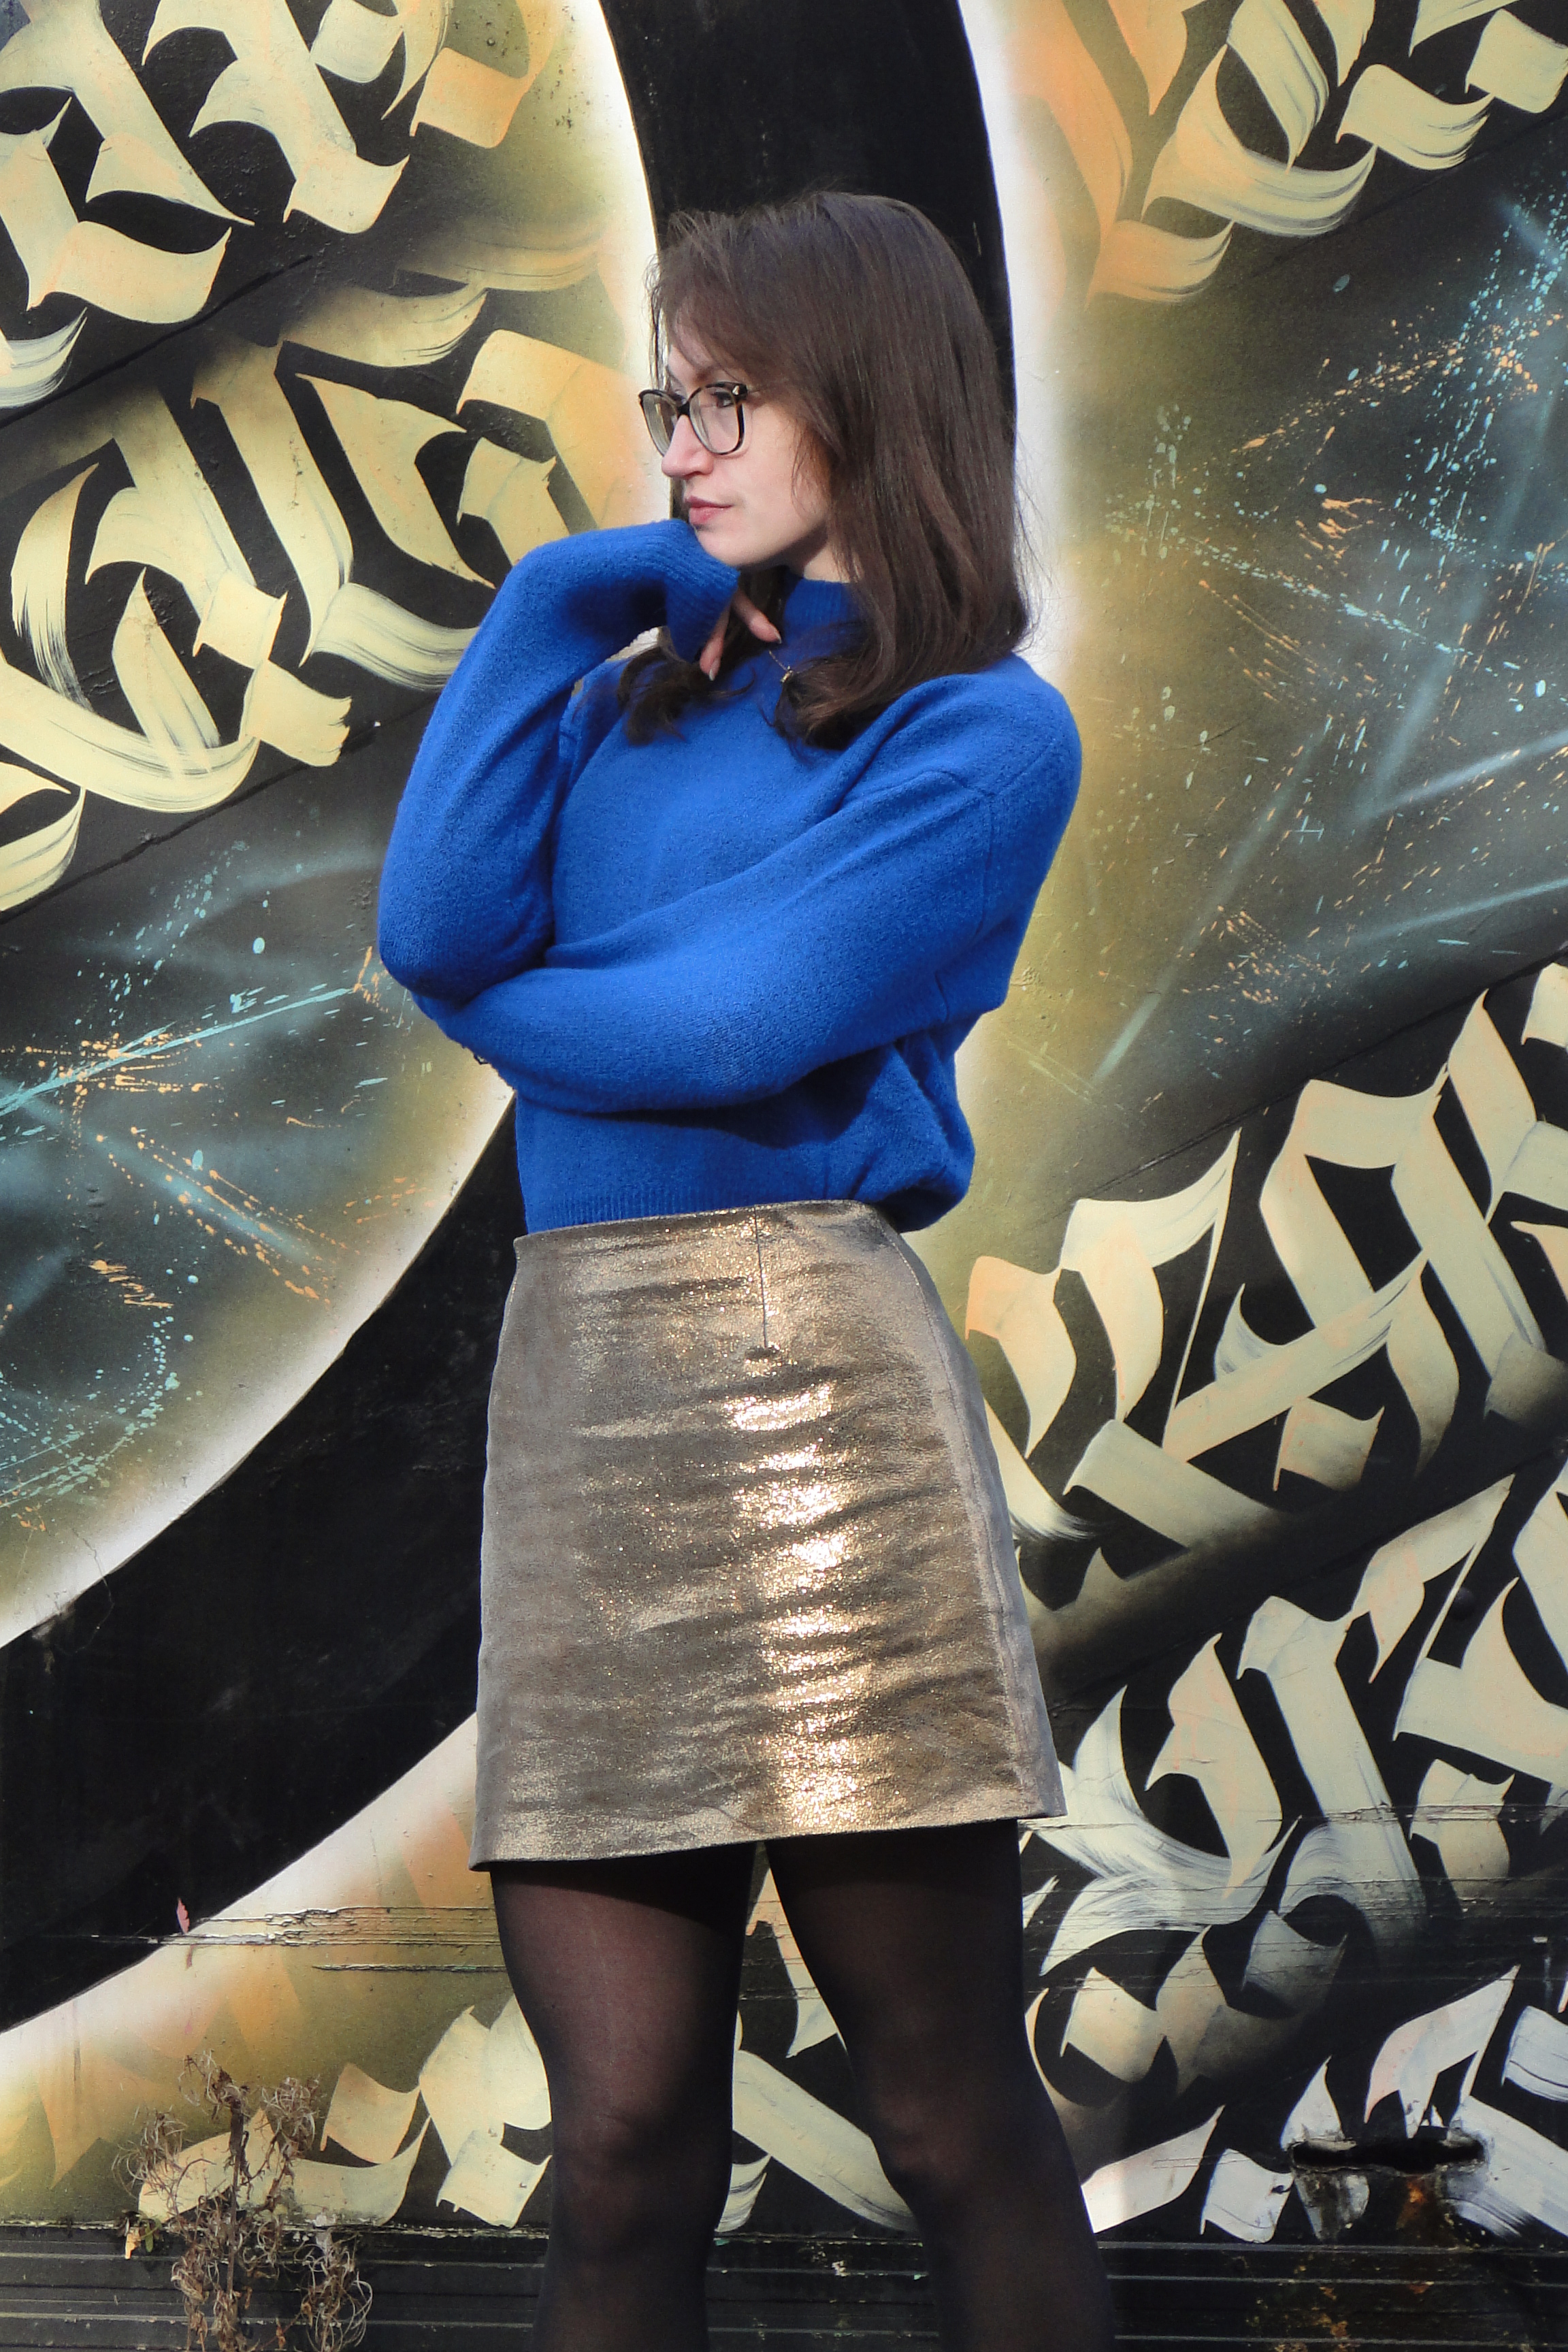
I was drawn to absolutely everything shiny at the fair, I had to try and focus my practical head to think which leathers would go through my machine without causing breakdown and what would hang right as a garment. Thankfully Mark had bought his practical head while I ran round stroking everything that was gold, and he helped me pick this textured gold, lightweight leather. It's super soft and has a nice drape to it whilst still having all the tough sturdy qualities of leather. The texture of the leather allows it to shimmer in different lighting.
You're going to roll your eyes - Yes Angela bought some lovely leather and made
another mini skirt. Let me tell you how this one is different. I used the New Look 6843 as a base pattern again - I love love the double darts in the back, I have quite a small back so always find the double dart flattering. For my toile, I cut the A-line pattern in a size 10 instead of the straight skirt. It fit well, but the shape just looked a bit comedy on me. A bit like I'd float with my parachute skirt if you threw me up in the air. I did some tweaking of the shape, I wanted to keep the soft roundedness of the hem, and keep
some of the A-line flair, but I relaxed this quite substantially. I added 0.5cm to the seam allowance at the hips and made the overall skirt a little shorter.
The silhouette of the pattern was already starting to be recognisable as my body shape. I thoguht this would really be accentuated by omitting the waistband, and instead making a waist facing that sat inside the skirt. I've never done this before, but I applied my logical brain again. I liked where the skirt was currently sitting on my waist, so I added 1.5cm to the top as a seam allowance. I then traced the top 7cm of the skirt pieces to form a facing band. I closed up the darts on the band so the pieces were curves that would fit into the top of the skirt once the darts were sewn up.

I then created a lining piece to hang from the facing in the inside. To do this I took 7cm off the top of the skirt pattern piece, added 1.5cm for a seam allowance that would attach to the bottom of the facing band. I took an inch off of the lining length so it would hide away inside the skirt. I traced the bottom of the darts onto the lining pattern piece, but instead of sewing the triangles in, I created tucks instead. This creates the right shaping so it fits inside the skirt and to the band as it should, but allows for a bit more movement, which is what you want in a lining really.

I assembled the lining before cutting the leather (because I was scared to cut obv). I overlocked the back raw edges before sewing any seams, and overlocked the top raw edge after I put the tucks into stop any fraying. after sewing the side seams and centre back seam up to the zip notch, I hemmed the lining (turned under 0.5cm then another 1cm) so I didn't have to faff with this once it was attached to the skirt.
Feeling warmed up now, I dared cut the leather. I fit the front, bands and one back piece out of one hide, then the second back piece from the other piece I bought. It feels odd, but you can be much more flexible with cutting lay plans as leather doesn't have a grainline the same way fabric does (go on leather officianados, tell me how there's a right and wrong leather cutting direction....). What I'm trying to say, is I still have enough leather left to add some accents or panels onto something else cool... Gold panelled matching jacket anyone?

Making the skirt was quite straight forward now as I'd put so much work into testing the toile. Darts, side seams then attach facing band (right sides together then flip it to the inside). I stitched everything with a layer of tracing paper in between fabric and machine. I felt my new machine was a little more forgiving than my old one and probably wouldn't drag so much, but I didn't want to risk anything. The tracing paper helps the machine glide over the fabric and makes for neat stitches :) I understitched the facing to the seam allowances at the top to help keep it in place, and then attached the top of the lining piece to the bottom of the facing band.
I'm not sure if it was because of the gold coating, but I found this leather pressed realllly nicely. I made sure I used a pressing cloth as all times - Imagine all that gold melting onto my iron!!! The darts and seams all looked so so much neater. I was feeling very encouraged at this point!
Inserting the zipper was easy as pie. I used clips to hold it in place, and used a 1.3cm seam allowance, as the leather was bulkier than my toile fabric and I was paranoid that was going to alter the fit. I stitched the bottom of the centre back seam after inserting the zip, which made it easier to get in and assemble everything flatly. To attach the lining to the zipper, I turned the skirt inside out, lined up the edge of the lining with the inside zip edge, and using a zip foot, sewed close to the zip teeth. I clipped the top corners and turned the right way out. This worked well, although the top of the zip opening is a bit bulky - however I was expecting this due to the nature of leather seams!

And then here is where I cheated. Am I ashamaed? A little? Am I proud of myself? Well, yes. Would I do it agian? In heartbeat. Due to the drapey nature of the leather, I was more than ready to turn up a 1cm hem and stitch it. I went round the bottom of the skirt with my clips, clipping up 1cm and thinking YES this looks great. I got sat at the machine, ready to hem, when fear suddenly struck. What if it stretches? What if the stitching line is wobbly? What if having visible stitching just looks a bit pants? SO, I glued it. Yes, glue. Throw me off of the Sewing Bee, exile me into a pit of sewing cheats. I don't care, cause I'll be wearing this super sassy gold skirt with a beautiful, stable, flat, invisible hem 😘
I love it. I really love it. The fit is absolutely perfect. I am going to draw the pattern pieces up on card so that I can use them over and over. It will be so versatile. Helllllloooo plaid Autumn skirts.
The only one thing I totally forgot in my leather excitement - I'd gone very off-piste from the pattern and didn't refer to the instructions at all - This lead me to totally forget to interface the facing band. I'm hoping, that due to the nature of leather being sturdy and stable, that there will be no negative comeback from this after I've worn the skirt a few times. It's keeping its shape nicely so far - but next time deffo add a bit of interfacing onto that band for assured stability Angela.
I love that I've made a skirt that I love as much as I loved the day I bought the fabric. Who's ready to dazzle?
x
Location: Broadfield Road, Sheffield
Currently Listening to: Leadlight, Julia Jacklin