Sunday 29 May 2022

Burda 6263, Necktie Shirt


Note: I wrote this blog in Jan 2022 but have been waiting until MAY to get some decent weather to get these pics! The chronology of my blog has gone waaaaay off track, so read this blog as if it were still winter and we don't yet know what beautiful things this year has in store for us...


Hi there! Hey! Hello, it's me! I'm back! I guess you might not recognise me with that HOMEOWNER glow I have going on? Or maybe it's because I officially grew my fringe out this time? 

I've been pretty damn busy, but I can tell you I've also been pretty damn happy. Moving was actually quite a streamlined process, the big hold up being getting the studio floor laminated before I moved all my sewing stuff in. 


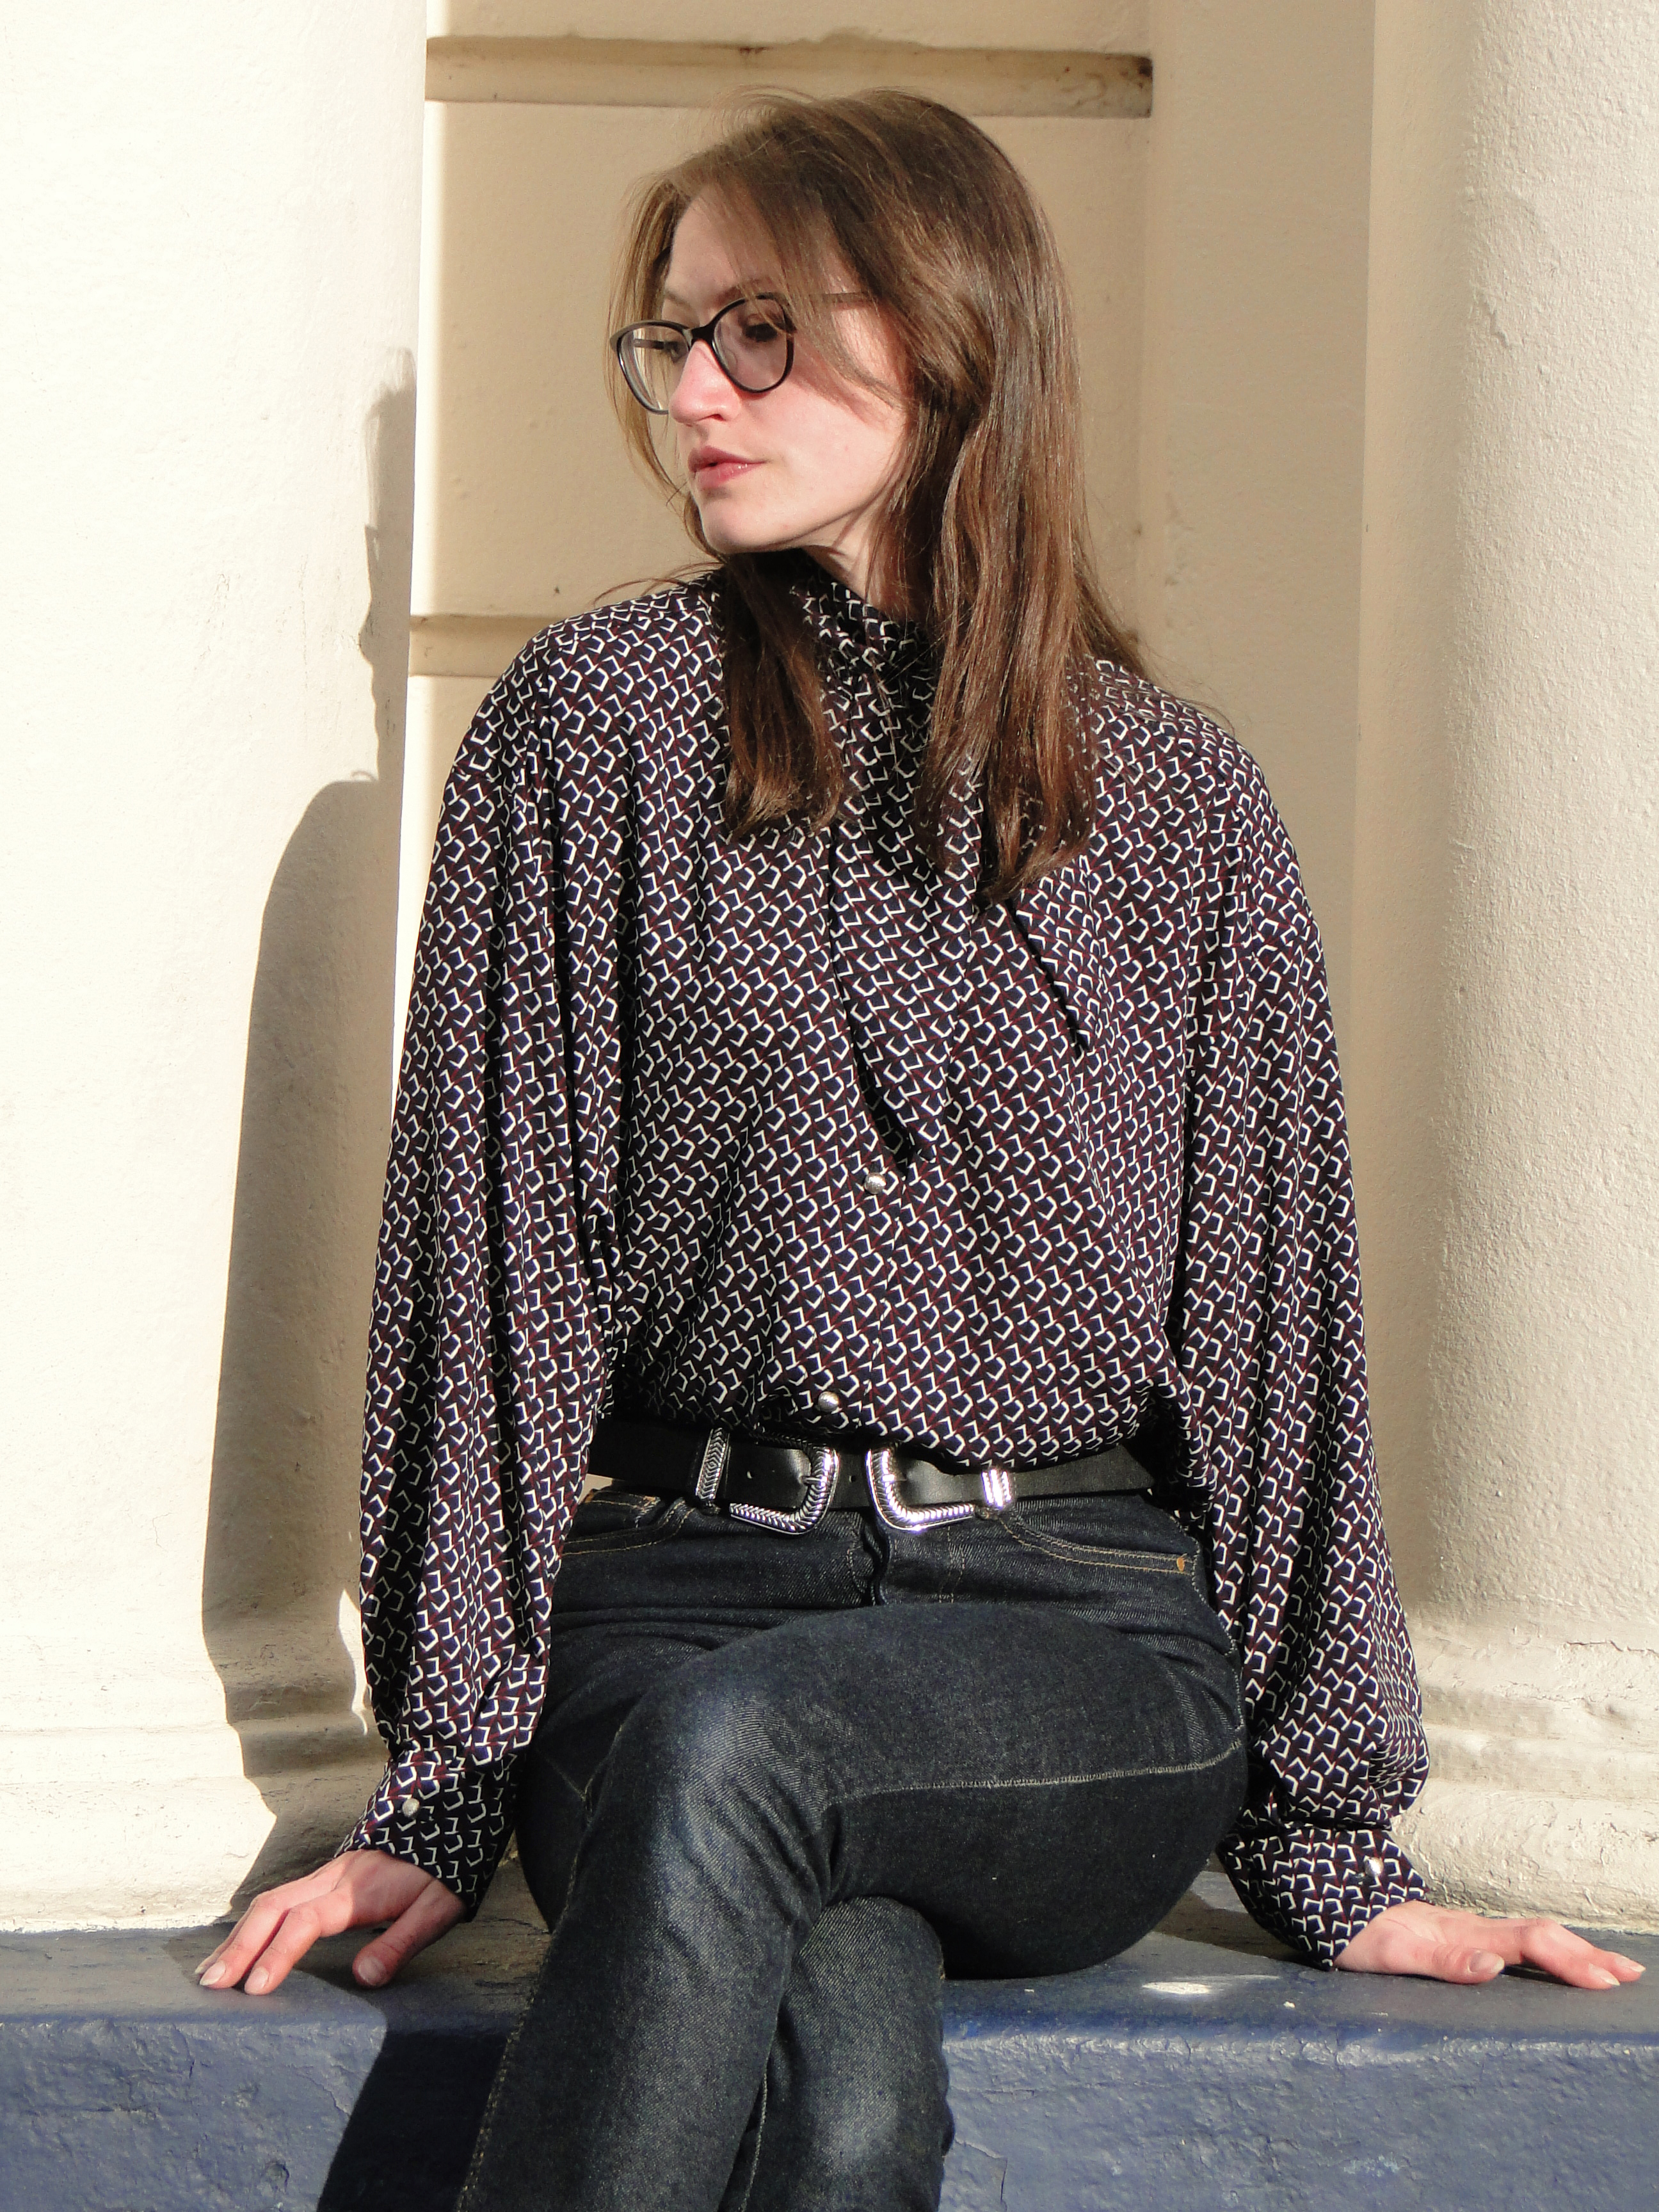
So this is my first make of 2022 - The first make from my new house! The pattern is Burda 6263 - what drew me to it was this nifty neck tie - come - collar which I don't think I've seen on a pattern before. This pattern is definitely under represented on the socials. I hope this post inspires some of you to give it a go - I think with different fabrics could make this shirt really versatile. 


My fabric was from Abakhan stash bins last summer, and bought with my leaving-money from my old job (thanks guys!). I love the geometric print (obv) and the subtle colours - navy, maroon and cream combine to create quite a retro feel. This teamed with the necktie is giving me majoy Peggy Mad Men vibes, but the over-sized sleeves and loose waist offer a more relaxed teen-grunge feel. Together I think these elements create the mixed-up, voyage of self discovery, like-a-little-bit-of-everything, Art School shirt that I keep dreaming of. 


Once I'd cut the paper, I thought the pattern looked really short in the body so I thought I was being really smart when I added an exta 5cm to the pattern length of view A. Not neccessary. The armholes are really low for those big sleeves, adding length to the body. I cut a size 10 according to my measurements, but of course as usual I could have cut an 8 and I don't think I'd have needed to cut down on the PopTarts (anyone else get obsessed with these the moment they moved out?!). Luckily my fabric has THE most gorgeous drape to it, the oversizedness of it falls really nicely against my body and it also feels so lush! The fabric really was a lucky find! All the joys of soft drapey fabric but with very little fraying or snagging. 

The pattern advised cutting the necktie on the bias - I'm not doubting Burda - I'm sure with some fabrics this is deffo neccessary, however due to fabric limitations I cut it on the grainline and hoped for the best. I think it worked fine, but again that may just be further credit to the qualities of this fabric. 

The drop shoulders add length to the sleeves too (kind of obvious when you think about it). They appear really oversized until you add the pleats and cuffs, then WOW we're back in Mad Men and we're storming the boardroom. 


I know I've said it before, but it's always such a pleasure when I can find some buttons from my gran's old stash bag. There were exactly 8 of these cute silvery buttons gleaming at me in her bag. Perfect retro vibes to compliment the fabric! While I've been away I may not have been sewing but I promise I have been keeping up to date on Insta sewing tips. I remembered seeing one using masking tape to mark button holes- I have now tried and tested this and can confirm it's a winner! SO much easier to follow than bobbly wobbly chalk lines or fabric pen that disappears into your print. I also improvised and used UHU glue as an attempted seal on my button holes??? Anyone done this? Buttonholes really are my nemesis, so willing to try any tips and tricks to make them more reliable. 


I'm so glad the Burda 6263 went without any hitches and that I love the finished thing as much as I do. I was so worried I would have forgotten how to do it!! Words can't explain how much I have missed sewing while I have been moving. I've been trying to channel creativity into doing up the house and a bit of scrapbooking, but nothing quite compares to taking 100+ selfies in the mirror in your homestudio, wearing a shirt you just stitched together. 


It's great to be back. Say hello to new and improved, 2022 Angela Holland.


x

Location: Loxleys, Kiln Street
Currently listening to: I Just Want To Make Love To You, Etta James

Sunday 22 May 2022

New Look 6233, Dressing Gown


I'm a firm believer that every problem has a fun solution if you think about it hard enough. I think we can all agree one of the problems uniting us right now is the price it costs to heat our homes (did I mention I'd bought a house idk). If you've been keeping up with me on insta or have had the pleasure of spending time with me in the real world, you will also know that I suffer from terrible circulation, and at the first sign of a temperature drop my hands start to throb and turn a red/white/grey colour. 

My solution was to make a snuggly dressing gown that would hopefully stop me reaching to turn the thermostat up when I'm pottering around the my house. After seeing @CrafternoonTeas' super lovely New Look 6233 gown I knew this was exactly what I needed. It is made up from 2 fronts, a back, a straight neck band, two pockets and a tie for the waist, so there's no crazy shaping or fiddling about with collars with this one.


I do like things a little bit unusual, and initially was worried about how I was going to make my dressing gown fit this criteria. When I found this super soft giraffe fleece on the Minerva website though, I knew I'd hit the nail on the head. What is more unusual than a giraffe?! I can't get my head round it that they are not completely mythical. How do they even stay upright?! 

Even when using a relatively easy pattern, sewing with fleece poses it's own unique challenges. Be prepared for FLUFF. Lots and lots of fluff. Just cutting out your pieces will create so much shedding, so be prepared and have the vacuum cleaner close at hand. This excess fluff in the seam allowances also poses as a potential issue if you don't manage it properly. Particularly where the seams meet, you run the risk of really bulky seam allowances, so my top tip would be to always grade the seam allowances and carefully trim the pile away from the fabric here. 

The pile of the fabric also makes it tricky to get a neat edge stitch - I found this when top stitching the pockets. It's hard to see exactly where the fabric is, so if you're not careful it's easy to miss the edge completely and just catch the fluff! Or, I also found - you think you've done a really straight line but when the fluff settles you find it comes out a bit wobbly! 

Luckily one of the benefits of having such a pile to the fabric means that with some gentle brushing around your topstitching you can hide, or at least partially camoflague your stitches underneath it all. 

Irritatingly, attaching the pockets is the first step to making the dressing gown. I think if I'd done a few more practice runs I would have had a neater edge stitch to attach them. I would recommend doing a practice pocket on some scraps! Another thing to consider is that due to all the fluff, this fleece didn't seem to respond to pressing! So it was hard to get a clean, pressed edge to follow in the first place. 

The only way I found to overcome the bulky and sometimes downright bouncey turn under when stitching the sleeve and bottom hem was to overlock the edge before turning it under. this sort of surpresses all the fibres and also creates a neat line to follow as you turn it under. I really love the chunky 2 inch hems on this garment. I used about 10000 pins and stitched it down from the top using a twin needle, both for the aesthetics of a double line of stitching and to ensure the edge on the underside was caught. 

I took care cutting the front/neck band as I was eager not to have any upsideown giraffes and also didn't want to cut anyone in half. I think I did pretty well in lining up the sitchline down the giraffe noses for the left side and lining it up with their back legs for the right side. This kind of manoeuvre is always tricky when your fabric is directional or has a one way nap. Success though! No upsidedown safari animals and not one ended up sniffing another's bum ! 

I took 4 inches off the bottom of the gown in attempt to make it a little sexier (what man doesn't need a sexy giraffe in their life?) and I cut the tie on the crossgrain instead of the straight grain so the print was horizontal. 

I'm really pleased with my make! Its so snuggly which was my main aim, and the yellow in the fabric goes well with my interior decor! 

What fun animals have you been adorning your garments with this season? 


x

Location: Hands Rd
Currently listening to: Must Be a Dream, Tempesst

Friday 13 May 2022

So Zo... Strappy Vest Top


I'd got one last day of annual leave, the weather outside was BEAUTIFUL, my new neighbour leant me a deck chair. My mum took me shoe shopping, I'd got a LOT of blogging to catch up on. But DAMN I just wanted to sew. If you've been following me a while you'll know I've use So Zo' s FREEE knicker pattern multiple times, but what I have naively overlooked is the FREE VEST PATTERN also included on Zoe's blog .

This pattern is the very definition of quick win. It's 2 pattern pieces, it's like 5 seams, it uses less than a meter of fabric. It's super easy to fit (I cut a size 8 and didn't have to make any alterations yay). The only special skill you'll need in your arsenal is the ability to attach elastic. If you've never tried though, in the instructions for the pattern Zoe explains two differnt methods for attaching the elastic. I had never tried fold over elastic (FOE) before, but did have some in my stash. I decided not to use a lace trim as I thought it would run the risk of looking a bit too underwear-y.


My tip for attaching FOE would be to do a basting seam from the right side of the garment, following the centre line of the elastic and stretching it gentley around the curves. Then flip the top of the trim over the basting seam and zig zag close to the edge. Pull out your basting stitches and you're good to go!


I toyed with the idea of attching sliders to the straps but something about the faff of that definitely didn't suggest quick win. Besides, if I made sure I made the straps the right length in the first place I wouldn't have to use sliders would I? The straps ended up being 28cm in length (this of course might be different next time depending on the stretch % of my elastic), and were placed on the back piece,11cm in from the side seams. If you leave yourself just over 30cm to make the strap from before you stitch down the trim to the front piece then you should be golden! You can tweak the length from here but shouldn't end up with too much wastage.

The hem on the pattern piece is 2cm wide. I didn't overlock the raw edge for fear of streching it out- instead I loaded up the twin needle and hemmed close to the edge. You have to do this from the right side for the stiching to be the right way round, so good pin placement is key here. 


I'm so super pleased with the fit! Once I've stocked up on different fold over elastics this pattern will be a total stash buster.


Who else has made one? What cute fabrics did you use? I used some more of this lovely lovely sausage dog print from Minerva. Oh my word, it's so cute. I can't get enough. I want a sausage dog everything!! Shorts or knickers next? 


x

Location: The Pinnacles, Sheffield
Currently Listening to: Bandits, Reverend and The Makers