
A year ago I was mid way through a pattern drafting course with the lovely Leann Marie Design and plans had already started swirling in my head to make my tassely dress of dreams.
This dress not only boosted my confidence in designing and drafting, it also introduced me to The Identity Store in nearby Matlock. The Identity store do a seasonal sale at the Imperial Rooms in Matlock and this Autumn my friend Charlotte and I took a look.

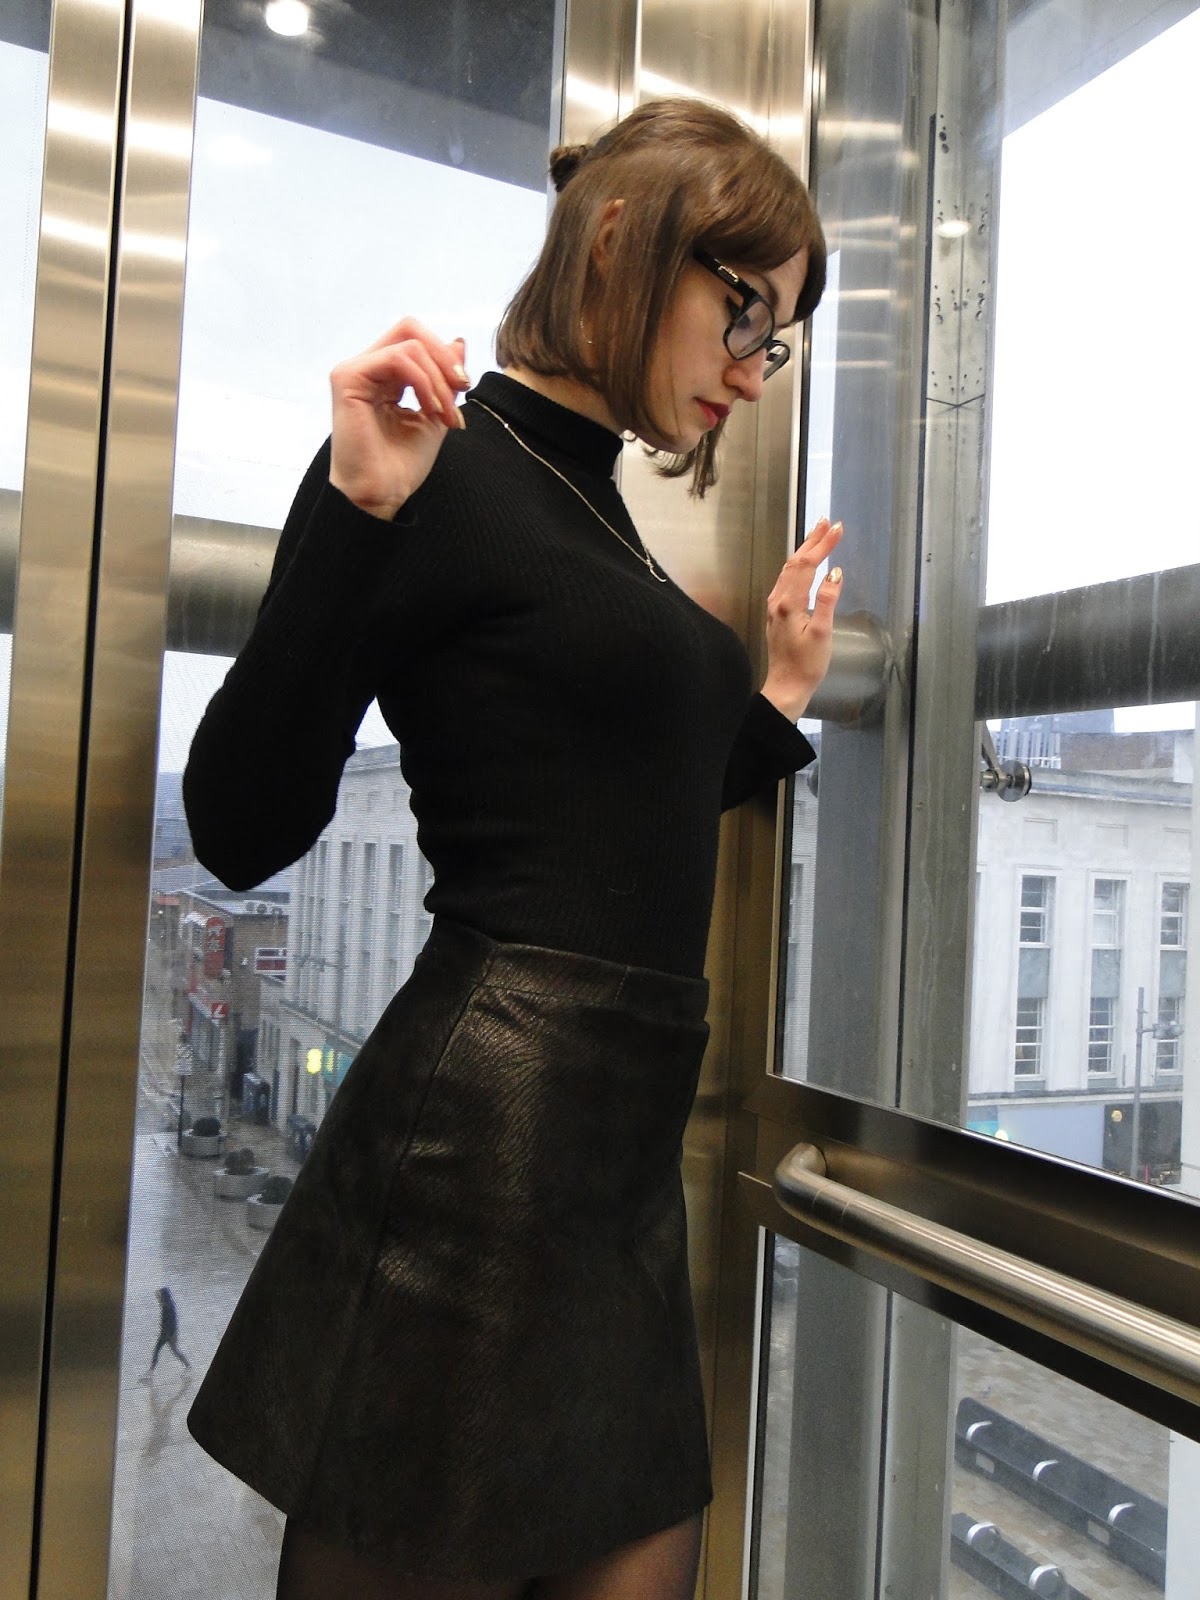
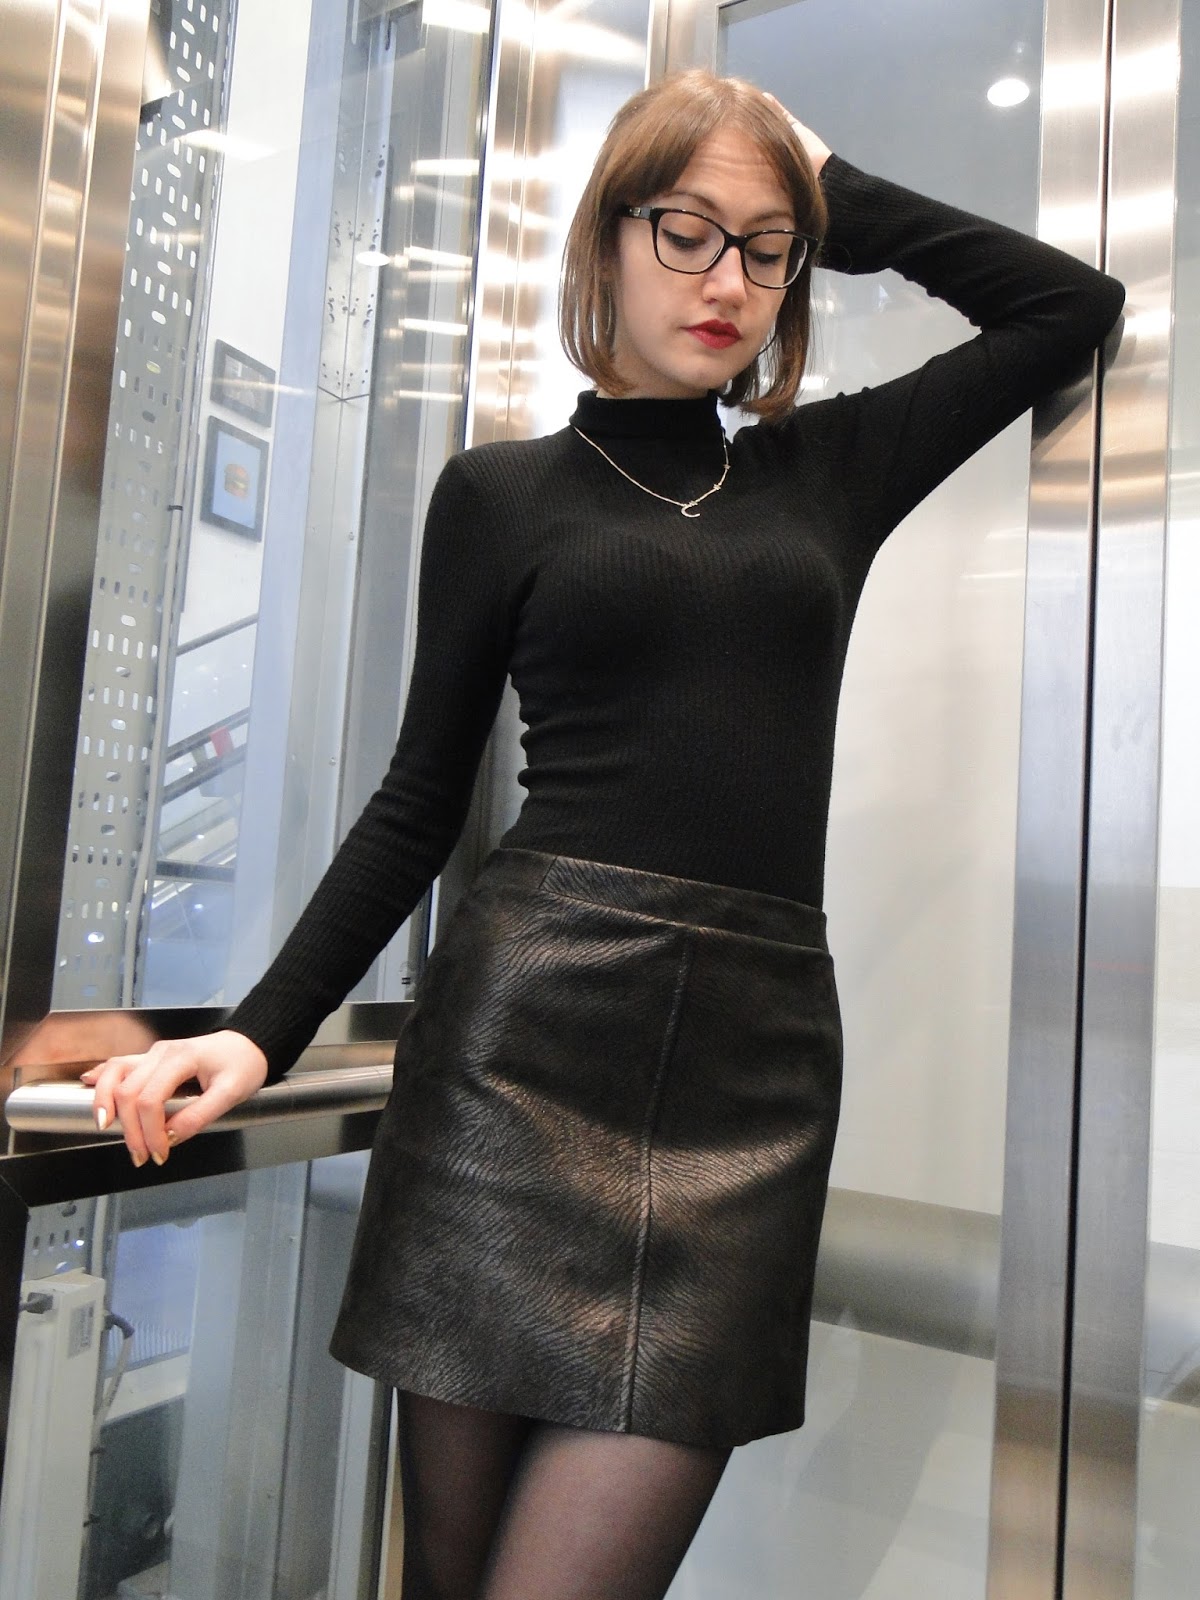
I didn't really know what to expect, but we certainly weren't disappointed. Much like the shop itself there was a massive selection of leathers, only here you could get a good look at everything! I knew I wanted to make myself a sassy mini skirt. I wear my self-drafted pleather Mia quite a lot, though there were a couple of tweaks I wanted to make to the pattern so had that in mind while browsing.

It came down to a lovely metallic blue sheen leather, or this printed tiger print leather. It was a tough call, but the uniqueness of the animal print won me over. How lovely it shines in the light! I bought two pieces, one at £15 and one at £20. We had a good stroke of all the pieces on offer to check for holes and abnormalities.
 |  |
 |  |
The main change I wanted to make to the pattern was to take a little out of the centre back. So what had happened, is when I had made my sway back adjustment at the top of the back, it had altered the hang of the skirt, meaning that the centre back was now angled not parallel to each other. It's not a massive deal, but I am aware of it when I wear my skirt and it scrunches up a little when I sit down. It seemed like a pretty easy thing to fix. On my paper pattern I just folded out the excess triangle of fabric at the bottom of the back skirt pieces. Too terrified to cut into my leather I cut the lining first. ITS A GOOD JOB I DID, what I had totally failed to consider was that taking two massive chunks out of the bottom of the skirt would massively change the fit! Ha! I could get my lining on, but it hugged my hips very tight then kicked out really weirdly. Back to the calico, I slightly altered the side seams of both the front and back skirt pieces, roughly putting back in the amount I had taken out of the back, only this time into the sides.

I find it tricky to tell how good something will look in actual fabric when you're all calico'd up, but it was definitely a vast improvement. Luckily I had enough lining fabric left for take two. Phew!! So much better!

*SNEAKY TIP* I cut a little extra into the front pieces so that I could add a little tuck into the lining at the waist band. Under a heavy fabric like leather the extra fabric in the lining won't show, but will just give you a little more room for movement. After the first lining attempt I wasn't taking any chances!!
 |  |
Held my breath the whole time cutting out my leather- There was a definite direction to the tiger print so I was careful with pattern piece placement. I decided it would be most effective to go for a kind of mirror image effect, so the seam at the centre front and centre back would break up the pattern.

I used the good old tissue trick and set the stitch length to 4 to stop the machine foot dragging the leather, works every time! I started with centre front seam which ran smoothly, then onto side seams.

The biggest problem I found was the bulk! The waistband which I pinched and edited from the lovely Simple Sew Shannon Shorts is made up of 5 pieces, and then another 5 pieces for the waistband facing. You can imagine all those fat seams!! It was a bit of a fiddle sewing waistband to skirt but I got there without throwing a full strop. It looks a bit lumpy in places which I think it inevitable when using leather. I gave it a good press (PLEASE use a pressing cloth!!) which helped a lot.
To battle bulk I could maybe use a different fabric for the waistband facing?

To sew in the lining, I stitched my leather skirt to one side of the waistband then the lining to the other. The seam allowance of the waistband on either side could then be sewn together keeping the waistband folded along the top seam. Next time I need to remember not to sew all the way to the end though, as I need to turn though the ends when stitching the lining to the zip.

Bulk was also a pain when inserting my zip. It was tricky to pin it into place. I played about with it a bit. To get it to fit where I wanted it to seam allowance was about 2.5cm. Last time I used a sneaky bit of double sided tape instead of pins to hold the zip on place as I stitched but this time I had real fear I would have to reposition it, and I didn't want the tape to peel off the animal print.
As it happens, I didn't have to take the zip out! Phew! To sew the lining to the zip you have to turn it all to the wrong side then sew close to the zip lump under the lining (I switched from invisible zip foot to normal zip foot for this). Then turn back and poke out all your bulky corners at the top of the waistband haha! I kept going back in to hack bits out!
Once the zip was in and the seam was closed up at the bottom of the skirt and lining, it was a tough decision whether to hem or not. I'd made the skirt with the intention of hemming and had taken an inch off the lining so that it wouldn't show when I had turned the skirt up, but when it came to it, the bulkiness of the centre front seam was so off putting. I had vision of the foot dragging along, making really tiny stitches over the lumps with no way of hiding them. I really really REALLY didn't want to fail at the last hurdle, so I decided no hem. I think I did right, the skirt hangs really nicely and at a good length.

So proud of this make! I'm slightly paranoid about sitting down in it and getting a bum print in the leather, but it's already my go-to skirt for nights out. Wonder what next year will bring, eh?
#sassy17
x
Location: The Light, Sheffield
Currently listening to: And I'm Aching, Black Rebel Motor Cycle Club
wonderful work - really beautiful skirt. I know I have started to use petersham as a 'waistaband' as it gives a less bulky finish but it only works if you dont mind the waistband less look
ReplyDeleteThanks! Absolutely love it, a great way to end the sewing year. I keep eyeing up the petersham in the sewing shop... We'll see what 2018 brings! xox
Delete