
For my second post as a Simple Sew blogger I decided to have a go at the Kaftan Top. I think the pattern is styled as a kind of loose fitting beach cover up- but seeing as my trips to the beach appear to have been few and far between I wanted to try and make this top a little more wearable for every day use.


First up, fabric choice was this luscious crochet lace from the fabulous folk at White Tree fabrics. It is a fine crochet with quite an open weave so had the drapey qualities I was looking for for something loose fitting. Seasonally, I also thought it looked a bit Halloweeny, and heads up, I'm one of those girls that likes spooky all year round! So naturally I fell in love straight away.

After reading fellow Simple Sew Blogger Vine Lines' tutorial on making her Kaftan Dress, it sounded like I would need to cut the smallest size. The size chart shows finished garment measurements so I took the plunge and traced off and cut out a size 6.

I decided to cut fabric on single layers as the lace has quite an obvious linear design and I didn't want it going wonky. I cut one half- flip it over then cut the second half, matching up the lace design. The Pattern packet says you'll need 3.12m fabric for the top in size 6. You definitely won't! I think I used about a meter and a half. The top is made up of four bits- front, back, front skirt and back skirt, with the top front being cut in two pieces with a centre front seam.

I used rotary cutter to cut the pieces out. Be careful. They are sharp.

The neckline of the top is meant to be finished with bias binding. I thought it would be a nightmare to try and bind with lace fabric so I cut a strip of really lightweight black jersey as I didn't want anything too heavy or anything too eye-catching to take away from the pattern in the lace. Once I'd got the neckline shape by attaching front to back at shoulder seams I thought black binding would look too heavy right the way around the neckline. Instead I opted to turn under about 1cm around the neck.

Next steps are pretty simple- Sew the centre front seam making sure the V of the neck lines up really precisely. My handy tip for sewing lace- I took 1 layer of toilet tissue and stitched all the seams with this underneath. This gives your stitching line something to lock to when you go over holy bits of lace. Then when you're done you can just tear it off! Despite my aversion to little bits of tissue (aghhhh, weird phobia number one), I sucked it up. Much better than getting all your threads knotted I think!
 |  |
Side seams next, which I overlocked (no need for tearing tissue here thankfully), then you have to attach front skirt to back skirt at side seams, then sew together the whole lot at the waist.

To make the channel for the drawstring you just have to stitch a line 3cm from the wasitline seam you just put in, then thread your drawstring through! Oh before this you will probably want to make some holes either with an eyelet putter-inner or the button hole function on your machine. I wasn't being lazy- but I was a bit nervous to do either with such delicate fabric so errr, I just poked my drawstring through holes in the lace. But don't tell anyone! For the drawstring I used my piece of bias binding that I didn't turn into a neckline! So it wasn't a waste of time!

Excited, I tried on. The neckline was really wide and there was too much fabric in the sides! Then as I mentioned when I made my Zohra, I remembered that billowy sleeves seem to suit other people much better then they suit me! To save it I knew the number one thing I needed to do was take some out of the side seams. Sadly this meant I would have to unpick the drawstring channel. I managed to avoid having to unpick any overlocking. I took out about 5cm in total from each side. This time I tried on BEFORE committing my waist seam and it looked much better. The neckline is still very gapey, but I get that's kind of a cute feature on a beach cover-up. I had to remind myself this pattern wasn't necessarily designed for spookily lurking round stone circles mid-autumn! If I wear the kaftan a little off the shoulder the drawstring sits quite nicely below my boobs and a little lower on my back.

Happier with the fit, I topstiched where the channel meets the top which makes for a super lovely professional looking finish.

I faffed about with the idea of making the sleeves a little narrower from the over-arm seam, but it didn't quite seem worth it. I took off 10cm from the bottom so it's more of a top than a tunic. I did a really simple hem on both the bottom and the sleeves. Then it was about done!

The pattern is really easy to follow. I would advise anyone making it to cut a couple of sizes smaller than their actual size- I'm guessing I ended up with a size 4 after taking so much out!! I terms of practicality, I'm not too sure when I'm going to get chance to wear it seeing as it doesn't look like anyone's going to be taking me on a spooky beach holiday anytime soon! I reckon I'll get a bit of gig wear out of it though. If I make another I think I'd quite like to add some embellishments around the neckline and maybe use some fancy topstitching thread.

x
Currently listening to: Halloween Head, Ryan Adams
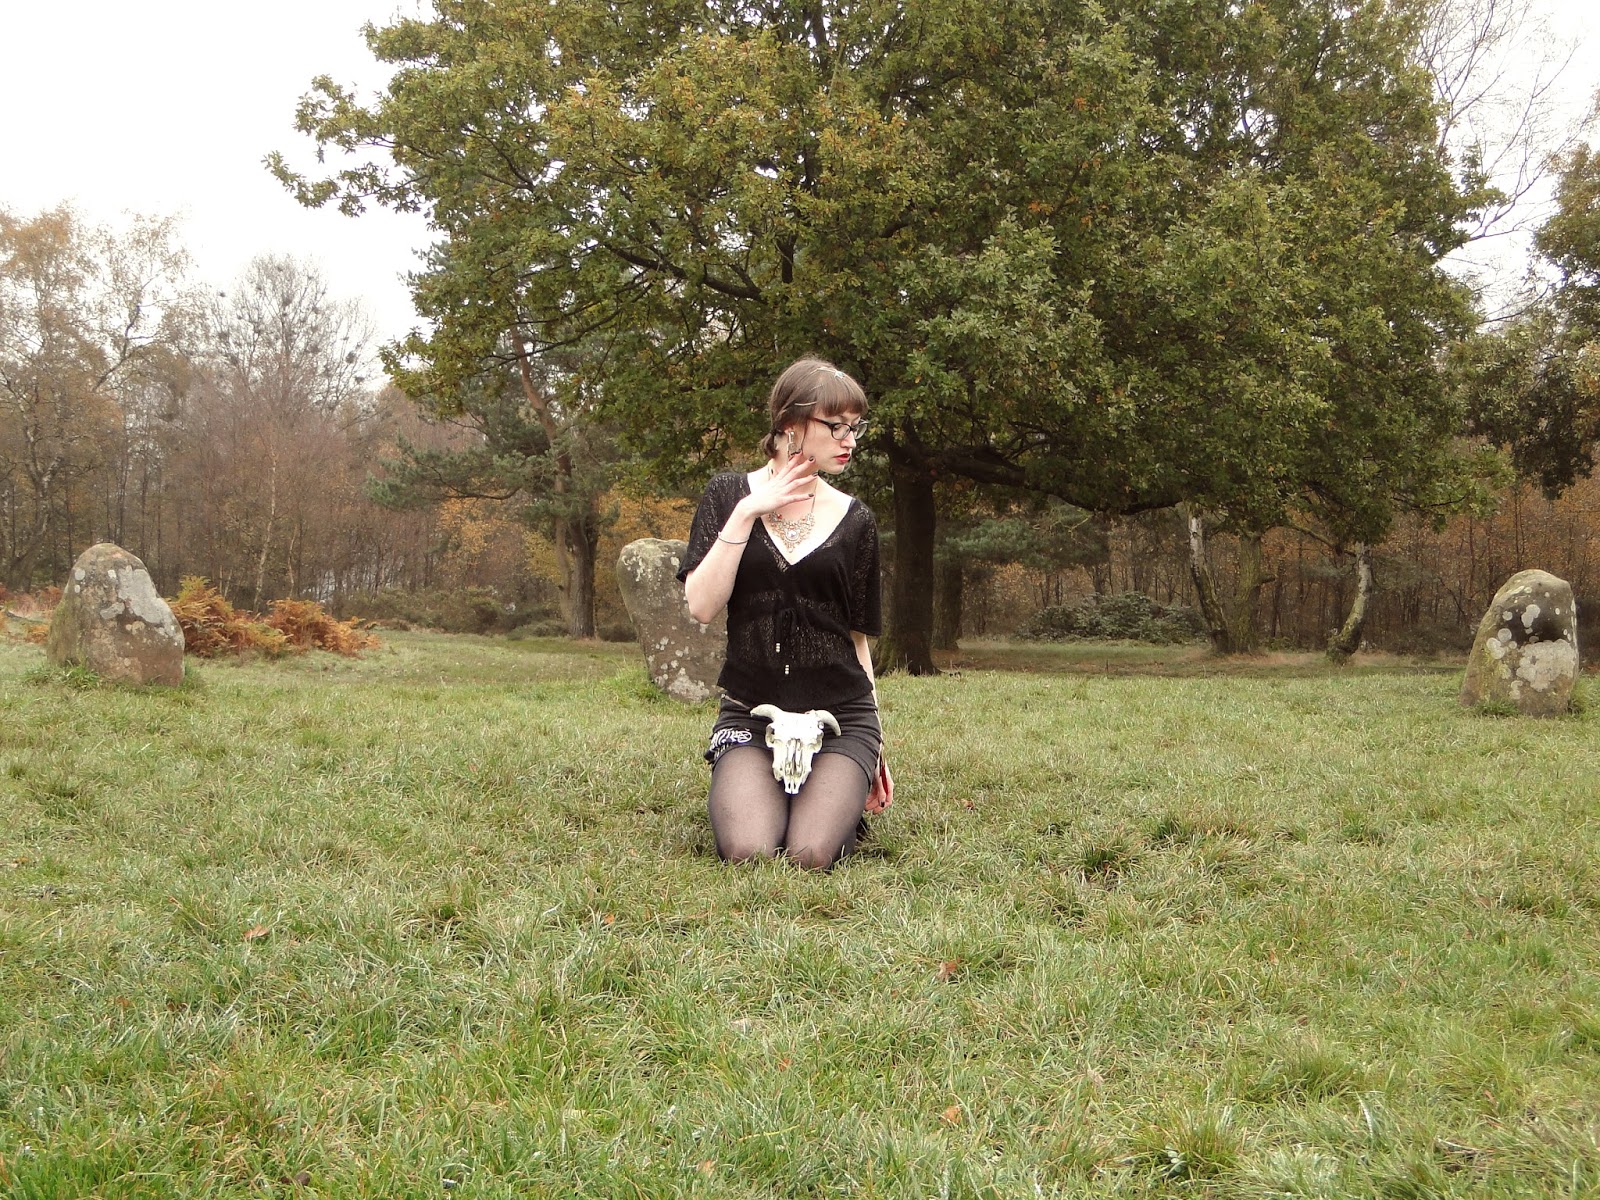
Location: Nine Ladies Stone Circle, Derbyshire
Spooky Beach holiday eh? I'm guessing that'd be a Whitby trip. Unless you get people dressed as Ghosts to run around Skegness.
ReplyDeleteHa! I guess I could start a trend! xox
DeleteThis comment has been removed by a blog administrator.
ReplyDeleteThis comment has been removed by the author.
ReplyDeleteThank you for sharing this thoughtful article. I’ve always preferred breathable fabrics, and kurta set for women seem like the ideal option after reading your post.
ReplyDelete