Sunday, 6 June 2021

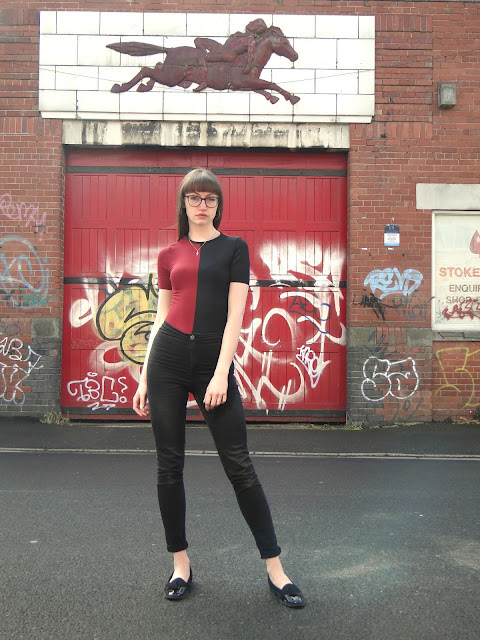
Simplicity 8513, Bodysuit into T-Shirt Hack

I think the pandemic has bought out a thrifty side in lots of us. I have seen an increase in the amount of people making patchwork trousers or mixing and matching old sweaters to make new colour block combos.


Never one to want to miss out, I decided to put some leftover fabric to good use by making this cute little tee out of rib fabric remenants.

By now I have perfected the fit of the Simplicity 8513 bodysuit pattern, sadly there wasn't enough black rib left to make the full bodysuit, but I thought it would be easy and fun to combine my rib fabrics and make a half-and-half fitted tshirt.

All I had to do was not cut the front piece on the fold and instead add a 1cm seam alloance to the centre front, and then make the decision of which colour way I wanted the sleeves to be. 


There was frustratingly little fabric left - so not enough to add a sensible hem! The bottom of the shirt is very much 'here's what I had left!' which is a bit of a shame but I kept as much length as possible so I could tuck it into my jeans.

The red fabric has a little bit more stretch than the black so the centre seam does like to creep towards the black side a little but I don't think it's too bad if I keep an eye one it.

Another simple stash buster for making cute basics! ðŸ™Œ 

x
Location: Little London Road, Sheffield
Currently listening to: Tutti Frutti, New Order 

Sunday, 23 May 2021

Simplicity 8513, Bodysuit

You're thinking this pattern rings a bell; you're right. This isn't my first bodysuit, in actual fact I think this is the sixth time I've made one of the variations of this pattern. 


I had some of this burgundy rib fabric left after my Eilidh dress, it's sooo comfy and stretchy and soft against the skin. The bodysuit pattern doesn't really require a lot of fabic, especially if you opt for short sleeves. It made sense to whizz together a tried and tested pattern with the fabric I had left!


I used the straight sleeve pattern but made them loads shorter so they were just t-shirt length and stabalised the shoulder seams with a little bit of lightweight interfacing. I used a 1.5cm seam allowance on all the seams as the fabric was sooo stretchy in all directions. I stitched everything with a zigzag stitch on my machine to allow for stretch and decided not to overlock anything (no matching thread on my overlocker, didn't trust it not to stretch out the fabric, fabric wasn't going to fray anyway).


I had some burgundy picot elastic I'd actually ordered by accident a while ago, so this finally came in for finishing the leg holes! Is there anything more satifying than finishing edges with pretty elastic and a zig zag stitch? I didn't apply to much pressure on the elastic, just stitched round keeping it taught but not stretched if that makes sense? I wanted the elastic to grip the body but not dig in at all. 


The neckband was the final and also the riskiest stage. I think it could have gone on neater if I'd used an overlocker I think but would have also run the risk of stretching the neckline out as the headhole was so prone to stretching!
I love the outcome. Such a simple basic which I know will get loads of wear. A great little scrap buster and so comfy... win win win ♡ ♡ ♡ 


x
Location: Barmouth Road, Sheffield
Curretly listening to: Colours, Hanni El Khatib

Sunday, 4 April 2021

Pipe Dream Patterns, Eilidh Dress

This is my second pattern of my 2021 make 9! I feel like lockdown has really affected my sewing pace- which I originally thought was a bad thing, but has proved that more time planning while I wait for supplies to arrive etc has really allowed me to think things through and give me time to better plan projects.

When my fabric arrived my pattern was traced, I'd perused the instructions, I'd assembled the mini version of the dress inculded in the pattern so I could envision the twist. I opted for the high back version as I thought fitting would be easier (no sliding shoulders!) and it would be wearable for more occasions. The feeling of being prepared is SO blissful! I hadn't made a toile of this pattern due to my stash being short on stretch fabrics, but I'd ordered enough of this burgundy rib knit to cut out more than one attempt if I needed.


Being so prepared gave me the freedom to be a bit more playful and less time conscoius when making adjustments. The main pattern change I made was adjusting the shoulders. The big issue from start to finish was that the fabric is SO stretchy, the front twist really weighed down the centre front. I took quite a wedge out of the front shoulders (leaving the back piece untouched) and reshaped the front armhole. I reinforced the shoulder seams with a strip of interfacting to stop them from stretchig out of shape too. Next time I will definitely shorten the bodice along the shorten/lengthen line on the pattern, but by how much is going to be really dependant on how stretchy my next fabric choice is. 
Once I was as happy as I could be with the shoulders I moved to shaping the the centre back seam. This was super satisfying - just pinning down the centreback seam, pinching in around my lower back to accentuate the curve. After pinning I chose to close up the back vent as the stretch made it quite unnecessary, and I was quite keen in my knee poking out of the front slit instead. For sturdier stretch fabrics I think the vent will look really class so looking forward to having a go at it next time.
The pattern is designed with 1cm seam allowance, which I mainly followed, but changed to 1.5cm on the sleeve seams, tapering to about 3cm at the top. I matched this at the top of the side seams, grading back out to the waist. The wonders of stretch fabrics eh!
I added a few extra stitches to the waist seam eiter side of the twist as there was a tiny flesh-flashing gap on one side! I then stitched two short sections along the centre front above and below the twist to keep myself from flashing anything else! This seam gets engulfed by the twist leaving the front section still really fluid. 
I was vey lax when it came to hemming. I'll admit I was terrified that running the rib fabric through the machine would stretch out the sleeves, even using the plastic presser foot and a stretch stitch. The pattern suggests leaving the front neck unhemmed as it just kind of rolls under itself, so I just adopted this idea and left the sleeves and bottom unhemmed.
The moment I tried this dress on (even before I'd put the sleeves in) I knew I was totally in love with it. The fit, the length, the colour, the leg and the neckline!!!! They all looked so film noir but still also really modern. Making it was realtively easy, with the biggest challenge probably being my choice of fabric - so stretchy in all directions!! This dress will definitely be my go-to with the nect stretch fabric I fall in love with ❤️️❤️️❤️️❤️️❤️️❤️️❤️️


Location: Domo, Little Kelham
Currently listening to: Ant Music, Adam and The Ants

Sunday, 21 March 2021

McCalls M7472 Blouse


I had been on the look out for a shirt pattern that was distinctly different from the McCalls M7575, but without too much flouce or frill so I could still feel comfortable wearing it at work. What attacted me to the McCalls M7472 was the raglan sleeves. These instantly make the shirt different and will add an eyecatching element when using a directional fabric like stripes. 


The size 12 lined up pretty much exactly to my measurements- I think this shirt is meant to be oversized as I feel I could definitely go down a size and it would still look loose. That said though, I don't think the shirt looks too big, it has a kind of Art School vibe to it, particularly in this fabric, which I am digging.
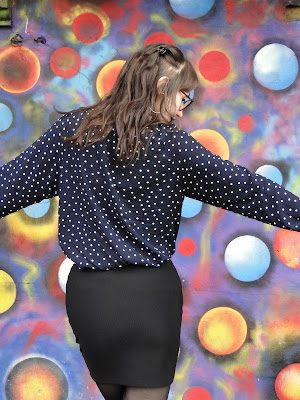
The fabric I chose had been in my stash for over a year - I'd been put off using it on any other shirts as the dots on navy make it look VERY NHS! I didn't want to look like I was swanning around in a work uniform! Again I think the oversized-ness of the shirt comes in handy to combat this. I decided to use diamante buttons to further make this not look like a work blouse!
The pattern features a cute litte dart in the shoulder to add shaping to sleeve. I've never seen this before but I loved it. The instructions advise to cut the dart, I assume for it to lay flat but my fabric was very thin anyway and I didn't want it to fray, so I skipped this step and nothing bad happend!

Each sleeve is then all in once piece, unlike the M7575 which has an upper and under sleeve. There are 2 pleats above the cuff and a (slightly fiddly!) continuous lap is added to the sleeve opening. You have to be really precise here as after you cut the slit into the sleeve there are literally millimeters left to sew the lap onto the opening. You have to open the split out and line the stitching/reinforement line on the sleeve with the 6mm seam allowance on the lap. The cuffs are then added which is quite simple, and  then slipstiched to the inside.

As well as the cuffs, the inside of the button bands and collar stand are all slipstitched with the option of topstitching if you want to. My hand stitching is quite neat but I found this fabric was quite prone to snagged threads particularly when hand sewing. In hindsight I do wish I'd just stitched everything down from the top to avoid snags! The threads are quite delicate so there are no blindingly obvious places where the threads have pulled.

The hem is super curved then goes up to a kind of split at the side seams. I was worried this would get on my nerves when tucking into my skirt, but I love the length (I made option C). This also makes it really easy to knot-up the front when the weather gets warmer. The curved hem can be a bit tricky but I've been practicing! My tips would be use a tape measure and PRESS! And also follow the instructions when it says to sew long stitches 6mm from the edge. You can pull to help ease the in the fabric at the  curviest points and it really works.

I'm a big fan of the shape of the collar on this shirt. I think the way it kind of squares off instead of points adds to the casual art school vibe.
I chose to put the pockets on and include the flaps to further distance this shirt from the M7575 Shirt. I am looking forward to playing around with these on my next one with some contrasting fabric (maybe horizontal vs vertical stripes??). I will definitely interface both the pocket and the pocket flap next time to make them look a little sharper.
I'm really glad I discovered this pattern. There are only 11 pieces to it, where as the M7575 has 17, so felt a lot quicker to put together. There are no darts in the bodice so makes for a speedier sew. I enjoyed the different elements like the sleeve plackets and the different shaped collar.
I'm super pleased I have another shirt pattern in my aresnal now! To finish I made a thin bow using some left over fabric just to tie round the neck if I do the button up to the top. There are so many options for styling the shirt! Tucked in, tied up, loose, sleeves rolled, buttoned up, buttoned down, casual and smart! A Spring 2021 essential. 

x
Location: Abbeyfield Park, Sheffield
Currently listening to: Other Woman, Paloma Faith