


And I'd be right. I was distrated, distracted growing into my house, distracted falling in love, distracted getting my heart broken, distracted playing badminton, distracted learning golf, distracted trying to learn how to swim, distracted writing songs, distracted letting men buy me dinner, distracted trying to get enough vitamin D, distracted recording songs, distracted getting a new job, distracted getting another new job. It's amazing I managed to get anything made really isn't it?

I want to cut the crap in 2023. I know what makes me happy. It's making, it's learning, it's putting skills into practice. It's sewing, damn it! I wanted to launch the year with a new pattern I'd never made before that would likely need a few fitting alterations. I'm a big big fan of a playsuit (despite their obvious awkward draw backs), a chairty shop TopShop playsuit find was on heavy rotation in 2022 for various occasions. So I wanted to make my own! Having gained a bit of confidence in fitting crotch and legs after my Simplicity Amazing Fit trousers I felt ready to take the plunge.


I used what I think was the last of the fabric from the backdrop in the Coco Don't video to make the toile. I cut to the bust size as this is where I always have fitting issues. I suspected, and was soon proved right, that this would cause the playsuit to be a bit short in the body. Visually, you could tell the crotch sat too high and it looked (and felt) pretty uncomfortable. The solution was easy - I added 1.5cm to the length of the bodice band. This meant it sat on my natural waistline and dropped the crotch lower. I also tapered the top of the inside leg seams out a bit where they met, so that the shorts were a little looser around my hips/bum.

On the top half, I had to take a little out of the neckline to save it from gaping. It was only a teeny tiny bit - I just pinched about 1cm on the neckline of the paper pattern and flattened this towards the bust. When I cut the fabric I trued the new neckline so it was straight.


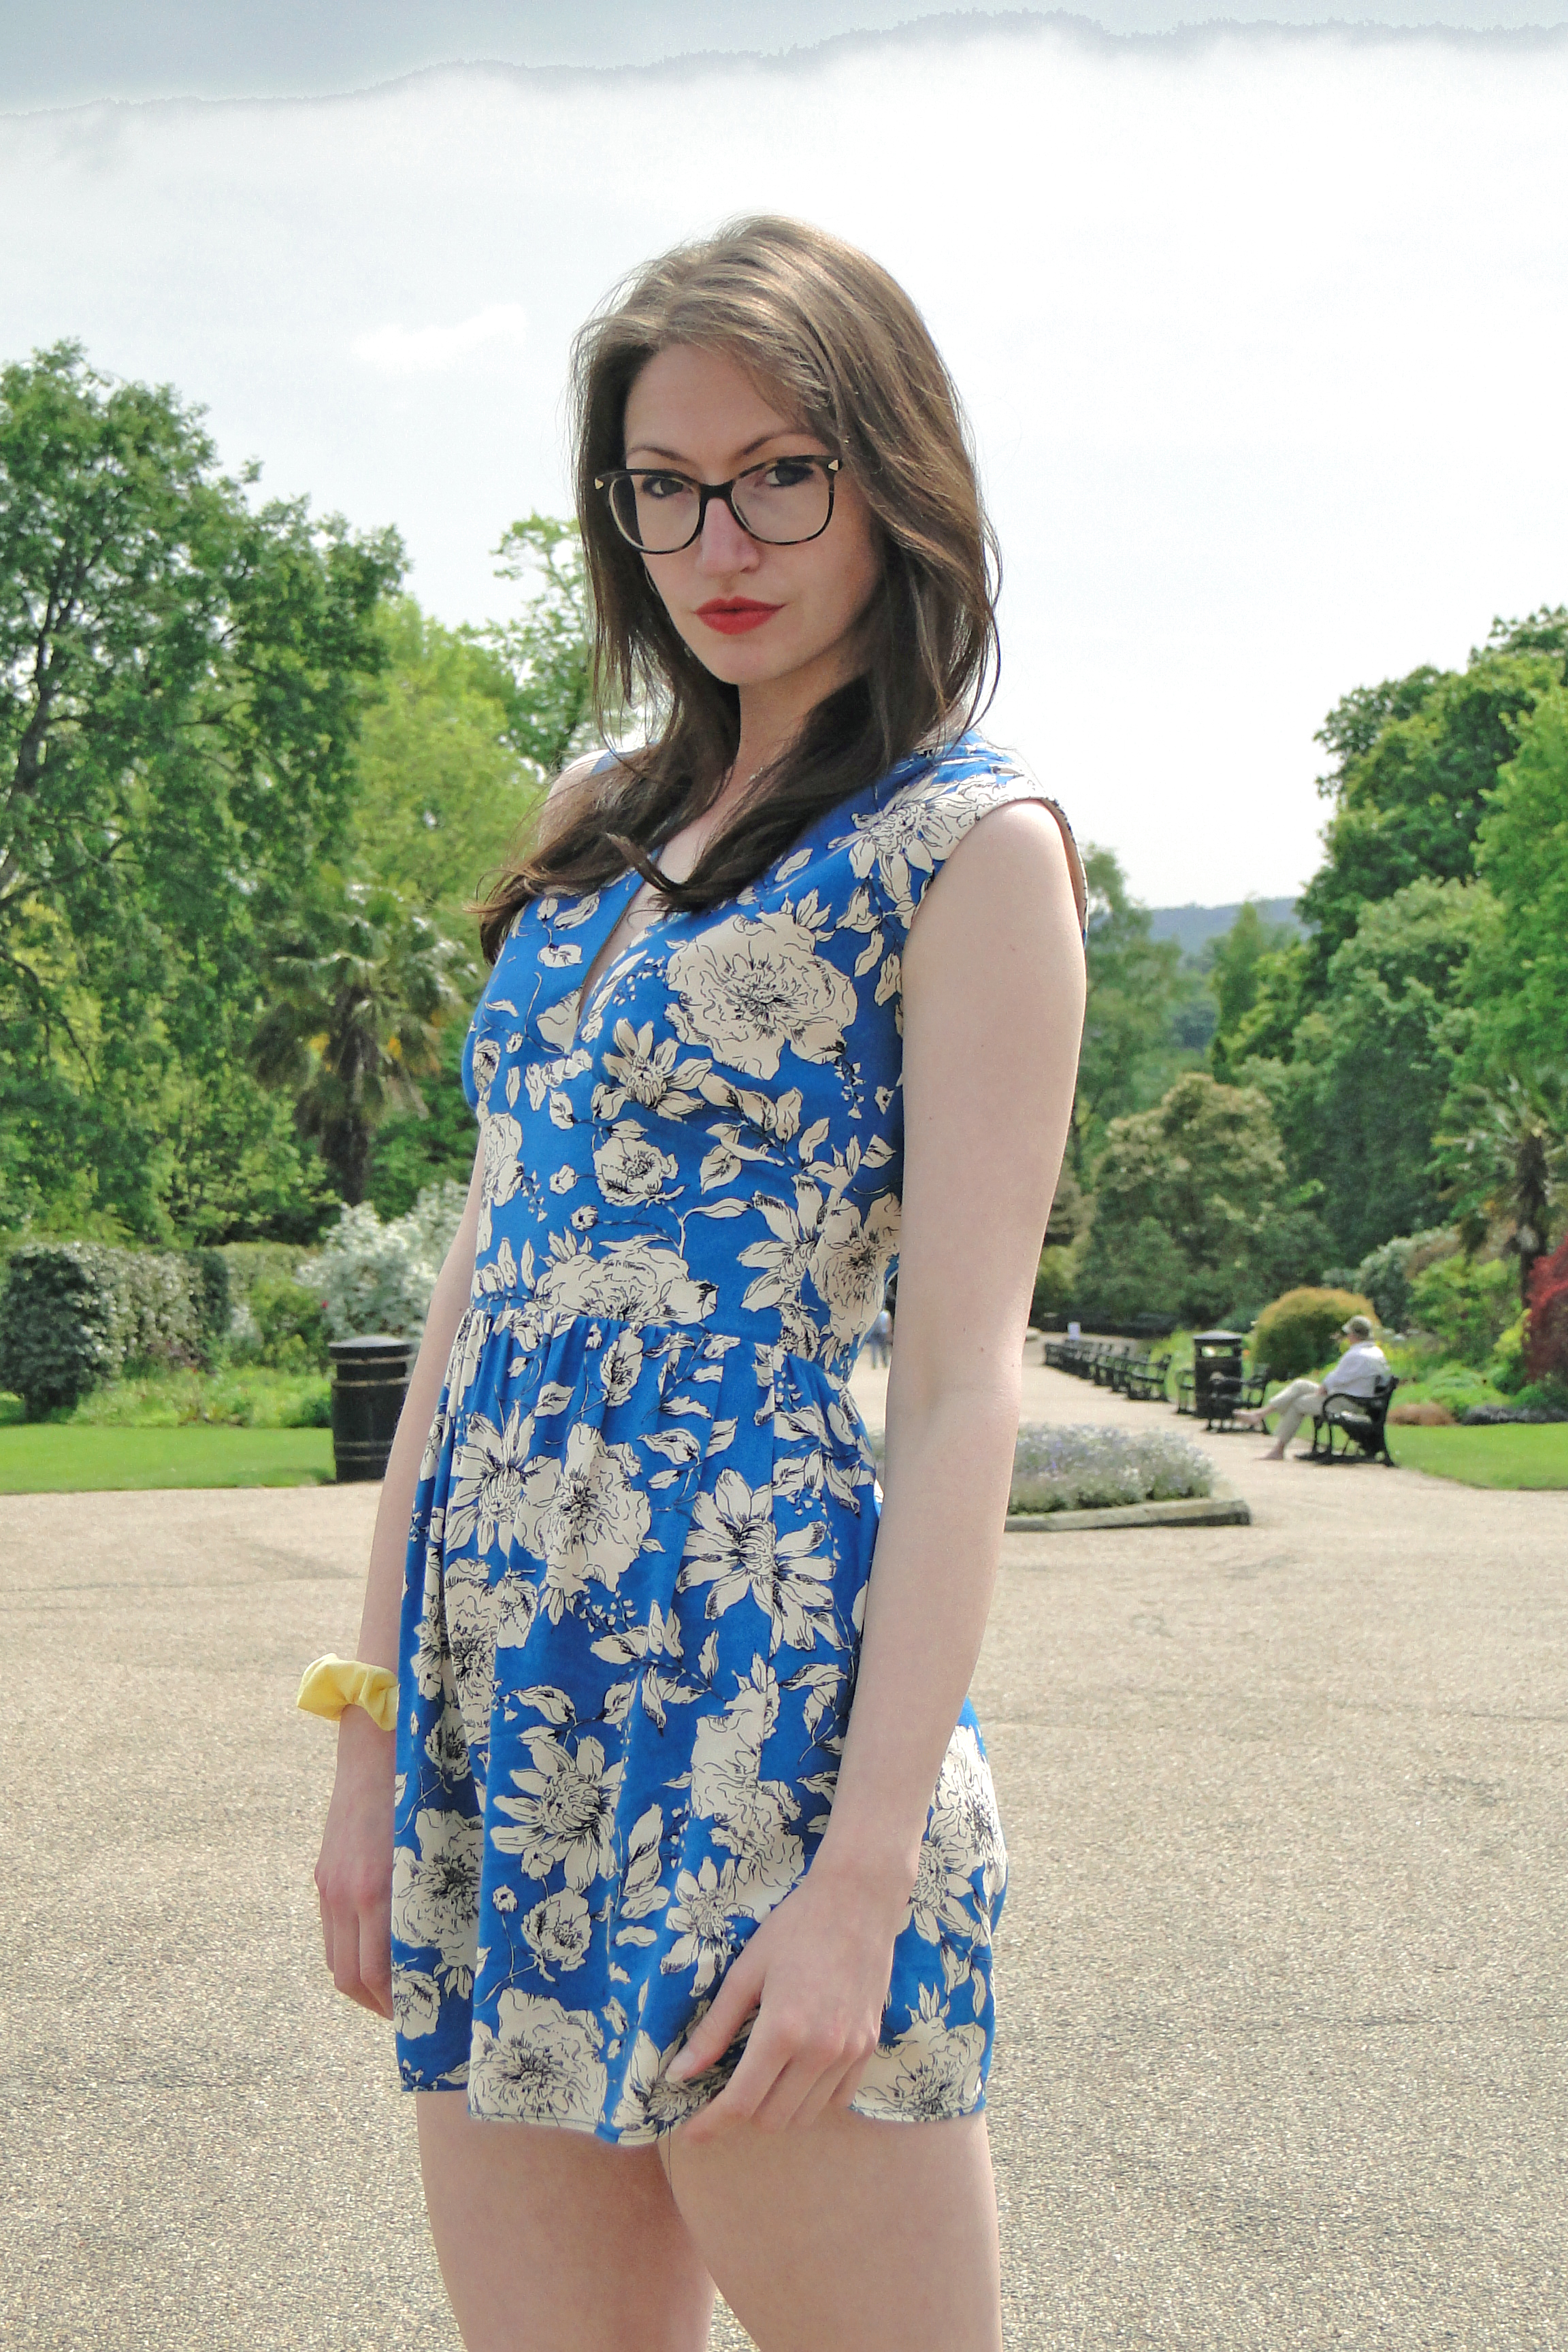

Tacking together the side seams and pinning up the back it became quite clear I needed to taper in the side seams at the underarm so that the bodice wasn't loose and lumpy. I increased the seam allowance by about 1.5cm, grading out towards the bodice band.

This floral fabric has been in my stash for 2 summers now I think?! I never quite knew what to make with it. It became obvious quite quickly that I wouldnt have enough fabric for the sleeves and I would have to use something different for the lining (delves into stash and comes up with some tan statin). I think this pattern was a really good match for the fabric. I added some lightweight interfacing to the outer bodice piece which I couldnt see any mention of in the pattern but I think it was a good shout. The pattern also calls for a 24" invisible zip... The shop onmy had 22", but when I put it in it reallly did feel like it was designed with 22" in mind so there were no problems there.

The shorts ran a chance of being too short, but before I comitted to the length I compared them to the Topshop playsuit I'd been wearing and they were about the same length. I overlocked the raw edge and turned up a tiny hem.

Lastly, as the sleeves were a no-go I opted for bias bound armholes. I dont actually ever recall doing bias binding before where the whole band is turned inside! It went well, the armholes definitely had the desired neat finish, but I 100% did not enjoy handstitching down on the inside. Next time I will make the armholes a little wider as I don't think I compensated quite enough for how much I lost by increasing the underarm side seam width.

The pattern is really cute! I'm glad I was couragous enough to try the plunge neckline, the alterations I made definitely allowed me to get away with it. Looking forward to getting my pins out this summer!

x
Location: Sheffield Botanical Gardens
Currently listening to: Universal Cinema, Gaz Coombes
No comments:
Post a Comment