Sunday 19 March 2017

New Look K6230, Lace raglan


I spend a lot of time on Instagram. Probably too much, but that doesn't have to be a bad thing. It's not just about checking out hot girls, I have found Instagram to be a great platform for sharing ideas and picking up creative tips, finding inspiration and celebrating successes. Sometimes just flicking though suggested posts can spark an idea.


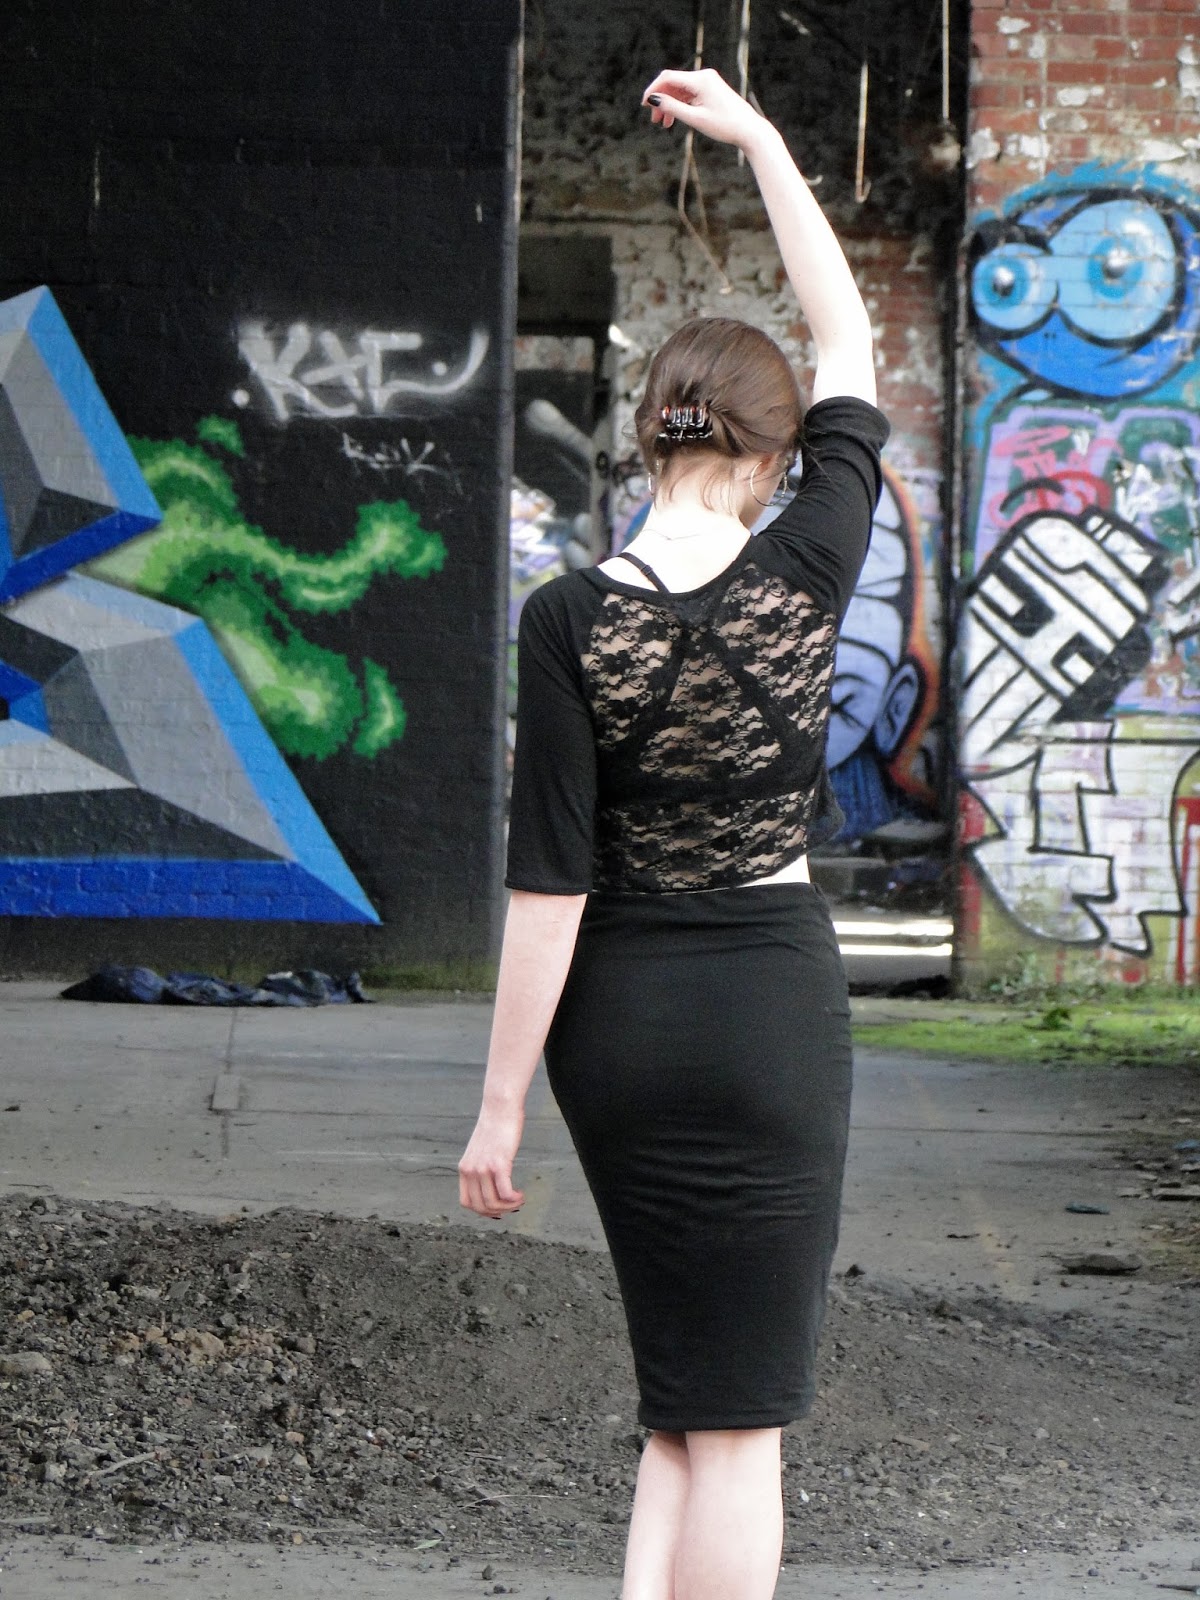
I'd love to be able to give credit to who it was that inspired me to make a lacy raglan but I foolishly didn't hit the save button. Someone on Instagram though has a top with a lace back and it looked cool! I thought 'I could make that!', then I thought why stop at a lace back, could I get away with lace front as well?


I have quite a supply to stretchy lace fabric which I've been stashing for underwear makes, and also some plain black t-shirt jersey left over from my last baseball top.


Perfect! This meant no trip to the shops. I had the inspiration, I had the fabric and I had the pattern. No time to waste!!


After drafting my second dress last month a project like this was just what I needed. Something I already knew how to make and knew what adjustments I wanted to make to the pattern.


I took 2cm off of each edge where sleeve and front/back meet. This time I committed it to the paper pattern! I took out the centre back seam from the pattern. I have made 5 now and not once included this! And I also took out about ?2/3cm from the centre front. This time I wanted the neckline to be a bit less off the shoulder! I wear my black and grey one a lot but the wide neck does always make it look a little bit slobby!


I cropped the sleeve to 3/4 length again and took some length off of the bottom of the top so it was cropped. I'll crop owt at the moment me!! Spring's on the way though so that is fine!


Pretty plain sailing from there. I found it pulled a little at the shoulders/chest so lucky I didn't take any more out!! I did pinch in a little at the underarm seams so the sleeves weren't so loose though. I had a good fiddle with my overlocker settings to get it perfect for the jersey and lace combo. Instead of doing a dodgy hem on the bottom I turned it over really narrow and overlocked around so the overlocking is visible. It makes for quite a nice finish. Is that a rolled hem? Or is that something else?


Pretty see-through, but not going to lie, that was what I was going for. Not sure if me nan will like it but oh well.


#Spooky17


x

Location: Attercliffe Tram Sheds, Sheffield
Currently listening to: 6 Foot 5, Lars Frederiksen and The Bastards

Sunday 12 March 2017

Self Drafted Olivia Dress


When you know how, the changes to my Rosalie pattern to make Olivia were pretty simple. This time last year I would have had no idea how though, and I would have been pretty mind blown to hear I'd just drafted and realised my second dress.


I used the same block as a starting point, and decided on armscye/bust panels as I loved them so much on Rosie. I SORT OF wish I'd done princess seams from the shoulder down, just to learn a little more about moving darts and try something different, but in visual terms I am definitely pleased with my panelling again.


Where Rosalie is a bit spooky, Olivia is a bit classy. I've opted for sleeveless this time, as Rosalie is quite possibly all the sleeve a girl will ever need! This also gave me chance to practice lining arm holes, which (shhhh!) I'd never done before! There are many different methods, but the one that worked for me was learned from Lisa Comfort's Sew Over It How to Line a Dress vid. The trick here is to make the shell and lining up as normal but WITHOUT sewing up shoulder seams. The two are then attached around neck and arm holes, understitched, the lining then turned in. You do something a bit funky with the shoulders, pulling one inside the other then sewing, making sure you match everything up perfectly before pulling back through to the right side. I could give you an in depth tutorial but just watch the vid ;) For my first attempt it worked pretty well!


The other major change is the skirt is now A-line instead of straight/pencil style. To do this I used a slash and spread technique on my paper pattern. Basically I closed up the waist darts which added kick to the skirt. I made a toile and ended up taking some of that kick out!! It looked good, but just not entirely 'me'.


Really happy with the amount of flare in the skirt now though! Love that shape over my hips and managed to avoid a billowing skirt affair!


The only problem is the back skirt. I hate to point these things out, but I guess it's how we learn! There is some unnecessary bagging in my lower back. Used slash and spread to take the darts out of the back too, but in doing this I have created bagginess! I thought in toiling stages that this wouldn't matter as it would somehow just add to the flare??? I don't know. The waist is pretty snug on me though, so I don't know how I could really add any shaping in to the lower back. Does that make sense? Can anyone help? It's a real shame as I absolutely love the hang and shape at the front. I'm sure it's possible to fix but it's really really hard working behind yourself!


Olivia's neckline is a little different too, the curve looking a little more square? I think? Either way, I think it's great. I took a little out of the back neck too so the zipper didn't sit so high.


Fabric choice is a stable velvet affair, with little diamonds embossed? etched? What's the sewing term?? Sort of quilted but not? Don't stroke it the wrong way or it will make you feel sick. Actually you know what, don't stroke me at all unless you want a fat lip.


#Sassy17


x

Location: Wicker Arches, Sheffield
Currently listening to: Black Saint, Witch

Saturday 11 March 2017

Simple Sew Patterns Blogger Meet Up

https://www.simplesewpatterns.com/


Flash back to mid November and I got the chance to meet these lovely ladies for the first time in a secret location in Manchester.

I'd made quite a selection of Simple Sew patterns before I was invited to become a member of the team so bought along a few outfit changes on the day (more than I had time to change into ha!)

First up,Skater Dress


One of my most frequently worn Simple Sews. The Skater Dress bodice is similar to that of the Charlotte but features a full skirt, perfect for parties! For my velvet skater dress I cut my skirt in quarters so that the nap of the fabric all went in the right direction. I chose a stretch fabric, but a nice woven could add some real good body to that skirt.

My velvet Skater Dress can be found HERE

Charlotte Dress


The Charlotte Dress pattern is a semi-fitted, straight skirt, multi-choice sleeve affair, with a lovely scoop neck. I made the pattern for mine a little smaller and used a jersey fabric, but I've seen some great ones in wovens. I've found the classic style makes the dress great for work events.

You can read about the making of HERE

Ruby Dress


Cheated a bit on this one! Technically I used the Skater Dress bodice with the Ruby Dress skirt (they are pretty much the same!). I swapped sleeves or armhole facing for bias binding at the arm holes. Again I cut the skirt in panels, this time so my fabric design wasn't cut diagonally.

Read more about my Ruby/Skater HERE


The English Tea Dress


Love the little cap sleeves on the English Tea Dress! I chose a light viscose with a cosmic swirly design for a summery, hippieish vibe. The bodice comes to a V at the centre front mimicking the Vneck.

HERE I am sporting cosmic vibes in my English Tea Dress last summer.


Becoming part of a blog team alongside my own blogging adventures has not only given me the chance to create some sweet makes, but also the opportunity to meet and mingle with other girls partaking in a similar journey to myself.
All patterns can be found on the Simple Sew Website (you can click through the links in my post).

Here's to the next Blogger Meet Up!

📷 Photo Credits @domjcrolla

x

Currently Listening to: Warsaw, The Black Halos