
The PDF consists of just the front and back shorts pieces and then you cut the length of your waistband according to what size shorts you cut. I didn't have enough fabric to cut the waistband in one piece so I halved the measurement, added on the seam allowance and stitched two pieces together. I thought I was being pretty smart but I hadn't taken into account that the back shorts piece is larger than the front piece- so the side seams of my waistband did not match the seams of the shorts!!! The waistband it elasticated though, so thankfully my seams are kind of hidden in the elastic!

I used 1 1/4 inch elastic so the dimensions of my waistband were 5 1/4 inch by 19.75 inch x2 - including the new side seam allowance. I left a little gap in one of my side seams so that I could insert the elastic. To match the underband of my sports bra, I cut the waistband from power mesh too and tacked to the orange band so I could treat this as one piece when assembling.

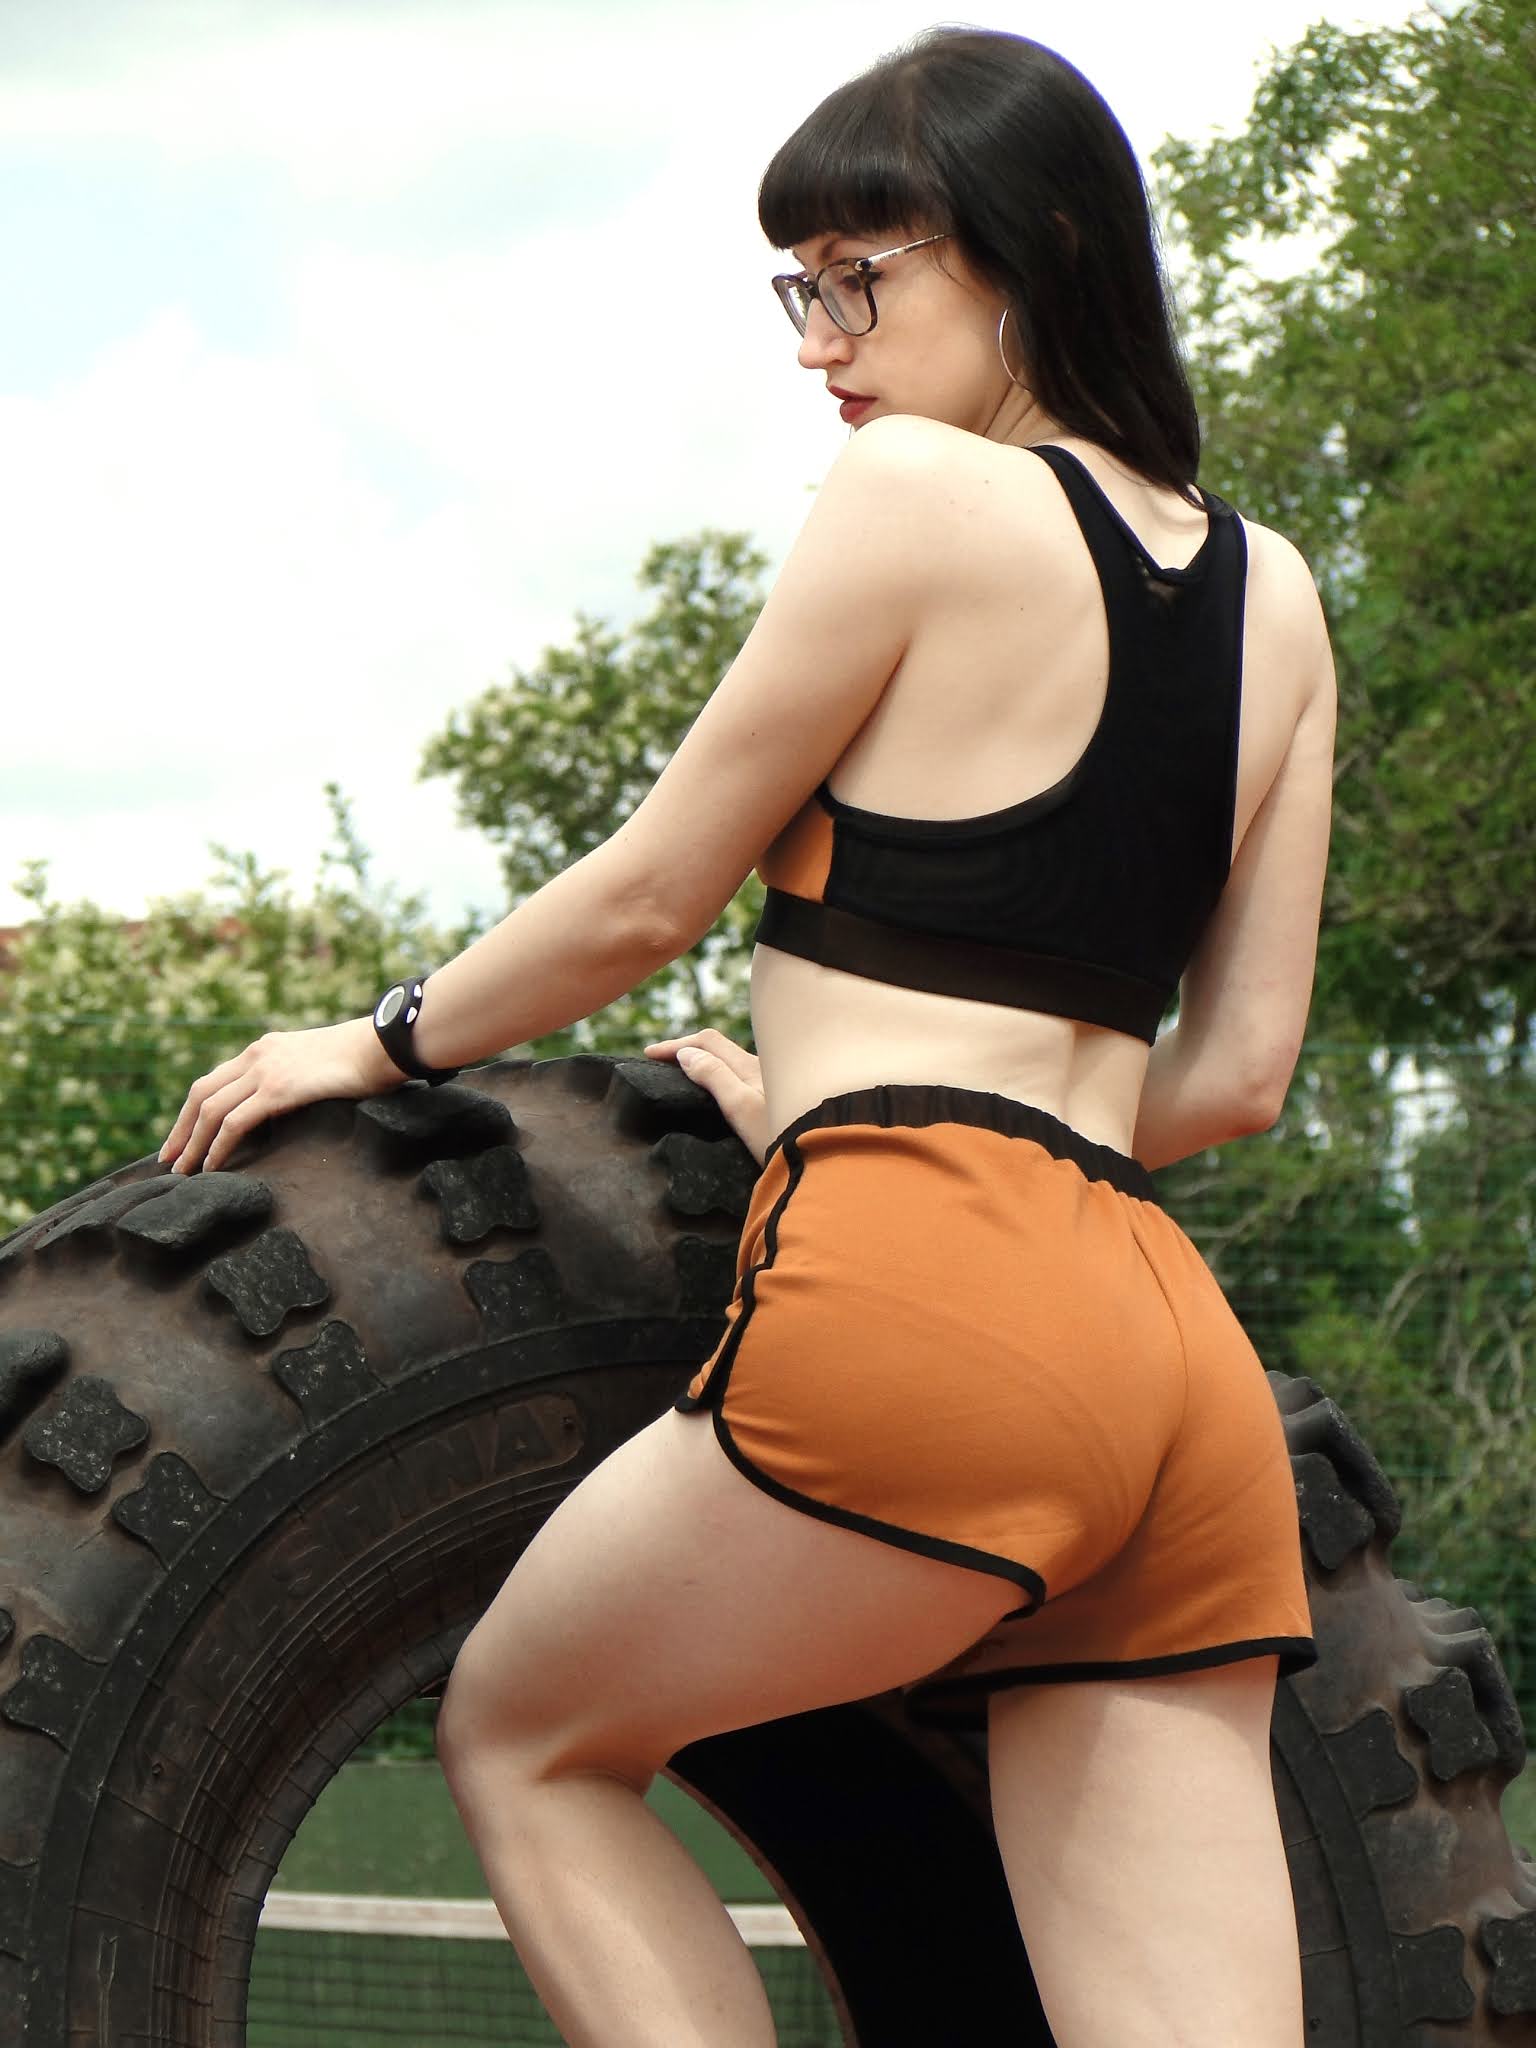
The super cool design feature of these shorts is the sporty overlap at the side seams. I love how this feature is a bit cheeky but also totally practical for workouts! The edge is bound right from the front side seam, around the leg and back up the back side seam before the side seam is sewn by overlapping the front over the back.

I used the power mesh for the binding. The binding pieces measured 50 inches by 4cm. The strip is then sewn to the right side of the shorts with a 1cm seam allowance. The binding is then turned to the inside so the raw edges are encased, and stitched again close to the fold line. Due to the stretchy nature of the power mesh, binding those curves at the front wasn't too tricky. I should point out that this pattern is actually designed for wovens - using bias binding you can get the same neat finish as I did using stretch fabric.

Confession time! I will own up to the fact that I initially did now attach the binding this way. For some foolish reason I thought it would be... easier? to attach it to the front and overlock the raw edges before turning the seam to the back... OF COURSE this did not work around the curves on the side seam! What was I thinking?! I then thought, maybe if I pressed the absolute crap out of it I could somehow make it sit flat?! Instead I managed to melt my binding!! What an idiot! Only the binding was harmed, thankfully, as I didn't have any more orange fabric to recut the whole shorts. I unpicked my terrible binding fail and reattached following the instructions.

Once bound, as I mentioned before the side seams are sewn by overlapping the front over the back and then topstitched. I made sure to measure how far down I stitched so I could ensure both sides were equal.

To add the waistband I abandoned the pattern again, this time with a greater success! I overlocked the band to the right side with a 1.5cm seam allowance then turned this to the inside. This can create a bit of bulk I suppose but it's quite a secure seam with plenty of stretch for sports... It's also loads easier to attach than folding and sandwiching the raw edges inside the band.

Insert the elastic, sew up the sneaky elastic hole and you're done! It feels like the shorts come together really quickly as you don't have to stitch side seams or hem them as you usually would with a garment.

Not much fabric is required to make these, especially if you want tiny shorts! Perfect stash buster!
x
Location: Coldwell Lane Sports Ground, Sheffield
Currently listening to: Let Me Blow Ya Mind, Eve & Gwen Stefani
cake is the most taste food. I love to eat is very much. Sometimes I love to eat healthy food is banana bread recipe.
ReplyDelete