Sunday, 28 August 2022

McCalls 7606, Wrap Skirt


I cut a straight size 10 for my toile and found it fit really well without making any alterations. I was also pleased to find that long skirts did actually suit me- despite it being years since I owned one. 

I chose the ruffled version for a bit of extra pzazz, I was planning my holiday sewing after all. The non-ruffle version follows the same shape as the fancy version but is just a bit longer and has a simple hem along the bottom - so definitely could be a good choice for the future if I'm using fabric that won't ruffle so well. 

I didn't really skip any steps when I made my toile as I really wanted to check that I understood the construction of the waistband and ties. It's really important not to get confused between left and right so that when you do the wrap around bit you insert the correct tie through the gap in the waistband. Once you've cracked it it feels like quite a magical invention that could easily be made to fit anyone. 


My tips for making the skirt as follows:

*Mark the middle of the ruffle once you've sewn the 4 strips together, then gather inwards from eitherside towards the middle. This prevents excess fraying or possible stretching on one side while you shimmy those gathers down. 

*Make sure you mark those dots on the skirt! These are essential for making sure you're evenly distributing the fabric in the gathers. The dots are definitely your friend on this pattern.

* Similar, but lining everything up neatly at the top (pay attention to that top dot) will prevent ruffles from getting in the way of the waistband when attaching it to the skirt.


Once I'd cut my toile for this skirt I did a little bit of construction every morning before work, just 10 mins or so before I left the house. I loved breaking down the process and not always rushing to get to the next step of the instructions. I hope I can continue with this way of working for future projects as it helped soothe my mid-week longing for stitching. The gathering probably took the most time and definitely the most concentration for this make, but was also the most exciting part! 


My real fabric had been in my stash since last summer, with the intention of making a summery two-piece. I grabbed the three pieces they had in the Abakhan stash bins knowing I wanted as much as possible to build my summery capsule wardrobe. It's been sat waiting for the perfect pattern since I bought it! 

It's more billowy/drapey than my (bedsheet) toile. It has a bit more stretch to it to had to be careful not to stretch out the seams - particularly sewing the curves (see slight curve at top of the back piece on pattern). This slight stretch resulted in the gathers being much softer that those on my test version, which I thought was going to disappoint me, but once it's on I think they hang pretty good. 

The fabric also posed all the usual considerations that come with sewing with stripes. I didn't want any mismatching! I decided I wanted vertical striped for the skirt and ruffle, but horizontal for the waistband. I paid extra care to make sure the same stripes ran through the waistband and the ties (messed with my head trying to figure out left from right and top from bottom whilst trying to make sure my 'favourite stripes' were showing on the outside not the inside!!). 


Then that's it! No faffy fastening, just wrap that tie round and give us your best bow! Don't you think the McCalls M7606 lends itself to being replicated loads of times with ALL the lovely fabric! All we need now is all the sunny days to wear them. 


x
Location: PlantSheffield, Eyre Street
Currently listening to: Eez-eh, Kasabian

Sunday, 26 June 2022

Mood Sewciety, Piper Shorts


Recently I've been browsing the Mood Sewciety website on pretty much a daily basis - who knew there were SO MANY FREE patterns on there?? I feel like I've been missing a trick here, there are patterns for everything from underwear to overcoats, all with clear, illustrated instructions. 


In search of summer patterns, I landed on the Piper Shorts - a paperbag style short with elasticated waist and cute tie belt. You're right- that means minimal fabric requirements and no faffy fastenings! 


This lush mocha coloured twill fabric was from my birthday haul (thanks moma!) from Hillsbrough Fine Fabrics in Sheffield. It was £7.99 a meter and I managed to squeeze these shorts out of 1 meter by cutting the tie belt in two halves instead of all in one. 


I made a toile from my brother's old curtains (!) and found the shorts a bit too long? Did anyone else find this? Compared to the piccy on the website my toile seemed a bit more pantalon than cheeky shorts! I took 6cm out of the crotch length so that the waist channel sat on my waist and the crotch sat comfortably. I also altered the curve in the front crotch a little so that it didn't look so baggy. 


After taking some length out of the shorts I also took some out of the back pockets too so they would still fit happily on my bum without disappearing into the turn-ups. This was my opportunity to do some crazy top stitching, but I chickened out! I think I'm gonna perfect an AH embroidery logo then have a stab at this next time I do back pockets. 

The good thing about the elasticated waist is you can shuffle the fabric round to allow for more fabric where you need it. This helps create a really good fit - the 'paperbag' bit at the top helping to create a flattering silhouette. I guess the lower you have your waist channel the more paperbag you get? 


Also helping to create that silhouette is the addition of this cute little bow belt. I made sure to interface my belt so it didn't get creased up and held onto its structure. Due to fabric restrictions, I cut it in two halves and attached together. 

I strayed from the pattern and added three belt loops at the side and centreback seams to keep the belt in place when I moved (had a habit of riding up off the shorts at the back if I didnt). To do this I just folded a strip of fabric in half to the belt look was 1cm in width, trimmed the seam allowance then turned. I cut the strip into 3 equal pieces, about 6cm in length, then top stitched the edges of each loop. I turned under roughly 1cm and stitched down close to the elastic, but without actually sewing into the channel. I love these as a finishing touch. 


I turned the bottoms up three times to create these chunky turn ups and secured with a few stitches in three places around the top of each. I think there is probably a way to turn these up so the right side of the fabric is still showing? Maybe I'll experiment with this next time. 


x

Location: COCO, Division Street
Currently listening to: 1%, Black Halos

Sunday, 29 May 2022

Burda 6263, Necktie Shirt


Note: I wrote this blog in Jan 2022 but have been waiting until MAY to get some decent weather to get these pics! The chronology of my blog has gone waaaaay off track, so read this blog as if it were still winter and we don't yet know what beautiful things this year has in store for us...


Hi there! Hey! Hello, it's me! I'm back! I guess you might not recognise me with that HOMEOWNER glow I have going on? Or maybe it's because I officially grew my fringe out this time? 

I've been pretty damn busy, but I can tell you I've also been pretty damn happy. Moving was actually quite a streamlined process, the big hold up being getting the studio floor laminated before I moved all my sewing stuff in. 


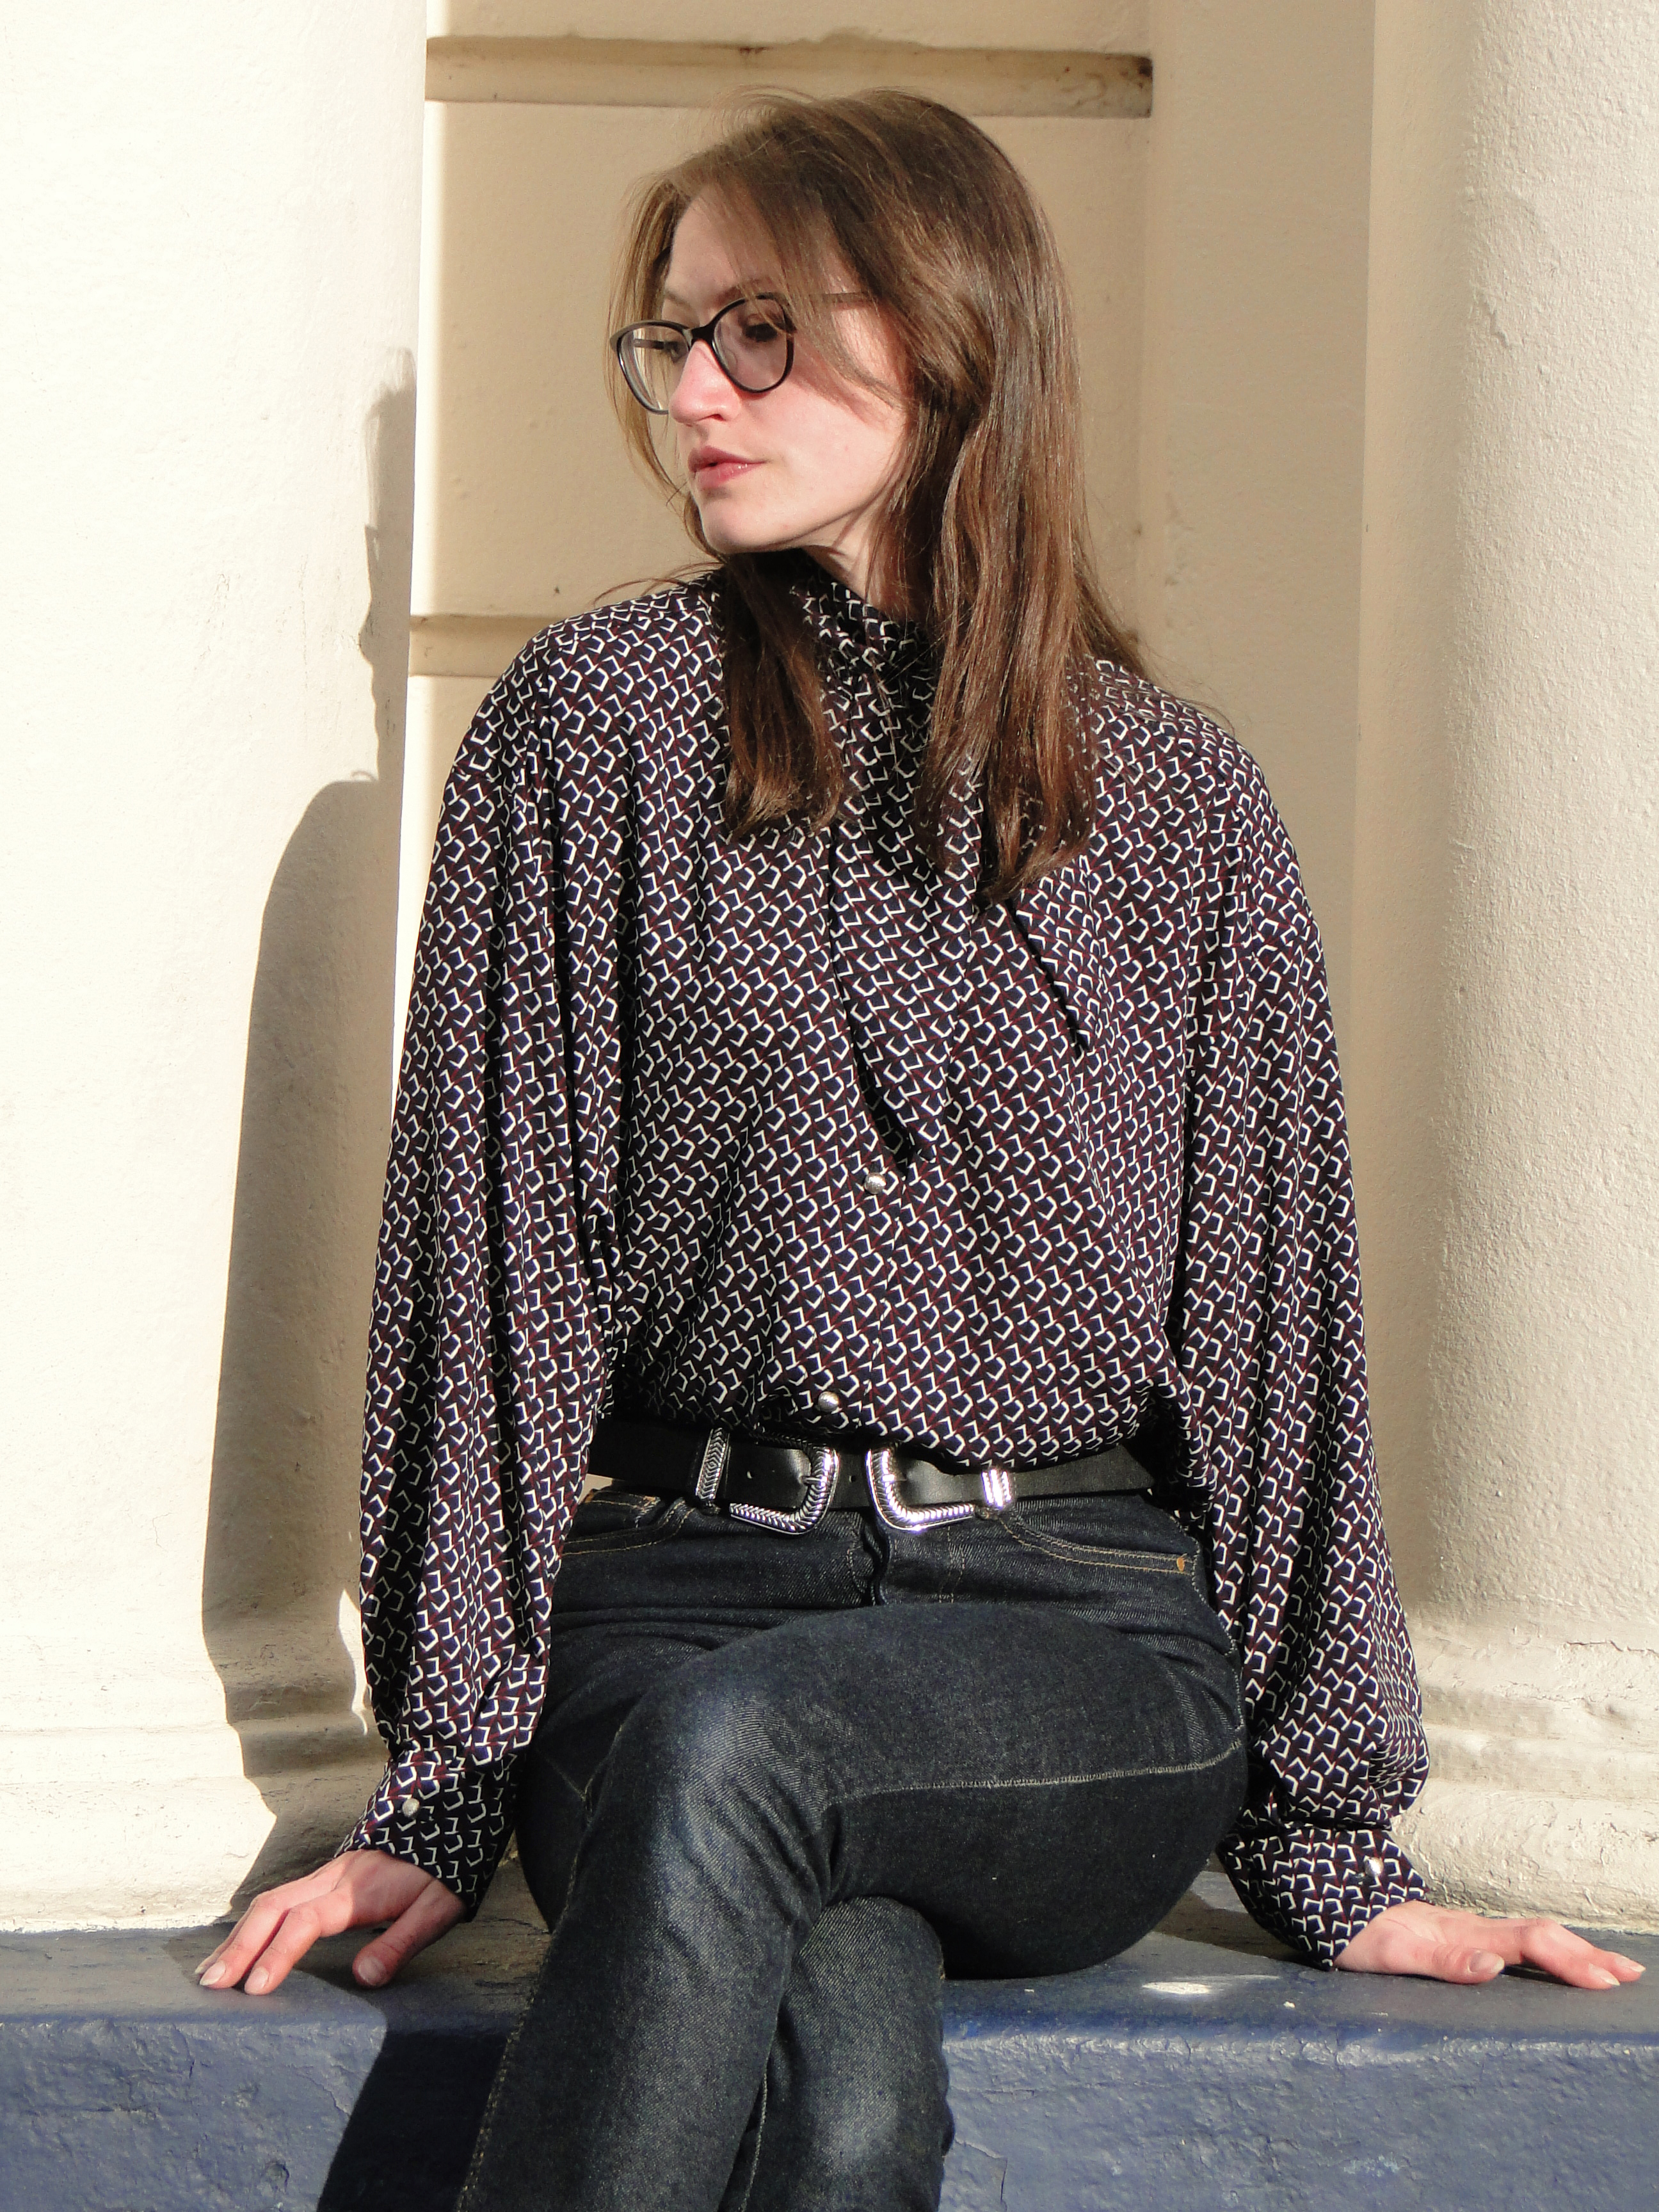
So this is my first make of 2022 - The first make from my new house! The pattern is Burda 6263 - what drew me to it was this nifty neck tie - come - collar which I don't think I've seen on a pattern before. This pattern is definitely under represented on the socials. I hope this post inspires some of you to give it a go - I think with different fabrics could make this shirt really versatile. 


My fabric was from Abakhan stash bins last summer, and bought with my leaving-money from my old job (thanks guys!). I love the geometric print (obv) and the subtle colours - navy, maroon and cream combine to create quite a retro feel. This teamed with the necktie is giving me majoy Peggy Mad Men vibes, but the over-sized sleeves and loose waist offer a more relaxed teen-grunge feel. Together I think these elements create the mixed-up, voyage of self discovery, like-a-little-bit-of-everything, Art School shirt that I keep dreaming of. 


Once I'd cut the paper, I thought the pattern looked really short in the body so I thought I was being really smart when I added an exta 5cm to the pattern length of view A. Not neccessary. The armholes are really low for those big sleeves, adding length to the body. I cut a size 10 according to my measurements, but of course as usual I could have cut an 8 and I don't think I'd have needed to cut down on the PopTarts (anyone else get obsessed with these the moment they moved out?!). Luckily my fabric has THE most gorgeous drape to it, the oversizedness of it falls really nicely against my body and it also feels so lush! The fabric really was a lucky find! All the joys of soft drapey fabric but with very little fraying or snagging. 

The pattern advised cutting the necktie on the bias - I'm not doubting Burda - I'm sure with some fabrics this is deffo neccessary, however due to fabric limitations I cut it on the grainline and hoped for the best. I think it worked fine, but again that may just be further credit to the qualities of this fabric. 

The drop shoulders add length to the sleeves too (kind of obvious when you think about it). They appear really oversized until you add the pleats and cuffs, then WOW we're back in Mad Men and we're storming the boardroom. 


I know I've said it before, but it's always such a pleasure when I can find some buttons from my gran's old stash bag. There were exactly 8 of these cute silvery buttons gleaming at me in her bag. Perfect retro vibes to compliment the fabric! While I've been away I may not have been sewing but I promise I have been keeping up to date on Insta sewing tips. I remembered seeing one using masking tape to mark button holes- I have now tried and tested this and can confirm it's a winner! SO much easier to follow than bobbly wobbly chalk lines or fabric pen that disappears into your print. I also improvised and used UHU glue as an attempted seal on my button holes??? Anyone done this? Buttonholes really are my nemesis, so willing to try any tips and tricks to make them more reliable. 


I'm so glad the Burda 6263 went without any hitches and that I love the finished thing as much as I do. I was so worried I would have forgotten how to do it!! Words can't explain how much I have missed sewing while I have been moving. I've been trying to channel creativity into doing up the house and a bit of scrapbooking, but nothing quite compares to taking 100+ selfies in the mirror in your homestudio, wearing a shirt you just stitched together. 


It's great to be back. Say hello to new and improved, 2022 Angela Holland.


x

Location: Loxleys, Kiln Street
Currently listening to: I Just Want To Make Love To You, Etta James

Sunday, 22 May 2022

New Look 6233, Dressing Gown


I'm a firm believer that every problem has a fun solution if you think about it hard enough. I think we can all agree one of the problems uniting us right now is the price it costs to heat our homes (did I mention I'd bought a house idk). If you've been keeping up with me on insta or have had the pleasure of spending time with me in the real world, you will also know that I suffer from terrible circulation, and at the first sign of a temperature drop my hands start to throb and turn a red/white/grey colour. 

My solution was to make a snuggly dressing gown that would hopefully stop me reaching to turn the thermostat up when I'm pottering around the my house. After seeing @CrafternoonTeas' super lovely New Look 6233 gown I knew this was exactly what I needed. It is made up from 2 fronts, a back, a straight neck band, two pockets and a tie for the waist, so there's no crazy shaping or fiddling about with collars with this one.


I do like things a little bit unusual, and initially was worried about how I was going to make my dressing gown fit this criteria. When I found this super soft giraffe fleece on the Minerva website though, I knew I'd hit the nail on the head. What is more unusual than a giraffe?! I can't get my head round it that they are not completely mythical. How do they even stay upright?! 

Even when using a relatively easy pattern, sewing with fleece poses it's own unique challenges. Be prepared for FLUFF. Lots and lots of fluff. Just cutting out your pieces will create so much shedding, so be prepared and have the vacuum cleaner close at hand. This excess fluff in the seam allowances also poses as a potential issue if you don't manage it properly. Particularly where the seams meet, you run the risk of really bulky seam allowances, so my top tip would be to always grade the seam allowances and carefully trim the pile away from the fabric here. 

The pile of the fabric also makes it tricky to get a neat edge stitch - I found this when top stitching the pockets. It's hard to see exactly where the fabric is, so if you're not careful it's easy to miss the edge completely and just catch the fluff! Or, I also found - you think you've done a really straight line but when the fluff settles you find it comes out a bit wobbly! 

Luckily one of the benefits of having such a pile to the fabric means that with some gentle brushing around your topstitching you can hide, or at least partially camoflague your stitches underneath it all. 

Irritatingly, attaching the pockets is the first step to making the dressing gown. I think if I'd done a few more practice runs I would have had a neater edge stitch to attach them. I would recommend doing a practice pocket on some scraps! Another thing to consider is that due to all the fluff, this fleece didn't seem to respond to pressing! So it was hard to get a clean, pressed edge to follow in the first place. 

The only way I found to overcome the bulky and sometimes downright bouncey turn under when stitching the sleeve and bottom hem was to overlock the edge before turning it under. this sort of surpresses all the fibres and also creates a neat line to follow as you turn it under. I really love the chunky 2 inch hems on this garment. I used about 10000 pins and stitched it down from the top using a twin needle, both for the aesthetics of a double line of stitching and to ensure the edge on the underside was caught. 

I took care cutting the front/neck band as I was eager not to have any upsideown giraffes and also didn't want to cut anyone in half. I think I did pretty well in lining up the sitchline down the giraffe noses for the left side and lining it up with their back legs for the right side. This kind of manoeuvre is always tricky when your fabric is directional or has a one way nap. Success though! No upsidedown safari animals and not one ended up sniffing another's bum ! 

I took 4 inches off the bottom of the gown in attempt to make it a little sexier (what man doesn't need a sexy giraffe in their life?) and I cut the tie on the crossgrain instead of the straight grain so the print was horizontal. 

I'm really pleased with my make! Its so snuggly which was my main aim, and the yellow in the fabric goes well with my interior decor! 

What fun animals have you been adorning your garments with this season? 


x

Location: Hands Rd
Currently listening to: Must Be a Dream, Tempesst