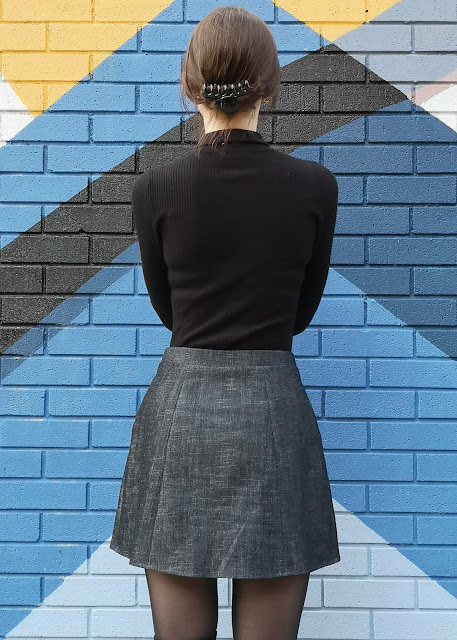
For my original toile I cut a size 8. I found it could have been clearer which sides of the side panels attach to the centre front / centre back, as the notches are in similar positions on both sides of the side panels. One side could have benefitted from double notches for clarity. I made sure to label the front and back side panels before I started sewing to avoid confusing myself later on!
The size 8 was a little bit tight! I realised then that the sizing of the pattern must be actual garment size not body size. This was okay though as I found I really liked the fit at the back (small back strikes again!). I restitched the whole skirt using only 0.5cm seam allowance on the side seams and panel seams (ie, added 1cm to each seam but did not alter the front opening).
I found this fit around my hips much better but was now a little gapey at the waist on the side seam. I graded back in at the waist, taking about 2cm in at the top of each side seam.
I made these alterations on the paper pattern, adding 1cm onto the side/panel seams and tracing my waist alteration. I found the shape of the gradient from waist to hip looked similar to that of skirts I have previously made... This was a good sign!
 |
I already knew I was going to have to re-draft the waistband. The difference in circumference between my hips and waist means a simple straight waistband with top fold just sticks out at the top.
Loosely based on the waistband of the Simple Sew Shannon Shorts , I reshaped the band so it was now curved and had side seams to shape with. Instead of cutting the front on the fold, I added 1.5cm for seam allowance and cut 2 pieces to allow for the centre front opening. I cut the back piece on the fold, taking out the 1.5cm seam allowance where the Shannon shorts zip would sit.
Happy with my toile and happy with my almost waxy denim that I found in Abakhan in Shrewsbury, cutting out the skirt was quite simple. The denim was very well behaved, so sewing the panes together was really easy. I overlocked all the panel seams before assembling as I knew I wanted to press the seams open. I made sure the buttons / button hole placement was really clearly marked to save myself trouble later down the line.
I cut the waistband- 6 pieces in total - 2 front and 1 back, then the same for the facing and interfaced all the pieces. I stitched the side seams of the waistband and then stitched together along the top, ensuring the side seams all matched. As the band is slightly curved I clipped then graded the seam allowance. I pressed open then understitched to the band facing.
I overlocked the outside edge of the facing, then attached the waistband edge to the top of the skirt. It looked soo professional and I was so happy that my reshaped waistband fitted to the skirt so well. I tried on.... Only to find it felt too tight at the waist!! Oh no! After a bit of whinging on Instagram, it was suggested that my cotton fabric may have shrunk when I interfaced it. I had applied quite a lot of heat so this made sense. I was faced with two options. Diet, or remake the waistband!!
....... I re-cut the waistband, adding 1cm to the top of the side seam of each piece, then graded back out the the hip. This still left an obvious gradient between waist and hip size... but allows me to sit down!
 |  |
Perfect! What a relief! Once attached to the skirt I turned the end of the waistband right sides together and stitched a straight line at each front opening. I made sure I trimmed the seam allowances as I didn't want to have to battle too much bulk when I inserted my fastenings.
I turned up a narrow hem and was then ready for fastenings!
I decided on snap fastenings, mainly because if I messed up a button hole there would be no hiding it on the centre front! I was very grateful to my past-self for creating this handy guide to inserting snap fastenings as it had been so long I had definitely forgotten. The fabric was quite bulky so just had to be super careful to make sure everything lined up nicely before I squeeeeezed those pliers! Thankfully they all behaved really well!
I love the skirt! I have previously avoided button down skirts, both sewing patterns and ready-to-wear as if they don't fit quite right the gaping between buttons really bugs me. I'm glad I took the time to get the fit perfected. I can see myself getting a lot of wear out of this ❤️
x
Location: Twinkl Way, Sheffield
Currently listening to: Candyman, Serpent Power


It looks great and your photographs are very professional.
ReplyDelete