Sunday, 8 January 2017

Butterick 5895, Tie Waist Shirt


The time between Christmas and New Year is for two things; watching World's Strongest Man and having a play with sewing-y Christmas gifts before you have to go back to work.


For Christmas this year I asked for Butterick 5895 Tie Waist Shirt pattern designed by Gertie. The pattern also features a jeans pattern not too dissimilar to the Shannon Shorts/Trousers from Simple Sew that I made a few months back. The shirt caught my eye a while back when I was a nervous beginner and I thought it was about time I found the courage- especially as it's labelled as easy!


With the large shoulders of Gertie's shirtwaist dress in mind, I was super paranoid before I got started that I was going to end up with a shirt too big. I double/triple checked my measurements and also referred to the actual garment sizes that are notes on the pattern pieces to try and work out how much ease I was going to want in the shirt. Always finding my boob to waist ratio is never the average against commercial patterns (tits always a little too small apparently! I'll get over it...) I cut a 10 but graded down to an 8 at the bust/underarm area. If I'd been going strictly on my measurements I think I'd have cut a 12. I'm quite glad I didn't- although I could have gone bigger at the waist at the tie bit gathers it all together to look super retro, I don't think my shoulder/arm/bust area needed to be any bigger. The shirt isn't meant to be fitted, but I don't want to be drowning in it! If I was bigger busted I think I could have got away with it (and probably many other things.......). Maybe for future shirts I might think about taking a little out of the overarm seam, but worry that could play hell with that whole collar construction....


Transferring the dots from the pattern sheets is super important for this pattern. I tailor tacked the lot, and a few had fallen out by the time I got to sewing up, ha! Oh well I tried. The most important ones are the markings on the shoulders by the shoulder darts. One of the first things you need to do is reinforce the corners by the collar/shoulder dart before you clip. This all becomes very integral later down the line when sewing the neck facings and making the collar more collar-y, so just don't cack it up otherwise you'll set yourself a right task trying to get it all to fit together around those corners!


When that collar comes together though, it's a dream!! The way it crosses over at the back is a cute little design feature. I might maybe make the lapels a little smaller next time though. Don't get me wrong I think they looks ace, but they are maybe just a little too flappy!? Next time I also think I might use a stiffer interfacing on that collar just to give it a little more form.


The way the facing turns into the collar is very reminiscent of the collar and facing on Gertie's Shirtwaist Dress to the point where I felt sickiningly nostaligic for last March when I made mine. The fabric I chose to make my shirt was the last of my stash from my trip to Leeds for Sew Up North, which was sort of a cross between the crape-y, swirly stuff I made my first Shirtwaist dress from and the random paislies of my second.


With this in mind, I think I would quite like to incorporate the sleeve band finishing of the dress on to the shirt, as I think the narrow hem can look a bit amaeatur? The sleeves are also maybe a bit too roomy?


Overall though, love the vintage look of the shirt. Would love to find some proper cowboy fabric any make myself a proper country and western shirt!


x

Ps, promoting posing not pistols... Mwah!


Location: Bradfield
Currently listening to: Time Collapse II / The 7th Terror, Fuzz

Monday, 2 January 2017

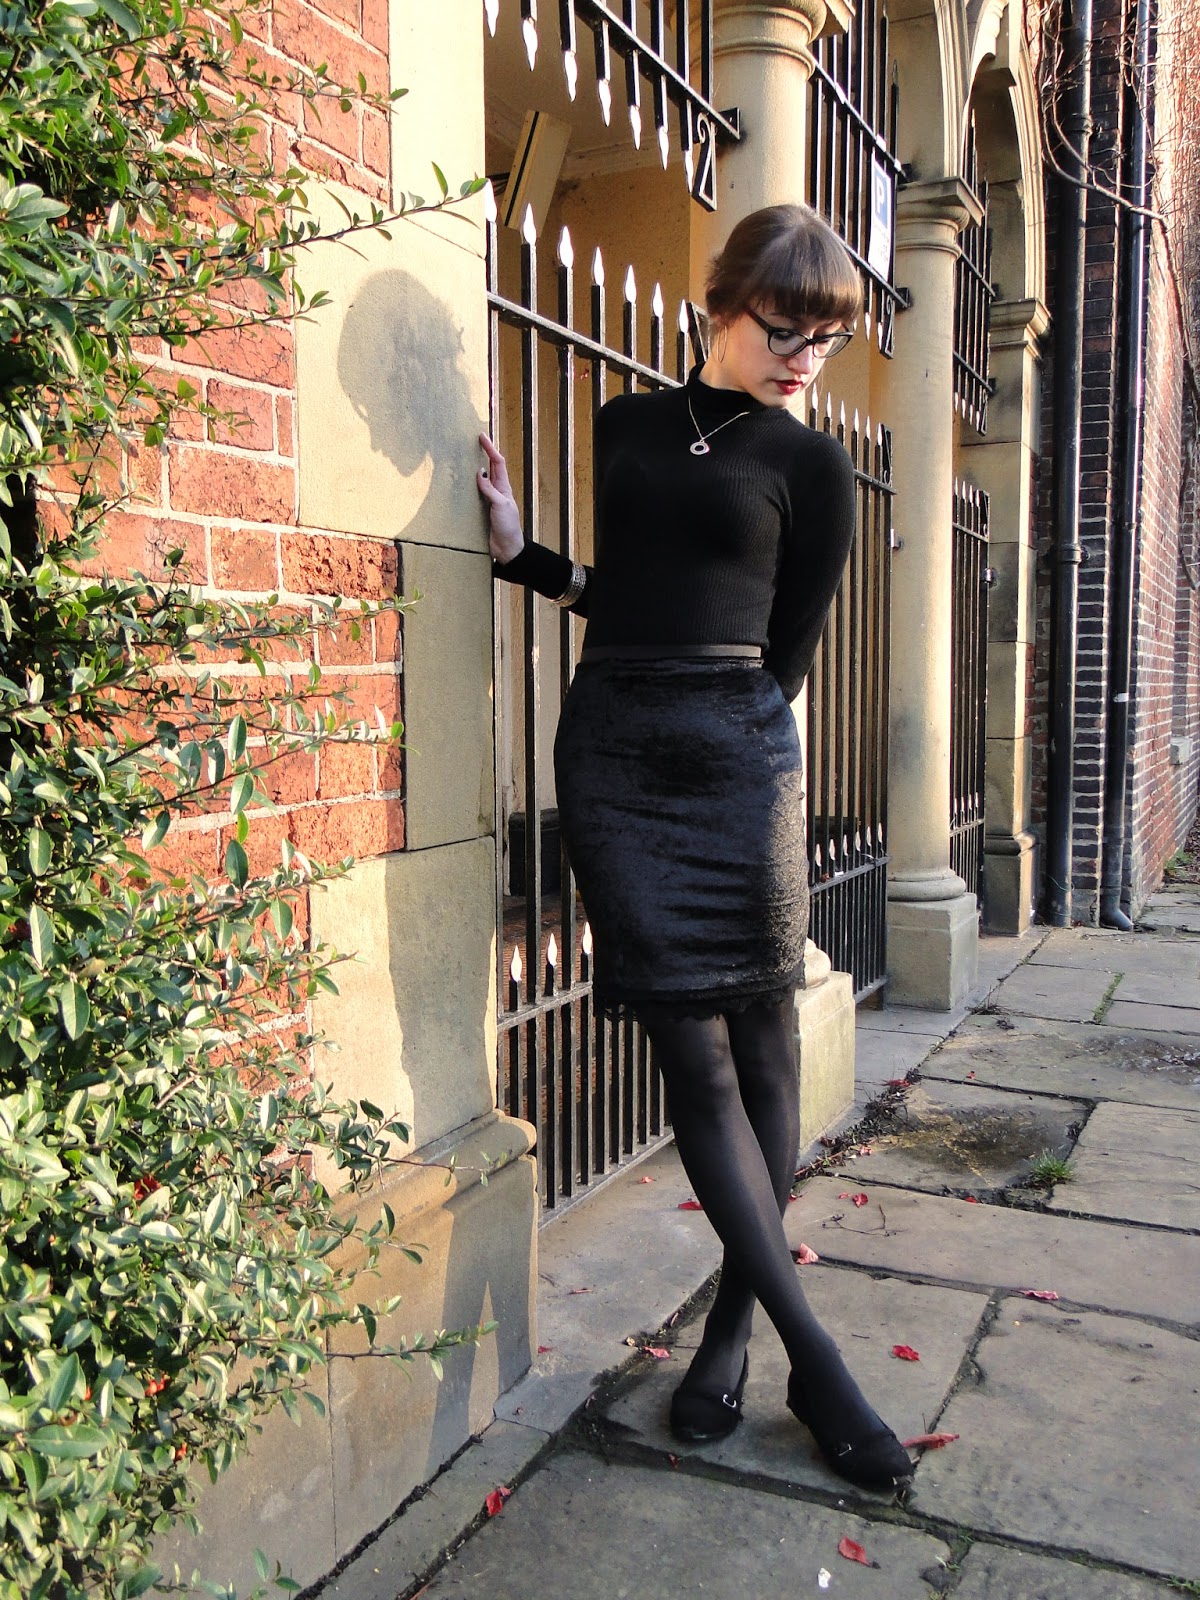
Hacked Charlotte Skirt


Start of November 2016 feels like a long time ago now. A lot has happened since. I wanted to make a sexy, spooky Charlotte dress for the Simple Sew bloggers meet up and to wow all the boys on Bonfire night (!). I was familiar with the pattern after making my first which was both a blog and office winner, so thought knocking together one in crushed velvet would be a breeze. Well, it didn't happen. There was no velvet Charlotte and there was no wowing boys.

What I'd forgotten about crushed velvet was its highly irritating desire to roll at the edges. Overlocking the seams to stop this just stretched the crap out of it and I ended up with an awful seam line lump right the way around the midriff. The fabric clung to my tummy and wasn't nipping in under the bust, so the illusion was small tits big tum which I wasn't really fancying as my new nickname.


The logical thing to do was to unpick the crap out of it and make separates. The top fitted around the bust much better without the skirt pulling it down, but sadly it was just too short to be salvageable. There's flashing a bit of midriff, and then there's wearing things that just don't fit. The bugger would have needed hemming too after the unpicking drama, which would have made it even shorter! I fancied maybe attaching something to the bottom- but that's exactly what I'd done to start with and that hadn't worked. A circular skirt rather than fitted would have worked... But I've already made that dress!


I had a lot to take out of the waist of the skirt to make it more of a wiggle shape, then opted for a simple elastic waistband. To avoid having to hem (cheater) I attached a wide lace trim on the bottom. Usually save that fancy shit for underwear so quite liked the chance to have it on show. My mom said it looked like an underskirt, followed by 'But I bet you don't mind'... She knows me.


Was surprised how well I'd managed to make something out of something so close to getting binned, even if it took me the best part of a month to go back and have a go. It's not remotely adventurous, but better than a total fail.

(-3°C up there, almost as cold as my hands)

Going to think twice about velvet in future. It's still a bitch to sew and also this skirt rides up like hell as the inside is so smooth. Was going to wear it for gigging but the thought of tugging down between each song was enough to put me off. She might be up to a coffee date in summer when I can get them ghost legs out without tights.


I've got a little new years' sewing list though, and 'make something spooky' is on there. Velvet gotta be the spookiest of them all so not sure how I'm gonna keep away! For fitted dresses I think the trick is not to have a waistline seam and instead cut all in one piece, which is totally doable. Also maybe use a velvet that is a bit more heavy duty and not cheap as chips. I'm currently loving Madame Tifaine's Deer and Doe Zephyr Dress. Looks proper swish!


Happy New Sewing Year friends, bloggers and secret admirers. I have a few exciting projects in mind for this year... #Sassy17 #Spooky17 #Sexy17

x

Location: Meersbrook Park, Sheffield
Currently Listening to: Can't Win 'Em All, Hanni El Khatib

Sunday, 18 December 2016

Moving Bust Darts, Tutorial


This Wednesday will be my final session of a 9 week Pattern Drafting course lead by the wonderful Leann Marie Marshall here in Sheffield. It's been an absolute whirlwind of learning, every lesson has had it's very own lightbulb moment where something in my brain has clicked and I know I've just discovered a new lifelong skill.

I've learnt much too much to sum up in a blog post. We started off with taking measurements then following a guide with some crazy maths to plot out our very own block. We considered style lines to make our own design from the block then transferred onto pattern paper so we could cut out dress pieces to make our toile.
The block we created features a dart from shoulder to bust point. In later classes we played around with this dart placement to create different styles of bodice. So this is my quick guide to moving dart placement! I'm not sure if the same principles can be applied if the dart is in a different place to being with, but here goes....

*1. Trace bodice between current dart lines onto paper

*2. Cut out the shape (This involved cutting a straight line to join dart point to dart point)

(Imagine I haven't cut into this paper, that bit comes later)

*3. Draw on a straight line where new dart is to go. This could be from the side seam pointing diagonally or horizontally or potentially from the arm hole. This line should reach the bust point of the current shoulder dart

(For this example I have decided to create my new dart from the armscye)

*4. Cut along new dart line to make two pieces

*5. The bottom piece stays fixed in the original position. Move the top piece to meet the outer dart line of the shoulder dart. This will open up a new space. Make sure the bust point stays fixed.


*6. Trace the new piece as a whole (inc. neckline right up to centre front) to create a new pattern piece. Trace the space of the new dart, *but move back the bust point by about 2cm*. Add a little triangle at the side seam of the dart to ensure there is enough fabric to meet the seam allowance. I just guessed the angle of my triangle and it seemed to work! What I mean here is maybe a little clearer in my last image.

*7. Cut out the new shape. Yay! You've moved your dart placement! Welcome to an endless world of potential!!


Here I have cut out the darts and separated the pattern with a curve to make a side panel. Don't forget to add seam allowance to these pieces!


For this piece the dart was moved to the under arm side seam for a traditional looking bust dart. You can see what I mean about adding a little triangle at the end of the dart at the side seam, and the point of the dart is 2cm back from the original bust point.
I've marked on the bust line from my block- as you can see it goes a bit crazy but once the fabric is sewn this line appears horizontal on the body... Magic!

It looks a bit daunting but it really isn't! Once your know your bodice fits there's a whole world of dart moving fun to be had! I have just toiled up my first self-drafted dress using an armscye dart/panel design and it's looking really good! Dying to share it with you but it's still top secret!

Please let me know if there's anything I could have made clearer and I'll try my best to explain. If there's a pattern drafting class going off in your area I strongly encourage you to sign up. If you are in or around Sheffield I suggest you get in touch with Leann with the details on the flyer above as she has been absolutely outstanding.

x

Currently listening to: Tumbleweave, Black Moth

Sunday, 4 December 2016

Prima Wrap Skirt II


In my last post I told you November has been busy, and it was no lie! Aside from the fabulous Sew Up North event in Leeds, I've also met some of my fellow Simple Sew Bloggers in Manchester and spent my Wednesday evenings taking a pattern drafting class. It's also been busy busy with gigs and mental at work... I don't know how I've kept up!!


In class last week fellow pattern drafter Gay told me she'd checked out my blog (Hi Gay!) and spookily the Prima Wrap Skirt was next on her to-sew pile!! What a coincidence! I'd already decided I wanted to make another when I picked up this leopard print jersey from B&M in Leeds at the start of the month. My me-made wardrobe has definitely been lacking leopard print because lets face it, it's up there with Houndstooth isn't it! And handily doesn't require pattern matching!! Wehay!!!


So I've worn my black Prima Wrap Skirt A LOT, and the scuba is starting to go a bit bobbly which is a terrible shame! I've had the de-bobbler on it a few times but it just keeps bobbling! For this skirt I wanted to extend the waist so I could wear it a little higher. My black one sits just below my belly button, and I think it's my only item of clothing that does! I find wearing things a little higher on the waist creates the sneaky illusion that I don't have a tummy, so I'm sticking with it!!


To alter the pattern I measured the distance between where I would wear my skirt and where my black one sits which equalled about 2inches. I added this on to the BOTTOM of the pattern as I freaked out and thought I'd make a mess trying to reshape the facing band and extend the darts. Thinking about it now and writing it down it doesn't sound that difficult, especially as I ended up extremely reshaping the side seams anyway! But it seemed like the easier option to add 2 inches onto the bottom when cutting out.


I cut out on the fold as there was no pattern matching to do! So much speedier. NEXT TIME if I'm using jersey again it might be a good idea to take a few cms out of the center front and center back so I don't have the massive chunks to slice off the side seams!!


Once all my pieces were prepped, front panel tacked onto the front skirt and center back zip put in, I took a wild guess and pinned my side seams with a 2.5 inch seam allowance. I know it seems pretty crazy, but the pattern is designed for wovens not knits and I also planned on wearing it higher on the waist than the pattern intended. I tried on and it made my bum look amazing!!


But on the whole, past the hips it was a little too tight. I eased out the seam allowance to about 1.5 inches at the bottom... Then back to 2 inches to get a bit more bum shape back!!


I tried on lots of times. With it in mind that the facing band would make it a little tighter still at the waist, I wanted to make sure I had enough ease to still zip it up!! I made these changes to the facing band so that it would fit then stitched it up.


I know it's pretty chilly for miniskirts, but since getting my hands on this awesome leather jacket, the boots and miniskirt combo has been a fave!


Stay warm guys! Chilblains are no fun.


x

Currently listening to: Sugar Beat, Las Kellies
Location: Sylvester Street Car Park, Sheffield

Sunday, 27 November 2016

Gertie Sews Vintage Casual, Pin-Up Sweater


It's been a busy month so far and it's been a struggle to sit down at my machine and get anything finished!
For my next make I decided to make something fairly simple for a quick win and confidence booster.


The journey of my Gertie Sews Vintage Casual Sweater started at the Sew Up North event in Leeds at the beginning of the month. Myself and a group of other stitchers from up North spent the day talking stitch perusing Leeds' fabric shops as well as raising money for charity, eating cake and swapping unwanted patterns and fabric. This ribbed white and navy jersey was from the fantastic B&M stall in Leeds Market... And I wasn't the only one pawing over it!! I opted for 1 metre, with it in mind I was going to make something tight and fitted.


The Sweater is just a front piece, back piece, sleeves and neck band. Pattern matching is essential!! I'm getting sick of telling you all- but I'll tell you again, I don't trust cutting on the fold when matching patterns so I cut the lot out on a single layer and flip over to get a perfectly symmetrical piece. Basically I am ensuring here that all the horizontal lines are at a right angle to the grainline, and therefore will not be going diagonally across my body.


I cut a size 10 but added a little extra in at the waist after consulting the size chart (note to future me- didn't really need to, especially when my jersey is quite so stretchy). The front and back pieces appear to be exactly the same apart from the neckline on the front is lower. I made sure that the front and back pieces were cut at the same point on the fabric design (as in, stripe placement) to everything would match up nicely. To do this I marked the navy lines of my front piece onto my paper pattern pieces and lined up with the lines when cutting the back.


Step one of sewing is to match up at the shoulders. Where the lines match from front and back makes these cute little Vs. Check out my symmetry! Before putting in the side seams you insert the sleeves. This saves and fiddly sleeve setting in. you just have to match at side seams, then pin the curves to fit. I tried like hell to match the navy lines across my chest and over the top of my sleeve! It's hard! As you're working from the inside when pinning its difficult to see exactly what will match with what when you put your actual stitch line in.


After inserting the sleeves, I tried to try on- which isn't easy or super insightful when you don't have any side seams yet. I pinned the sides and decided that I would make the seam allowance 2cm instead of 1.5cm.


Top make sure stripes matched at the side seams I pinned ALONG the navy lines through front and back to make sure they were all in line. I then used my sewing machine (not overlocker) to effectively tack down the sides being super careful to make sure the lines all matched up at the side of the fabric. Only when I was happy nothing was skew-wiff did I overlock these seams.


So I might have mentioned stripes a few times in this post, and how important it is to treat them with care so they don't look shit. This is true also for the neckline! Possibly even more so as realistically, more people are going to notice a wonky neck-hole then a dodgy underarm seam.
The neck band it is about 5cm wide, this is pretty easy for cutting when you have nice straight lines to follow!
The neckband needs to be a little smaller than the head hole... but apparently there's no rule to calculate by how much!! The book suggests about 2 inches. This is what I did, but with my fabric I think it is a little on the small side. The aim is to stretch out the band a little but not the head hole.


Firstly, it's important the stripes meet at the back of the neck where it joins to make a hoop. Secondly when sewing the right side of the neckband on to the sweater before folding over to the back it's important that the same amount of stripe is showing right the way round. If your stripe is wider at one point than another it will be really obvious. This is also the case when folding over the band- I was super careful to make sure the white stripe was the same width all the way round before I pinned and tacked it.
I used a narrow zig zag to attach the neck, then used my twin needle to topstitch and hold down after folding over to the back. I tried overlocking the long raw edge of the band before attaching, but it was really messing up the stretch factor so abandoned that!


It might all sound a bit daunting for such a simple top, if that's the case I would suggest using a plain fabric. This would look great in any kind of ribbed jersey. If I make another I think I might ditch the stripes!


x

Currently listening to: Three Alley Cats, Roy Hall
Location: Damflask Reservoir, Loxley Valley