Showing posts with label Simple Sew Patterns. Show all posts

Sunday, 8 September 2024

Simple Sew Patterns, Serena Dress


We finally got some sun! We've been waiting over 365 days for this and it's finally here! Cue a mad scrabble to the summer patterns! 

I wanted to make something light and floaty and this pattern and fabric combo definitely hit the spot. The pattern is the Simple Sew Serena dress, however I've modified it in a few places - most notably the length 😜 


The fabric is this super duper lush silk crepe de chine from Minerva 😍😍😍 Obviously I was first drawn to it's safari style print, then browsing the Minerva site I got super excited about its evident drapey qualities. I wasn't disappointed when this arrived. 


The silk crepe de chine was quick to dry, easy to iron and press, reluctant to fray unless you really ragged it around, easy to cut without it going wavy and easy to maniplulate. Literally an absolute dream to handle! The only thing I struggled with with this fabric was fusing interfacing - the interfacing seemed very reluctant to stick to the fabric, and if I applied more heat the fabric did seem prone to shrinking a little - just something to keep in mind! 


Lets just go back to the print design, I love the simplicity of the line and the two tone black and faun kind of colour. I can feel a bit exposed in lighter colours, but this off white compliments my skin tone a little more and creates the safari vibe! Leaf prints are very on-trend right now, and who doesn't love a tiger 😍🐯 


On to the pattern adjustments - I had made this pattern 2x before, but I found both dresses are looking a bit worn and have a slight fit issues that I wanted to address this time round. 


Firstly, I committed a second dart to the bodice from the arm scye. Ive snook this on as an after thought in the past so knew it needed to be there from the start this time. With this in mind, I thought I would need to add a little length onto the bottom of the side of the bodice to make up for the fabric the dart took up. I then added this length onto the side panel and back piece to keep it even (I later found I'd over compensated somewhere as the bodice and side panel met at a bit of an angle that I needed to amend when I tried it on...). 


I noticed a bit of gaping at the under arms on the side panels of my last attempt, so I squeezed out a 1-2cm triangle at the top of the panel pattern piece before I recut. This just meant I needed to slightly true the curve at the underarm when I cut the piece. 


The back of the dress is made up of a shirred panel. I highly recommend drawing the lines on to follow first! In the past I have used the foot-width as a guide, but it all gets a bit crazy and wavy after you've added 4 lines of shirring, so it's best to follow a guide. The pattern has the shirring at 1.5cm intervals - I would probably change this to 1cm in the future to give it a bit more spring. 


I used the folded over top edge of the backpanel to insert a piece of flat elastic. This wasnt included in the pattern, but either my shirring elastic was getting a little old (anyone know the lifecycle of shirring elastic??), or I could have done with some more lines, as the panel wasn't quite as 'grabby' as I would have ideally liked. To combat this, I did make the panel 10cm shorter before attaching into the side back seeam. The elastic worked well though, and I think I would include this next time just to add a bit more stability to the back. 


To further increase stability, I interfaced the straps and the front and side of the bodice. The fabric is really light and a bit see through and I didnt want the piece I'd used as lining to show through. 


I slightly altered the bust darts - The still start and end at the same place, but instead of looking like pyramids, they look like houses with rooves! I'm sure there's a name for this?? Essentailly the lines change angle half way up before they meet (creating the 'roof'!). 


The adjustments I made made for a much better fit this time around! If I make Serena again, I would move the front straps inwards a little as they do sit a little bit wide on me, but I'm really really happy with the fit, particularly the bust darts. 


I was terrified that the overlocker would mash up the fabric with it being so fine, but overlocker and fabric were both very well behaved. I finished the dress with a lovely little narrow hem that keeps it light and airy, washed off my water soluable pen marks from the back panel then I was out in the sun 😎 

x
Location: Loxley
Currently listening to: Hot In The City, Billy Idol

Friday, 25 December 2020

Simple Sew, Lena Wrap Dress

The Lena Wrap dress is a circle skirt dress featuring a faux crossover top and a coice of three sleeve variations. There is a contrast band at the bottom of the skirt, but I decided to trace this onto the bottom of my pattern as I didn't have any contrast fabric but didn't want the dress to be too short.


I knew I would have to make some alterations to the pattern, as ever crossover top I have ever attempted has always been too roomy in the bust leading to gaping at the neckline. I took a wedge out of the front of the pattern, altering the angle of the shoulders and overall meaning there was less fabric between the neck and the point where the crossover meets.

After this I had to alter the ansle of the bust dart a little. To do this I unpicked the dart on my toile and then pinched the fabric from the side seam towards the bust point anf pinned. I could then transfer this new dart position onto my paper pattern, ensuring the lines met at the new bust point.


For me the process of getting the fit right was very trail and error, even after making a couple of toiles I was getting frustrated with my lak of clear direction in my ad-hoc alterations. I had an enlightening moment though, when I remembered the playfulness of the Sewing Bee contestants when completeing the Transformation Challenge. I altered by approch and took pleasure in manupulating the shape- taking bits out here and there until the dress started to resemble my body shape!

There were a few niggles with the pattern - I accept it's my small bust that lead to the gaping neckline, but there are no notches on the armholes for setting the sleeves in and there are notches marked on the foldline of the waistband!! Thankfully I was paying attention when cutting out my fabric and I didn't snip these in or I'd have had notches on the centre front and centreback of my waistband.

I made the bodice a little shorter- In hindsight I should probably have added a little extra length to the bottom of the waistband to accomodate for this. Like many of the bloggers who have tried this pattern, I also decided to stitch up the centre front of the wrap dress to er, keep everything in place.

Confession time! I didn't line the bodice! If I'd have had a perfect fit, lining the bodice would have given a beautiful finish and would have helped to support the weight of the circle skirt. Once I'd finished hacking bits off of the side seams and armholes, the last thing I wanted to do was replicate this on a lining piece! Instead I folded under the neck opening by 1.5cm and stitched around the neckline.  


Despite the rather haphazzard nature I put the dress together I do quite like the silhouette of the finished thing. I tried really hard to keep all the chaos on the inside! To finish I took about 1.5 inches off of the length and did a tiny narrow hem. Next time I will do a bit more research on how to do a small bust alteration on a wrap dress so that I feel more confident in my alterations, but I am more than happy with this as a starting place.

x

Location: Endcliffe Park/Ecclesall Road, Sheffield
Currently listening to: Moi Je Joue, Brigitte Bardot

Sunday, 30 August 2020

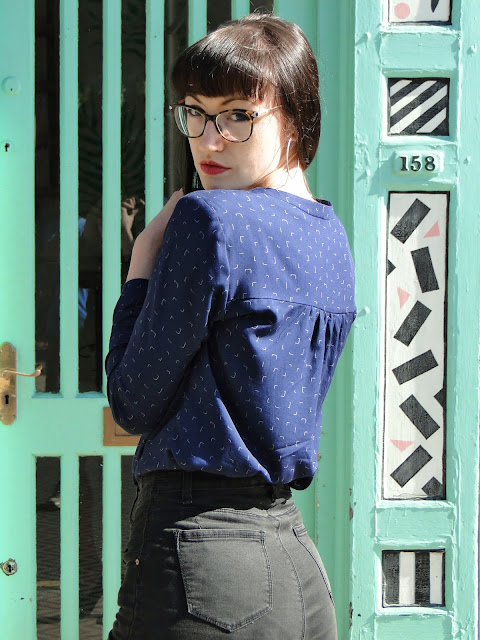
Simple Sew, Olive Blouse


I have seen surprisingly few Olive Blouses pop up online, so I was excited for my chance to make one for this months' Simple Sew blog.


I cut a size 8 and made a toile to check fit. The blouse fitted nicely across the bust and around the waist but felt tight across the back, restricting movement a little. The sleeves were also a little snug around the elbow, so I set to making a couple of basic adjustments to the pattern. 


To make a broad back adjustment, I first folded under the seam allowances on the paper pattern where the yoke and back met and taped them together so I could treat this as one piece. I drew a line about 2cm along the shoulder from the sleeve cap and another about 2cm below the armpit, then extended these to meet at a right angle. I cut along these lines and moved this shoulder section outwards. I used a shirt pattern I know fits well across the back to use as a guide for how far out to move the pattern piece. Comparing the pattern pieces I also realised I needed to extend the shoulder seam by another couple of cms or so and then redraw the curve from the shoulder point down to the double notches. 
To match I made this same alteration to the front yoke piece- extending the shoulder and then redrawing the curve this time to the front notch of the armhole. I made a minor sleeve adjustment, adding just a little bit more fabric into the back sleeve cap to aid movement.


To make the sleeve width alteration I firstly marked on the seam line of my toile where the sleeve felt too tight- basically just the section around my elbow. On the pattern I straightened the curve on the sleeve seam so it was a straight line from underarm to wrist. This added a few extra cms where I needed them but didn't affect the fit elsewhere on the arm. 


Onto my fabric choice... I couldn't have fallen more in love! I used this 100% rayon from the Cloud 9 'Business Class' range, kindly supplied by Bobbins n Buttons. The whole range is absolutely beautiful, but I chose this 'Business Class Coder' design. It's geometricity appealed to me as well as the print looking somewhere between an organised explosion of staples and a CSS coder's dream. This was before I'd even touched the fabric.... Wow, once it arrived I was falling all over again, the rayon was the perfect weight to make this drapey shirt- ideal to make the most of those gathered sections below the yoke. It also found it pressed like an absolute dream! The fabric had just enough stretch for me to stop worrying that I hadn't added enough extra fabric across the back and elbows and it wasn't prone to laddering which was a relief when it came to adding my snap closures. Honestly, I was so impressed I can see myself going back for the other designs in the range.


The pattern itself is easy to follow, though I would have appreciated a few more notches, at the shoulders for example, to ensure I was matching everything up properly. The pattern doesn't quite prepare you for how tricky attaching the front band around the neckline curves can be either! Due to my rayon being so well behaved it thankfully wasn't so bad, but when making my toile I found it quite tricky to match together the opposing curves at the neckline. 


My advice for attaching the neckband would be go slow and be as accurate as possible! When stitching I started at the centre back and worked outward toward the front neckline. I would also recommend making sure you trim and clip your seam allowances to get the neatest finish.


The uninterfaced band is attached to the neckline first, then the interfaced band is sewn right side to right side before being flipped to the underside. I trimmed the seam allowances here too and then understitched the inside piece to the seam allowance. This stops the inside from rolling out and becoming visible from the front. 


The band is then fixed by 'stitching in the ditch' around the neckline seam... Make sure you overlock the raw edge of the inside band first! In reality you can trim this by about 1cm as you overlock- as it is not folded under you end up with quite a large overlap over the seam on the underside if you don't. 
Again I found it helped to start at the centre back then stitch out toward the front. I would also recommend just stitching sections to hold the underside down  instead of stitching all the way around to avoid any pulling or rippling of the band.


The thought of putting button holes in the band after all that work went right through me, so I struck lucky when I found these pearl Prym snaps at  my local market. They are in the Prym 'Jersey' range, so I was a little worried that for some reason they wouldn't work with woven fabric but it was fine! Always double check your snaps are the right way round before fixing them!! I very almost had a scary moment featuring a back to front popper that would have ruined the whole thing!!


The blouse fits well, the gathers below the yoke make it loose fitted, which I love for tucking into my work skirts... And works with my shorts too! I would recommend wearing a little cami or something underneath for work, as the neckline is quite low for something that loose.


Who else is making an Olive blouse? I want to see some more sassy fabric combos!


x
Location: Syd and Mallroy Devonshire Street, Sheffield
Currently listening to: The Drugs Don't Work, Verve

Sunday, 12 July 2020

Simple Sew, Lapwing Shorts Hack


I imagine most seamstresses are familiar with that heart-sinking feeling when you realise you're just 20cm off making your dream garment from your perfect fabric. When you've explored all the different possible layplans and you've flipped your pattern pieces around that many times that you don't know up from down any more. Well, for the first time ever, I had the complete opposite issue - I'd already made two garments from this lovely viscose scattered in tiny hearts and I'd got plenty left for something else. 


I could never see this fabric as anything other than pyjamas, with PJ bottoms and camisole already in the bag I thought I'd make some matching PJ shorts now that the nights are warmer. 


I used the Simple Sew Lapwing pattern again, making a few obvious changes - the first being making the pattern well, shorts length. With the side seams being straight it was quite easy to measure the length I wanted and then square them off at the bottom. From the top of the pattern piece down to the bottom along the outside leg measured 40cm, and the inner leg seam was 9cm. 


I decided to omit the pockets this time for a few reasons. 1- I was worried the extra fabric would add a little unwanted bulk/weight and make my shorts a little less shimmy, 2-  I really didn't want the bottom of the pockets to poke out of the bottom of my leg, I could have amended the shape but, 3- Maybe I was just a bit damn lazy! No regrets here though!


I was tempted to add a shirred waist like I had done on my full-length Lapwings, but I had the perfect width waistband elastic in my stash so I opted to turn under the top of the shorts by 1.5cm, press and then turn under again and stitch around to create a channel. As I was using elastic not drawstring I omitted the drawstring openings and just stitched around the little gap I'd left myself after inserting the elastic. 


To add a bit of a professional finish to the waistband, I did a row of stitching across the top and bottom, stitching though both the fabric and the elastic. This stops the elastic from flipping, twisting and shifting inside the casing. You have to make sure to pull the waist out as you sew so that when the elastic pings back into place all the gathers it creates are evenly distributed. 


To jazz up the front a bit I made a bow out of yet more leftover fabric (!) and hand stitched to the centre front. I used the guide to making bows from the Secrets of Sewing Lingerie book and played around with the width and length of the bow. It's easy to make (you just use one piece of fabric folded and stitched cleverly for the horizontal bit and then a separate section is wrapped around vertically to hold it all together. Cute huh?


To hem I turned under and pressed 1cm, and then turned under another 1cm and stitched. As I'd cut the legs so square it was easy to get a nice neat finish, though I would like to have a play around with curved hems next time to maybe add a bit of a flirty flare.


What do you think though - Flirty enough at that length?! 


Of course no PJ set is complete without a matching scrunchie! This was a super quick and satisfying little make, and totally necessary now my hair is getting longer! I followed this How to Make a Scrunchie tutorial from Melly Sews. Great thing is, is once you've made one you can go back and make one to match every outfit you've ever sewn!


I still have some fabric left... What next?


x

Location: Endcliffe Village, Sheffield
Currently Listening To: Trouble With My Baby, Paloma Faith