Showing posts with label Minerva Makers. Show all posts

Sunday, 8 September 2024

Simple Sew Patterns, Serena Dress


We finally got some sun! We've been waiting over 365 days for this and it's finally here! Cue a mad scrabble to the summer patterns! 

I wanted to make something light and floaty and this pattern and fabric combo definitely hit the spot. The pattern is the Simple Sew Serena dress, however I've modified it in a few places - most notably the length 😜 


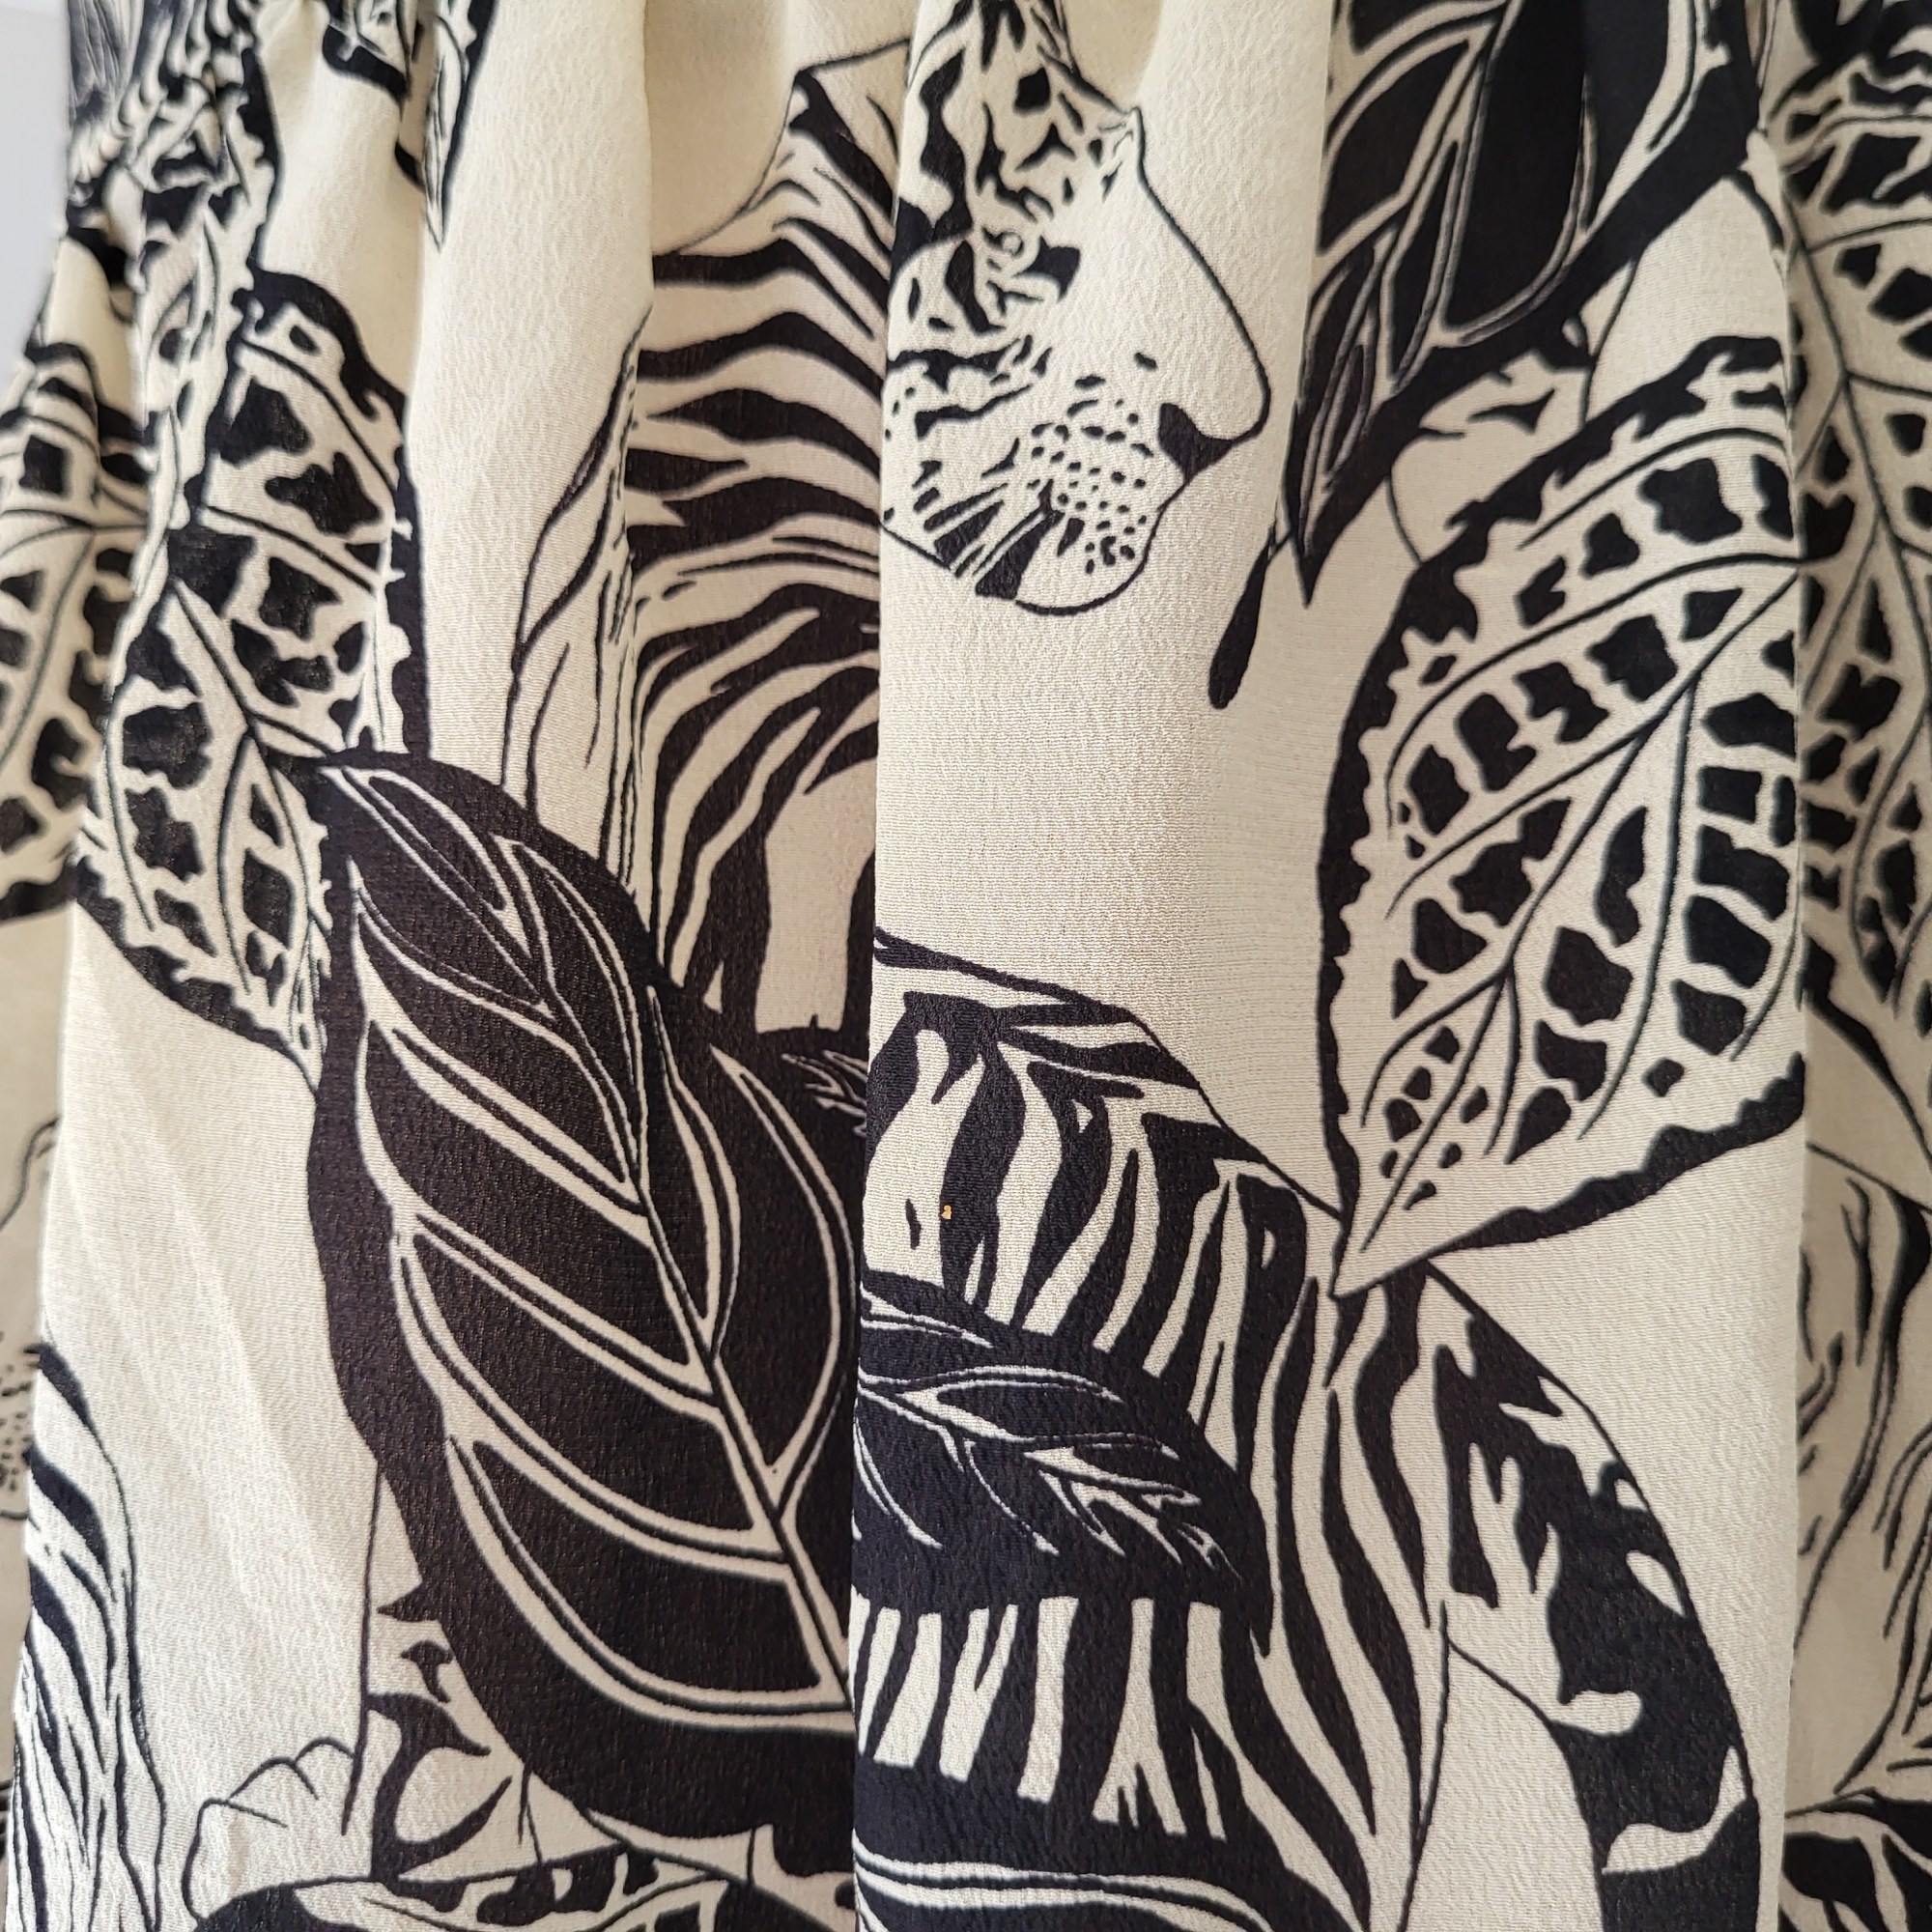
The fabric is this super duper lush silk crepe de chine from Minerva 😍😍😍 Obviously I was first drawn to it's safari style print, then browsing the Minerva site I got super excited about its evident drapey qualities. I wasn't disappointed when this arrived. 


The silk crepe de chine was quick to dry, easy to iron and press, reluctant to fray unless you really ragged it around, easy to cut without it going wavy and easy to maniplulate. Literally an absolute dream to handle! The only thing I struggled with with this fabric was fusing interfacing - the interfacing seemed very reluctant to stick to the fabric, and if I applied more heat the fabric did seem prone to shrinking a little - just something to keep in mind! 


Lets just go back to the print design, I love the simplicity of the line and the two tone black and faun kind of colour. I can feel a bit exposed in lighter colours, but this off white compliments my skin tone a little more and creates the safari vibe! Leaf prints are very on-trend right now, and who doesn't love a tiger 😍🐯 


On to the pattern adjustments - I had made this pattern 2x before, but I found both dresses are looking a bit worn and have a slight fit issues that I wanted to address this time round. 


Firstly, I committed a second dart to the bodice from the arm scye. Ive snook this on as an after thought in the past so knew it needed to be there from the start this time. With this in mind, I thought I would need to add a little length onto the bottom of the side of the bodice to make up for the fabric the dart took up. I then added this length onto the side panel and back piece to keep it even (I later found I'd over compensated somewhere as the bodice and side panel met at a bit of an angle that I needed to amend when I tried it on...). 


I noticed a bit of gaping at the under arms on the side panels of my last attempt, so I squeezed out a 1-2cm triangle at the top of the panel pattern piece before I recut. This just meant I needed to slightly true the curve at the underarm when I cut the piece. 


The back of the dress is made up of a shirred panel. I highly recommend drawing the lines on to follow first! In the past I have used the foot-width as a guide, but it all gets a bit crazy and wavy after you've added 4 lines of shirring, so it's best to follow a guide. The pattern has the shirring at 1.5cm intervals - I would probably change this to 1cm in the future to give it a bit more spring. 


I used the folded over top edge of the backpanel to insert a piece of flat elastic. This wasnt included in the pattern, but either my shirring elastic was getting a little old (anyone know the lifecycle of shirring elastic??), or I could have done with some more lines, as the panel wasn't quite as 'grabby' as I would have ideally liked. To combat this, I did make the panel 10cm shorter before attaching into the side back seeam. The elastic worked well though, and I think I would include this next time just to add a bit more stability to the back. 


To further increase stability, I interfaced the straps and the front and side of the bodice. The fabric is really light and a bit see through and I didnt want the piece I'd used as lining to show through. 


I slightly altered the bust darts - The still start and end at the same place, but instead of looking like pyramids, they look like houses with rooves! I'm sure there's a name for this?? Essentailly the lines change angle half way up before they meet (creating the 'roof'!). 


The adjustments I made made for a much better fit this time around! If I make Serena again, I would move the front straps inwards a little as they do sit a little bit wide on me, but I'm really really happy with the fit, particularly the bust darts. 


I was terrified that the overlocker would mash up the fabric with it being so fine, but overlocker and fabric were both very well behaved. I finished the dress with a lovely little narrow hem that keeps it light and airy, washed off my water soluable pen marks from the back panel then I was out in the sun 😎 

x
Location: Loxley
Currently listening to: Hot In The City, Billy Idol

Wednesday, 10 January 2024

So, Zo... Strappy Vest Top V


Velvet and bodysuits definitely feature in my top 10 sexiest things (right next to bob haircuts and David Gandy in that Dolce and Gabana advert), so it seemed like a natural pairing to use this black velvet from Minerva alongside the bodysuit pattern hack I'd been working on, using the So Zo free vest top and Simplicty 8513 bodysuit patterns as a base. 

This fabric is a cushed velvet which catches the light from all angles. What I really like about this velvet, is it doesn't instantly get my heckles up if I stroke it the wrong way 😅 Don't get me wrong, there is a clear nap to it, but it's very comfortable to wear. 


The fabric is described as 80% stretch crossways and 10% stretch lengthways. I must admit when the fabric arrived and I did a test stretch, the lengthway stretch felt pretty non existent (Have I overestimated what 10% stretch feels like?). The alarm bells were already going off that a fabric with only 2 way stretch was probably not going to work for a bodysuit. The Simplicity 8513 bodysuit pattern however did say that it was suitable for 2 way stretch on the packet (spoiler; it's not) so I thought I would cut it out anyway, with the option of cropping the 'leg' area off if needed and therefore elimiating the necessity for lengthway stretch. 


With this issue in mind, I did cut the body pieces out with a couple of extra cms in the length (hmmm, not enough). 


I was excited to try my new little hack to this pattern by inserting a powermesh panel into the front section. I drew out on my pattern piece the depth of the triange I wanted and then added a 1cm seam allowance to both the new neck opening and the edge of the triangle. I fiddled around a bit then trying to remember how to line up the triangle and exactly where to clip to at the V-point so the triangle sat flat. Any creeping seam allowances here were put in their place by using a straight stitch and topstitching around the panel. 


I used a lovely picot edge elastic around the back/underarm/front neck and attached pre-made straps pinched off of a Primark Bra (sometimes a lot cheaper to buy and deconstruct than it is to buy supplies from scratch). I hand stitched the straps at the front for an invisible join and also cause the fabric gets a bit bulkly there where the elastics all meet. 


With straps on, I could try on the bodysuit. I attempted pinning at the crotch to see what comfortable range of motion I had. The front looked OK, though a lot shorter than I would wear my bodysuits. The back however was pulling at my hips, meaning the fabric wasnt fitting to my lower back, the curve in the centreback was too high as the fabric wasn't stretching the way it would with 4 way stretch. My mind was made up to convert to vest top, but I did get some photos of the garment as a proposed bodysuit to remind myself I was right - this pattern and velvet was definitley scoring the sexy points. 


I tried on once I'd removed the bottom part of the pattern and felt the vest top would benefit from a slightly curved hem. I chalked the curve onto the velvet following the natural contours of my body, making sure both sides were symmentrical when I snipped away the excess. I added a cute trim of picot elastic to finish the bottom edge and we were good to go! 


I love the velvet and the mesh working together, and I think the velvet is super flattering. Looking forward ot having a go at the full bodysuit version when I get my hands on something with a little more stretch. 


x
Location: Home Sweet Home
Currently Listening to: A Pile Ou Face, Felipecha

Sunday, 18 June 2023

Mood Sewciety, D'Arcy Bralette


I wanted to fine tune the fit of my second D'Arcy Bralette. This time round I cut a smaller size and slightly increased the side seams. I found cutting the smaller cup size removed the wrinkles around the top and bottom of the cup so definitely did the trick. 


I did find the cut of the underarms was still a little high so I again omitted the second pair of cage straps from the bralette. 


I paired two lovely stretch mesh fabrics from Minerva for this project, dotty for the outside and plain for the lining. I did find these fabrics (particularly the dotty) were a little more stable than the fabric I used for my my black bralette, this added a bit more structure to the bra but also reduced the stretch, making it slightly more of an effort to get it over my head! 


I chose to use ivory fabrics instead of white, which created a softer look against my skin, however I did only have white plush elastic for the straps. I think both the ivory and the white pair well with the gold rings and sliders I used though - adding a glimmer of elegance to my make. 


I had a vision that leaving a sheer panel in the bralette would look kinda cute and sexy, after toing and froing in my brain for ages I decided to go for it and just used a single layer of power mesh for the centre front panels. In hindsight, I think the bralette would have looked better 100% dotty on the outside. I don't think the placement of the cup seam is flattering enough when the cup is so blatantly divided. 


I do love the pairing of the two fabrics, and using them gave my chance to test out the stretch settings on my new sewing machine! I zig zagged pretty much all the seams and opted to french seam the side seams as suggested in the pattern instructions... I think the side seams came out really bulky because if this though and think leaving them flat and perhaps just topstitching close to the stithcing would have created a smoother finish. 


We live and learn though, so instead of rushing to make matching knickers this time, I have a couple more bralette patterns I would like to use the left over fabric on. I am also eyeing up this fabric in other colours (swit swoo to red polkadot power mesh!!).


I think this bralette looks super cute peeking out of the top of things, especially summer vests and open shirts. I'm a big big fan ofthe cage straps and hope I can incorporate them into my own patterns sometime. 

x
Location: Home Sweet Home
Curretly listening to: Stupid Girl, Garbage

Sunday, 9 April 2023

McCalls M7575 / M8009, Shirt Hack


Sometimes things don't go as you planned. Like when your mum says she'd like to go to Asda for Mother's Day and you bump into your ex at the checkout with his new girl. Or when you plan a trip for your Brother's birthday but at 9am in the morning you get a call to say your dad has cracked his head on the fireplace and won't stop bleeding. Or when you spend the morning rehearsing in your head how you're going to give your number to the cutie in the park at lunchtime and then he's not even there. Or when you make the M8009 puff sleeves for your spooky playsuit but they just don't quite.... eugh. 


Luckily, sewing seems the one thing I have control of and there was a way to save this one. I couldn't quite pinpoint exactly why I wasn't feeling the sleeves on the playsuit. Maybe it's because the blacks didn't quite match, or maybe I just loved how er, playful it was while sleeveless. I wanted to stay true to my vision but also didn't want to make something that I knew would make me feel a little bit disappointed when I took it out of the wardrobe before I promptly hung it back up. To be sure, I did what any girl would do, and posted an Instagram poll to see what the fans thought. A wopping 80% voted YES to putting the puff sleeves into the playsuit. That told me all I needed to know. I was gonna go sleeveless. 


So that left me with a pair of chiffon sleeves, fully gathered with no home to go to. With THAT Zou Bisou Bisou scene from Mad Men in my head (always), and style icons Laura-Mary Carter and Gizzi Erskine plumping up my Insta feed with 60s-inspired sexiness, I knew the sleeves were going to bring my next garment to life and fit perfectly on-brand with that style we've coined beretcore


The Franken-pattern came in the form of the ever-versatile McCalls M7575 shirt. Tried and tested a billion times now, I know this shirt pattern fits me well and I can just about make it in my sleep. The black fabric was left over from the Maneskin-inspired Tuxedo blouse, a pattern which hacked the Burda 7136 with the Mia Blouse, which came free with an issue of Simply Sewing a few years back. It seems this fabric literally lends itself to frankenpatterns. With both of the patterns in my hack being McCalls, I thought there may also be some kind of dim hope that that sleeve notches would align, as if the designer had planned this duet all along. 


With the 60s vibe in mind I wanted the shirt to be more floaty than fitted, so I decided to omit the darts in the front and back. 


It's been a while since I sewed with chiffon........... I remember why now!! Yes, it still likes to wiggle around when you as much as touch it, trying to cut something out on the bias leads to some interesting shaped pattern pieces! BUT it does gather like and absolute dream, and I'm still a big fan of wearing sheer fabric (even tho I'm like 30+ years old now, what the hell), so it was well worth the perseverance. The sleeve bands were meant to be cut on the bias, there was no talk of interfacing them... Well I stitched my bias cut sleeve bands onto the ends of my rapidly fraying, gathered poofy sleeves, folded over and slip stitched the insides.... Oh my word, they looked terrible! The centre crease was the very definition of wibbly. I pressed and pressed and even did the second one in hopes of kidding myself it was all a figment of my imagination. Sleeve 2 was just as bad. I was in too deep now to just shelve the whole project, so I unpicked both bands and returned to trusty stability by re-cutting the cuff pieces from my black cotton. I took no chances this time, I was cutting on the straight grain and I was interfacing these bad boys! 


The result is a slightly chunkier band at the cuff, but I think it does help the sleeves feel like they belong to the shirt, and they add a bit of weight to stop them billowing like billio. 


My initial rejection of the sleeves on the playsuit was mainly down to not feeling like the fabrics worked well together. To try and further combat this I wanted to try and use the chiffon where I could on the rest of the shirt. I orignially planned to cut the button band and collar from the chiffon, but I had a few questions to myself:
1) Would the seam allowance inside be drastically visible?
2) If I didn't interface the band, would the buttons/holes cause absolute chaos?
3) If I did interface the band, would you be able to see the interfacing and would it look shite? 


I'm sure a quick Google search would have reminded me how to suitably interface chiffon (I feel like in the past I've just cut an extra piece of the same fabric and stitched it in???), but with sleeve wibble still blazing at the forefront of my mind, and enough fabric to cut a sensible button band, I decided to play it safe. As some kind of compromise I cut the top layer of my collar out of chiffon and hoped my seam allowances would blend into the inside. 


I like the collar and I think I made the right choice. In hindsight, I could have really accentuated the Parisian 60s vibes by opting for a peterpan-style curve instead of classic collar points, but like I said, the M7575 is ever-versatile and I'm sure I will be returning to it when I'm ready to hack that collar. 


How many times did I go on to insert and re-insert the sleeves? I don't know. With pattern notches and dots not really being too trustworthy anymore since mashing the two patterns together, and quite severe fraying going on by now, there was a bit of guesswork involved in figuring how gathered the sleeve heads should be and where the gathering should start and finish. I knew I would instantly reject anything that made my shoulders look massive so I did have to pace myself a bit to make sure I got it right. As with every single time I've inserted gathered sleeves, one sleeve looked undeniably better than the other! We've come this far though! So I restitched and restitched until I had what I felt was a symmetirical, poofy, but not too poofy, pair of gathered sleeves. 


Perseverence was the key! I'm super glad I did, and glad I didn't 'make-do'. I feel like this shirt is a bit of a metaphor for how I decided I want to live my 2023. If it doesn't feel right then it isn't. Don't just put up with shit! 


Psyched by the success of the sleeve hack, I was wearing this shirt around the house before I bought buttons. I liked all the style in its simplicity, so when I finally did get to the haberdashery, I opted for plain black buttons, and one blingy diamante at the collar as one final nod to Zoubi Zoubi Megan

Un, Deux, Trois, Quatre.... 


x
Location: Western Bank Library, Sheffield
Currently Listening to: Chaise Lounge, Wet Leg