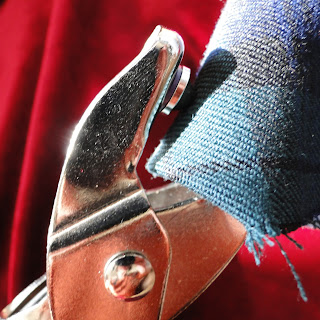
Recently I had my first shot at installing some poppers instead of buttons onto a shirt. I've had a popper-putter-inner for a while now, but never had the guts to use it. I had a few practice shots and found the instructions to be a bit vague, so thought I would knock together a tutorial on how to attach snaps to your garment for my own benefit as much as anyone elses!
There are a few different ways you can put them in, but the most reliable way seems to be by using pliers designed for press studs, eyelets and piercing. There are various different press studs you can get- the ones in this tutorial are Prym Anorak poppers. If you're using a different sort please check your individual instructions as they may vary.
First you want to punch two holes in your garment where the press-stud is going to be, one for the top of the popper and one for the bottom. The placement should already be marked on your garment from your pattern.
 |  |
The first tool you will need is this pair that come with the pliers themselves. The rounded tool (not the pointy one) can be used either way round for punching different width holes. I used the smallest size.
 |  |
You won't need these punch tools again so you can remove them from the pliers. This handy blue tool comes with the pliers for removing the different accessories.

We are going to put in the top of the press stud first. For this you will need the white round plastic tool and the bevelled pointy metal one that come with the snaps.
 |  |
We then need the top and bottom of the the top popper. The bottom piece slots nicely onto the bevelled tool in the pliers. The top piece is then placed into the white plastic.
 |  |
This now needs lining up with the hole we punched on the part of the garment which will be showing (ie, top of the button placket, top of the pocket flap etc). Before squeezing the pliers I urge you to check you have got the top of the press stud on the top of the garment!! Close the pliers gently at first to make sure both sides match up nicely with the hole... Then squeeze!

The top of the popper is in! We are halfway there.
 |  |
The tools in the pliers need changing to this one with a rubbery bit in and its inverted partner piece. We need the top and bottom bit of the bottom of the press stud, like so;
 |  |
The bottom of the bottom of the press stud sits happily inside the rubbery bit of the tool.
 |  |
The pointy bit of the press stud now inside the rubbery tool needs to be lined up with the hole in your garment. This bit will need to go on the back, so that the top of the bottom of the popper matches up with the back of the top of the popper when all is in place.
 |  |
Line up the top of the bottom of the popper with the inverted bit of the tool then crunch down on your pliers! Your press stud is complete!
 |  |
Overall, I found using snaps much easier than faffing about with risky button holes. What do you think? Does anyone have any experience with other types of press-stud? How did you get on?
x
Currently listening to: Lucky Man, Verve

nice work, I have only used these for eyelets and had been given a set of press fasteners some time ago with this tool but have not used it yet....may do some experimenting
ReplyDeleteWould love to have a go with eyelets now I'm in the groove of it! Had to write it all down quick before I forgot the process! xox
DeleteThank you for this. I was talking about the trouble I was having with some snaps I bought on Amazon in my last post and I think Prym might be the safest bet and the set I will be able to use for a long time.
ReplyDeleteYeah, I think they are fine once you get into the groove of it. I found it very daunting to start with! Had a couple that went a bit dodgy along the way but thankfully had two spare in the box! xox
DeleteHi, have you tried using the plastic Kam snaps - you would need a different set of tools for the pliers to apply them but we use them all the time, they come in so many colours and are really sturdy.
ReplyDelete