Pages

Sunday, 24 September 2017

Inserting Poppers/Snaps Tutorial


Recently I had my first shot at installing some poppers instead of buttons onto a shirt. I've had a popper-putter-inner for a while now, but never had the guts to use it. I had a few practice shots and found the instructions to be a bit vague, so thought I would knock together a tutorial on how to attach snaps to your garment for my own benefit as much as anyone elses!

There are a few different ways you can put them in, but the most reliable way seems to be by using pliers designed for press studs, eyelets and piercing. There are various different press studs you can get- the ones in this tutorial are Prym Anorak poppers. If you're using a different sort please check your individual instructions as they may vary.

First you want to punch two holes in your garment where the press-stud is going to be, one for the top of the popper and one for the bottom. The placement should already be marked on your garment from your pattern.


The first tool you will need is this pair that come with the pliers themselves. The rounded tool (not the pointy one) can be used either way round for punching different width holes. I used the smallest size.
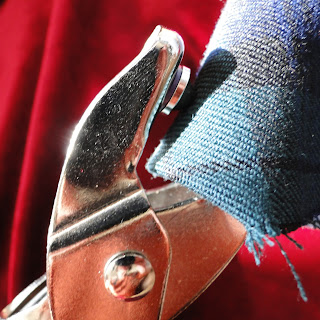


You won't need these punch tools again so you can remove them from the pliers. This handy blue tool comes with the pliers for removing the different accessories.


We are going to put in the top of the press stud first. For this you will need the white round plastic tool and the bevelled pointy metal one that come with the snaps.


We then need the top and bottom of the the top popper. The bottom piece slots nicely onto the bevelled tool in the pliers. The top piece is then placed into the white plastic.


This now needs lining up with the hole we punched on the part of the garment which will be showing (ie, top of the button placket, top of the pocket flap etc). Before squeezing the pliers I urge you to check you have got the top of the press stud on the top of the garment!! Close the pliers gently at first to make sure both sides match up nicely with the hole... Then squeeze!


The top of the popper is in! We are halfway there.


The tools in the pliers need changing to this one with a rubbery bit in and its inverted partner piece. We need the top and bottom bit of the bottom of the press stud, like so;


The bottom of the bottom of the press stud sits happily inside the rubbery bit of the tool.


The pointy bit of the press stud now inside the rubbery tool needs to be lined up with the hole in your garment. This bit will need to go on the back, so that the top of the bottom of the popper matches up with the back of the top of the popper when all is in place.


Line up the top of the bottom of the popper with the inverted bit of the tool then crunch down on your pliers! Your press stud is complete!


Overall, I found using snaps much easier than faffing about with risky button holes. What do you think? Does anyone have any experience with other types of press-stud? How did you get on?

x

Currently listening to: Lucky Man, Verve

Sunday, 17 September 2017

Madalynne Intimates, Noelle Bra


After the success of my Sierra bra from the free download on Madalynne's website, I was well hyped up to have a go at another of the free patterns on her site. The Noelle set was next up- another soft cup bra with a panty pattern thrown in!


Love a good lingerie make for using up fabrics- You barely need anything to make this! I used a little left over velvet for the front outer, the back and linings out of mesh and the underbust band from left over lace I also used for my Sierra bra. Only other notions you need are a metal hoop to join the halter straps to the bodice at the back and some elastic. I used this lovely lacy flat black lingerie elastic from The Button Shed on Amazon, still some left! But I've ordered some more so stocks don't wear thin! Inside the bra I used some plain elastic on the underbust.


As with the Sierra Bra, the Noelle pattern suggests including a lining. The Sierra sew-along explains how to hide the side seams inside the lining. The Noelle doesn't mention this, but I thought I'd use my new found skills to do the same again. I have read on quite a few reviews of this pattern that the sizing is a bit off, and lots of people have just taken in a little extra at the side seams. Typically I'd made life harder for myself in hiding the seams inside the bra! Although it could have got away with being a little tighter, I decided against altering the seams- but will remember to take a little out next time!! Next time I must also remember to trim down my seam allowances before they get sandwiched inside the bra and also make sure the allowance in the top half is hidden in the same direction at the allowance in the band.


I could have made a neater job of attaching the elastic around the edge. You can't tell, but I foolishly thought you could just go right the way round so started at the top of a side seam, only to find that when I reached the strap area I would have to cut the elastic and start sewing a new piece at the neckline. What I should have done is start at the centre back! No one will know though.


I stitched the elastic so the straight edge lined up with the raw edges, picot facing inwards, then flipped it up so the seam was hidden underneath and picot on the outer edge, then zig-zagged on top. It is important to either put the neckline piece on first, or up the back/underarm elastic on first so that you can do the flipping up bit without getting in a twist. You'll see exactly what I mean when you have a go!


I attached my underbust band using the overlocker, which was fine but did make the seam a little bulky. The pattern suggests using zig-zag stitch on the normal machine which I might try that instead next time. The side seams of the band are at a slight angle, but due to body shape the fabric pools a little at the widest part where it joins the bra. It's not much so I shaved a little off the pattern, making a straighter line for next time. Plain elastic is then sewn to the inside of the bra, hiding the seam and adding a little more 'grab'. I used my flat picot elastic to finish the bottom of the band.


My metal loop was 10p from market! Bargain! They gave it my dad for free though because he only had a fiver, even better! It's about the size of a 5 pence piece, perfect size for getting the top of the back looped round as well as the two straps. I stitched the ends of the straps down with zigzag stitch to keep them secure once in position. The front of the bra loops through smaller loops on the other end of the straps. It was a little bit of a squeeze with all the picot and velvet but the straps join on nicely.


And then it's finished! Already! My head is spinning with all the lovely fabrics I can use to make more! I've got some red velvet in my stash that's nore been doing anything for a while...


x

Location: Botanical Gardens, Sheffield
Currently listening to: We're In This Together, Nine Inch Nails

Sunday, 10 September 2017

Grainline Studio, Archer Button Up Shirt


I've finally joined the Grainline Studio club! The Archer Shirt is my first Grainline pattern. I've seen so many Archer shirts on Instagram, I've been chomping at the bit to have a go at one for myself.


The fabric was some cheap plaid from Leeds Market from Sew Up North. My measurements matched an exact size 4 so I decided not to make a toile, but consider this as a wearable toile and make any adjustments as I went along. Lazy I know! But the shirt is loose fitting so figured there wouldn't be too many alterations to make.


I'd been putting off getting started for ages now because... Pattern matching! I love a good pattern match, but sometimes it's just damn daunting to get going! Cutting out took an afternoon, simply to get all those stripes lined up. So worth it though! Once you know all your pieces are cut out symmetrically, actually putting the shirt together is easier than if you were using plain fabric. I cut my cuffs and yoke on the bias just to avoid having to match, but I think it's nice to break the pattern up a bit! I originally cut the button placket on the bias too, until I realised that the placket on the left side is folded over from the actual front piece- therefore only the other side would have diagonal checks on once I'd attached the bias-placket to the right. I don't really get why the two fronts are done differently? I have both folded over the front to make a placket and added an additional band on in the past... But never one of each on the same shirt! It's important to bear in mind that right front will be on the top- so you want this placket piece to be cut from a piece of fabric that won't clash. I made sure that my horizontal lines matched up and continued across my chest.


Talking of horizontal lines, I also had the protractor out when I cut my sleeves! I wanted to make sure that all horizontal lines were at a right angle to the grainline and therefore should (!) meet at the seam line. I still find figuring out the match at the shoulders where sleeves join the bodice really hard. I think I did an alright job here, it certainly doesn't look bad.


Sleeves were the only alteration I had to make on the shirt. I'd put them in and they were sitting neatly but the shoulders were about 1-2cm off my shoulder point. I kept telling myself I could live with it and it wouldn't notice when it was finished. So I went ahead and overlocked the sleeves in. The shirt didn't look cute and oversized like I'd nabbed it from my boyfriend though (shush with your imaginary boyfriend jokes guys), it just looked well... Ill fitting. I unpicked the overlocking (ouch) and my stitching between the sleeve notches and moved the sleeve head in a bit to bring it back up to my shoulder point. It worked and I was very relieved! It might be worth me making a size smaller in future so I don't lose that sleeve-head ease when shaving cms off my bodice shoulders.


Collar and cuffs were good fun. My tips for collars would be make sure your plaids are symmetrical, it will look a bit off if you have a big square chunk of plaid at one end but not the other. Stitching the collar to the shirt and collar stand it so much easier when you are working off one side and matching the other. I know it sounds like more work but trust me it's not!


Making the sleeve plackets was a fun little exercise. You have to be careful as you have to stitch really close to the edge when sewing the placket to the middle of the sleeve slit, but it all comes together in a moment of magic! I love the little diagonal cut aways at the cuffs and how neat my sleeve pleats are! I top stitched around the whole cuff just to keep it neat and professional looking. I would recommend this.


My hem was a bit shit. Why are my hems always a bit shit?! Am I rushing because I'm excited I'm almost at the end? The pattern suggests a double turned hem which is what I did, but its pretty curved so you just have to be careful. It's not awful and still has it's shape, it's the same length at both fronts so can't really grumble. Just try not to look inside ta.


I had to wait until the end for the most exciting part though. This was my first go at poppers!! I've had a popper-putter-inner since Christmas that I've just been too scared to use yet. I chose the 'Anorak' Prym poppers, mainly just because I liked the colour best. There's a few different ones to chose from for different fabrics so excited to get involved with that in the future. I picked my Prym supplies up from the market in Sheffield instead of John Lewis and it was much cheaper!


The instructions on the putter-inner and on the actual snaps don't go over the top in explaining how to not completely ruin your garment in the final stage, but there's a handy Prym video on Youtube that definitely helped. Before getting to it I did a test one on a piece of scrap, then wrote down all the stages just to test myself. Instead of going through it all now, I want to do a little tutorial blog on how to attach your snaps, so keep your eyes out!


A popper on each cuff and then she was done! I decided against pockets as I just didn't feel I needed them. If I make another I am tempted to use the pocket pattern from my Burda Button Up as I think those flaps look pretty cool and I remember them being fun to make.


For once, I've actually made something seasonal! I would love to make a lovely warm one with some proper flannel and maybe a fleecy inside collar stand for winter. As much as I love the box pleat in the back I could easily get away with taking this out and making the shirt a little more fitted around the small of my back. This pattern is so versatile! You could easily make a floaty office shirt using the Grainline Archer pattern too.


If you get stuck along the way there is a handy sew-along on the Grainline Website.


Have fun sewing! Would love to see what fabric you choose for yours.

x

Location: Miller's Dale, Derbyshire
Currently listening to: Outta My Mind, The Arcs

Saturday, 9 September 2017

New Look 6035 Vest Top IV


I had fabric left over from my flared sleeve Mia Blouse as I seem to be in the habit of over compensating at the fabric shop at the moment. I had just enough left to make another from one of my go-to patterns, the New Look 6035.


This is my fourth vest top using this pattern. It's such a delight to sew! I was cut out and finished in just over an afternoon. The pattern consists of a front and back and binding for the neck and arm holes.


Sew easy!


I've seen a few people have commented before that the back neck is a little to wide and sags a little in the middle. I have found this too, so I decided to take action and took about about 1.5cm from the fold line before cutting (so 3cm in total). This solved it! If doing this, remember to take the same out of the neck band length.


Due to fabric restrictions I had to cut the neckband into two pieces and attach them so the seam lines up with the shoulder seams. I measured that my back neck was about 30cm, then worked out how long the front piece needed to be by subtracting this from the length of the pattern piece. Don't forget to add seam allowances! (3cm for the additional join)


The gathering stitches in the front of the top are then pulled to fit the neckband. Just like magic you have yourself a vest top that just needs hemming. A quick win and perfect when you're left with an awkward amount of fabric!


x

Location: Bolehill Quarry, Derbyshire
Currently listening to: Everybody Knows I Love You, Carmen Ghia and The Hotrods