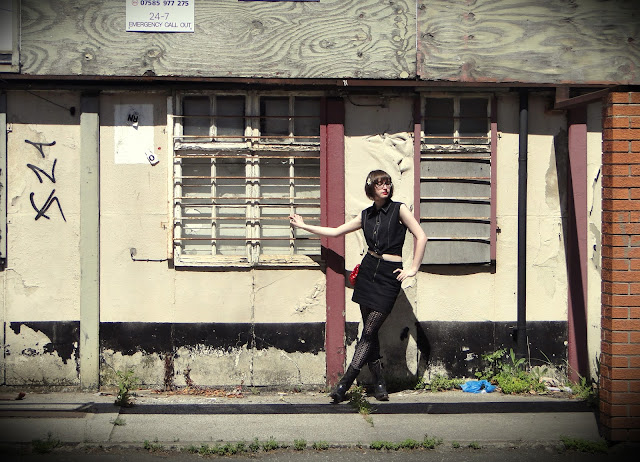
Inspired by the wonderful Laura Oakes' stage outfit when she played with Ward Thomas at Sheffield Plug earlier this year, I have been chomping at the bit to make myself a country shirt. I cheated a few months back and customised a Primark denim shirt with some tassels...
... this kept me going for a little bit, but I was so full of ideas on what I wanted to do with my own that I couldn't wait much longer. I decided to make the most of my last classes at college and focused on learning how to attach a collar properly to my toile so that I could knuckle down and get on with making myself some cowboy shirts!
Construction
I was surprised at how swiftly I seemed to make my toile. Granted I didn't overlock a thing, did no hems and didn't faff around with interfacing, buttonholes and buttons, instead I wanted to focus on two things- construction of the collar and button placket and the overall fit.
The practice run gave me a good taste for topstitching and I learned not to get too close to the edge when attaching the placket. I followed the collar instructions step by step and found that is wasn't nearly as scary as I thought it was going to be. The most accuracy was needed when stitching around the curved corners at the top of the neckband. These need to be 100% symmetrical with no pointy bits! But if you sew everything together in the right order and make sure you have right sides/wrong sides together when necessary then there is no real reason that it should go wrong! Sewing down the band from the outside around the neckline is a bit fiddly but It didn't get the better of me.
 |  |
Fit
If you recall my post about my Ruby Dress that I made at college, you may remember me saying I wanted to use these classes to help learn how to fit garments. Once the main bits were done on my toile it seemed like a good time to try it on. There were a few changes my tutor helped me make as I described it as being a bit 'boxy':
1- We took in the two seams down the front of the shirt.
2- We took in a little off of the side seams.
3- We Took a little off of the arm hole opening.
4- We took a little off of the collar.
5- We took OUT the box pleat at the back all together.
6- We put in two darts at the lower back.
The changes to the pattern looked like this:
And it really made all the difference! Although it is difficult to tell how a finished garment is going to hang before you have even bought your material, let alone started sewing with it, I was fairly certain that I would be happier with a more fitted shape. The changes were subtle really, with the most change being made to the back. I knocked together another toile with these changes to the pattern and was happy so set to getting some suitable fabric for my actual shirt.
I already have a denim sleeveless and a gingham sleeveless so thought I would go for a plain black fabric that I could do contrasting stitch on and hopefully later embellish is relevant places. My choice came from Hillsborough Fine Fabrics and was a joy to sew with. It seemed to be pretty fancy (wool blend!) and I could really tell it wasn't cheap crap while I was sewing with it.
I used a strip of bias binding (pre-bought, who can be bothered with the faff?) to Country-up the back- especially after having taken out the box-pleat from the pattern. I think this works pretty well with the white topstitching I chose.
Then it seemed I did have to whip up some bias binding! I hadn't finished the sleeves on my practice runs, so had completely forgotten that they would need binding when I was in the shop buying supplies! Not to worry though- I probably needed the practice! And it seemed to go very well for something I had never really done before. Tick bias binding arm holes off the list!
I went for quite a subtle button choice- probably because Hillsborough Fabrics isn't really at the top of the button-choice league, but I surprised myself and went for gold as opposed to silver. I applied the 110% concentration needed for button-holing and got the job done, I found that at 100% concentration I still almost stitched the holes into the wrong side of the shirt... Saved myself in the nick of time!!
Overall I am dead happy with my shirt! I followed all the steps in the pattern very closely as not to cock it up and I think it's come out quite professionally. The only thing I am desperate to do is sew some patches on the the shoulder/chest area. Ideally I want some rockabilly swallows or possibly some kind of over the top flowery embroidered Dolly-style patches- so as it stands I'm keeping my eyes peeled for such!
Next up I fancy a denim one!
x
Currently listening to: Power and Control, Marina and the Diamonds
Location: Broadfield Road, Sheffield


